Share your app
Now that your app is deployed you can easily share it and collaborate on it. But first, let's take a moment and do a little joy dance for getting that app deployed! 🕺💃
Your app is now live at a fixed URL, so go wild and share it with whomever you want. Your app will inherit permissions from your GitHub repo, meaning that if your repo is private your app will be private and if your repo is public your app will be public. If you want to change that you can simply do so from the app settings menu.
You are only allowed one private app at a time. If you've deployed from a private repository, you will have to make that app public or delete it before you can deploy another app from a private repository. Only developers can change your app between public and private.
Make your app public or private
If you deployed your app from a public repository, your app will be public by default. If you deployed your app from a private repository, you will need to make the app public if you want to freely share it with the community at large.
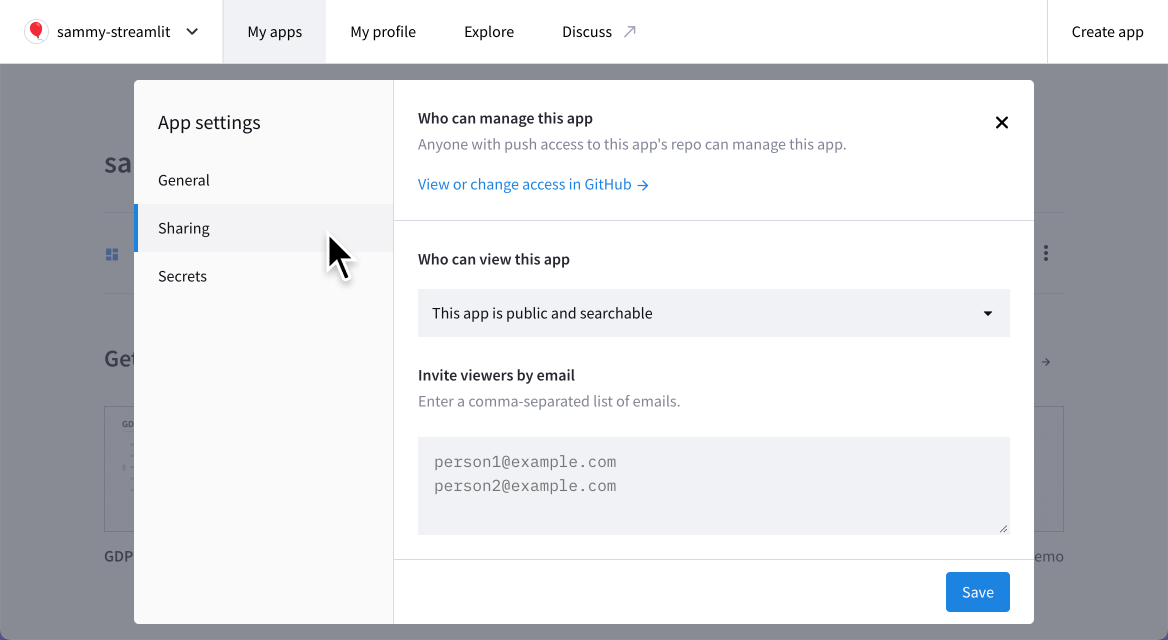
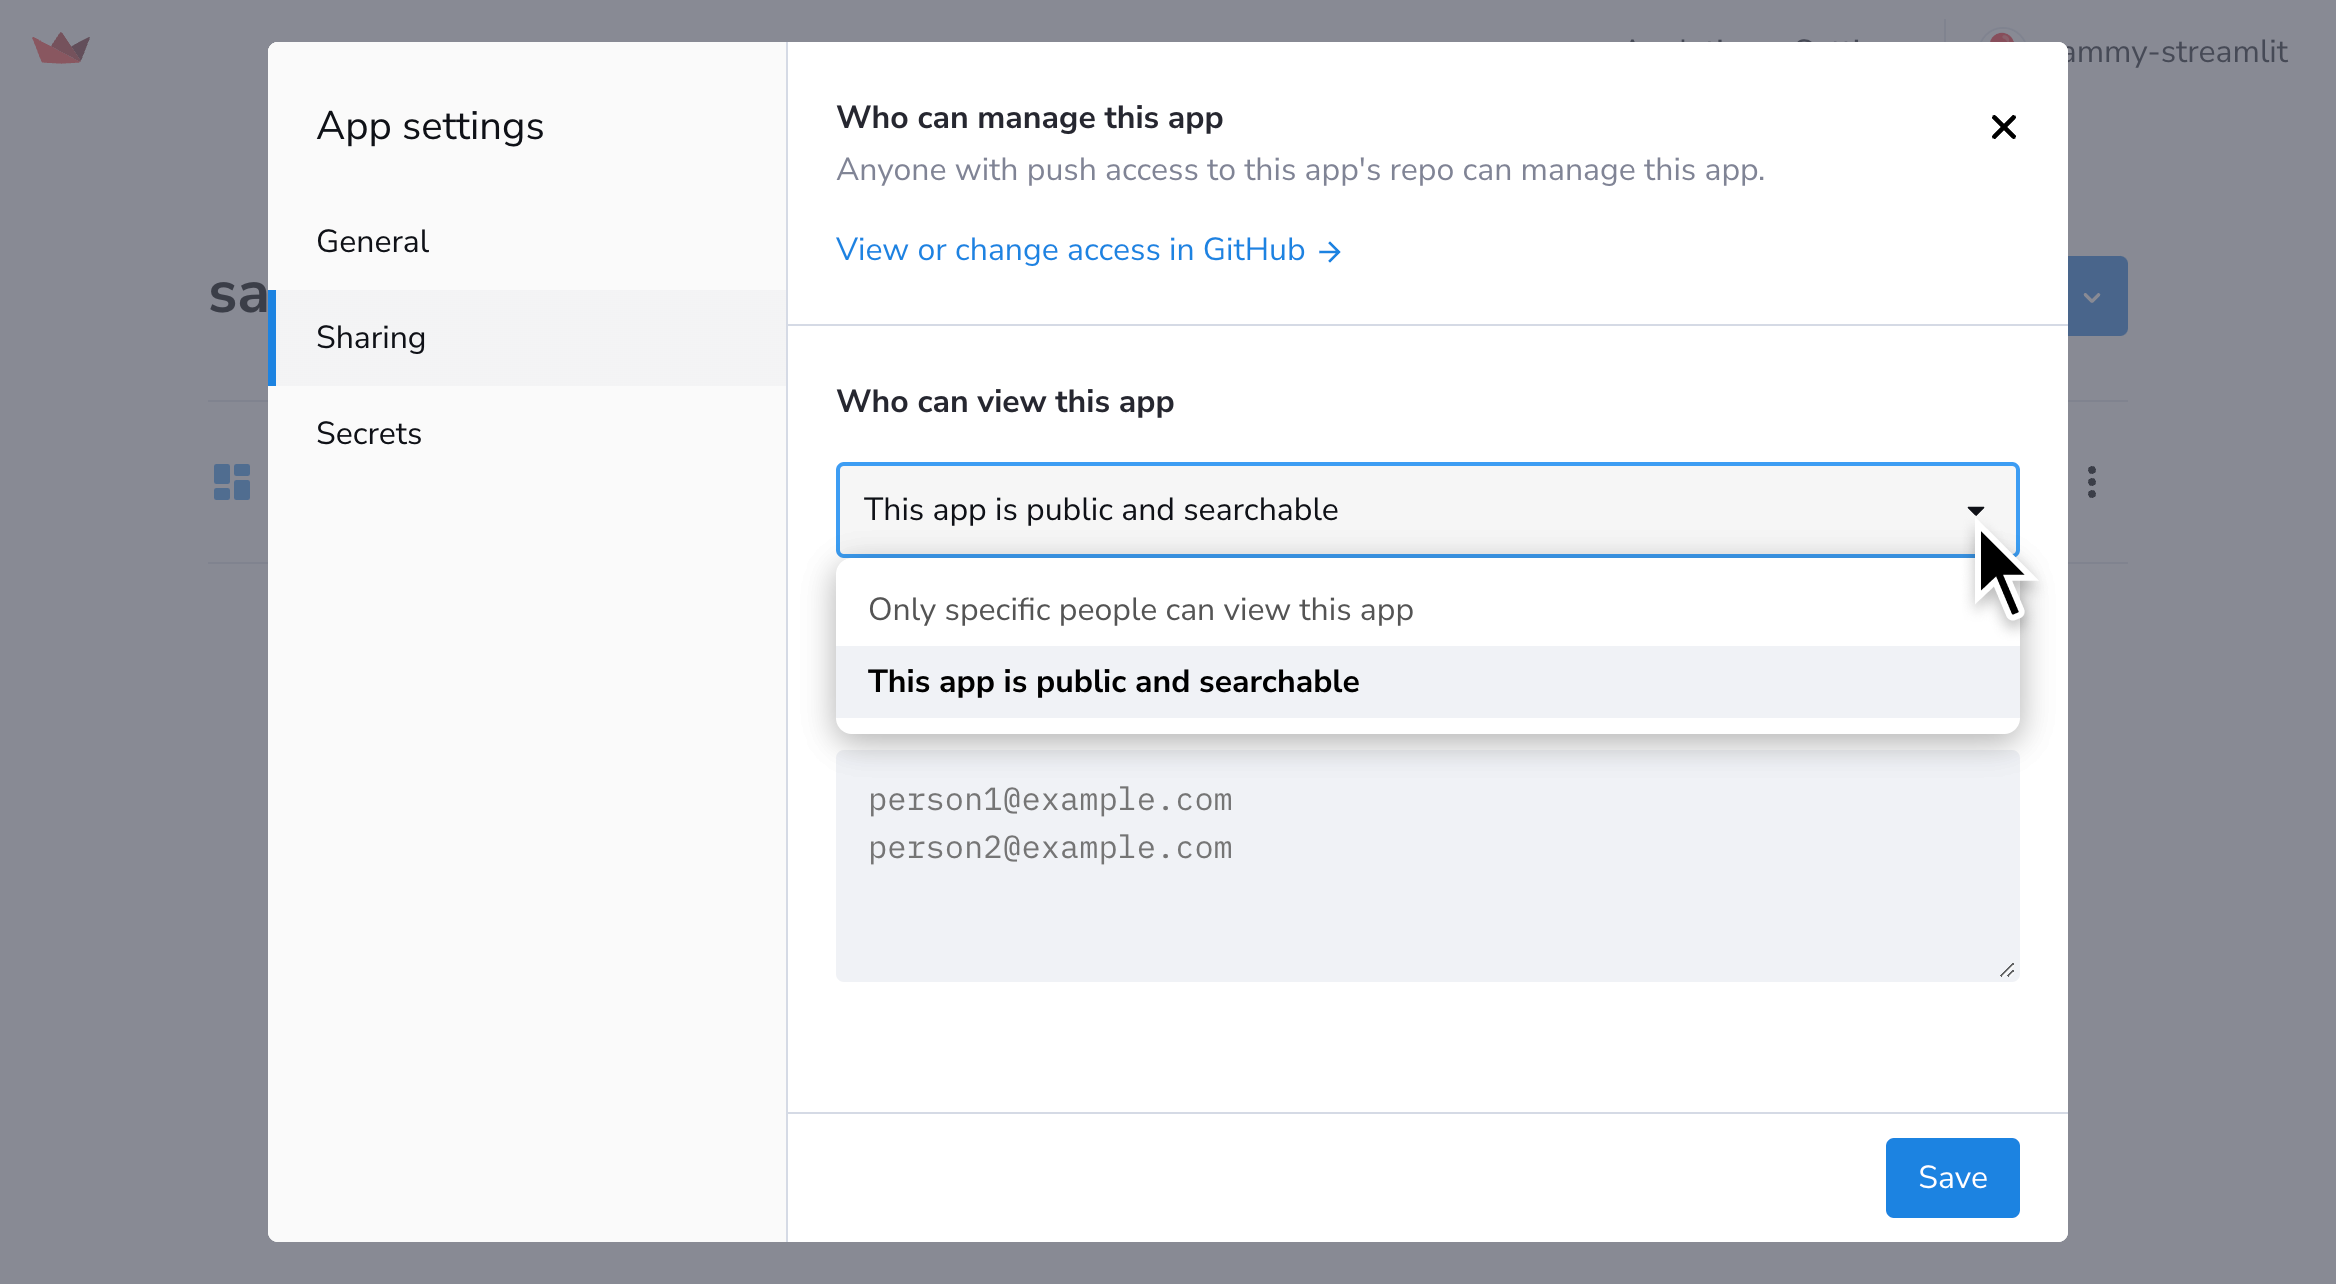
Set privacy from your app settings
-
Access your App settings and go to the "Sharing" section.
-
Set your app's privacy under "Who can view this app." Select "This app is public and searchable" to make your app public. Select "Only specific people can view this app" to make your app private.
Set privacy from the share button
-
From your app at
<your-custom-subdomain>.streamlit.app, click "Share" in the upper-right corner.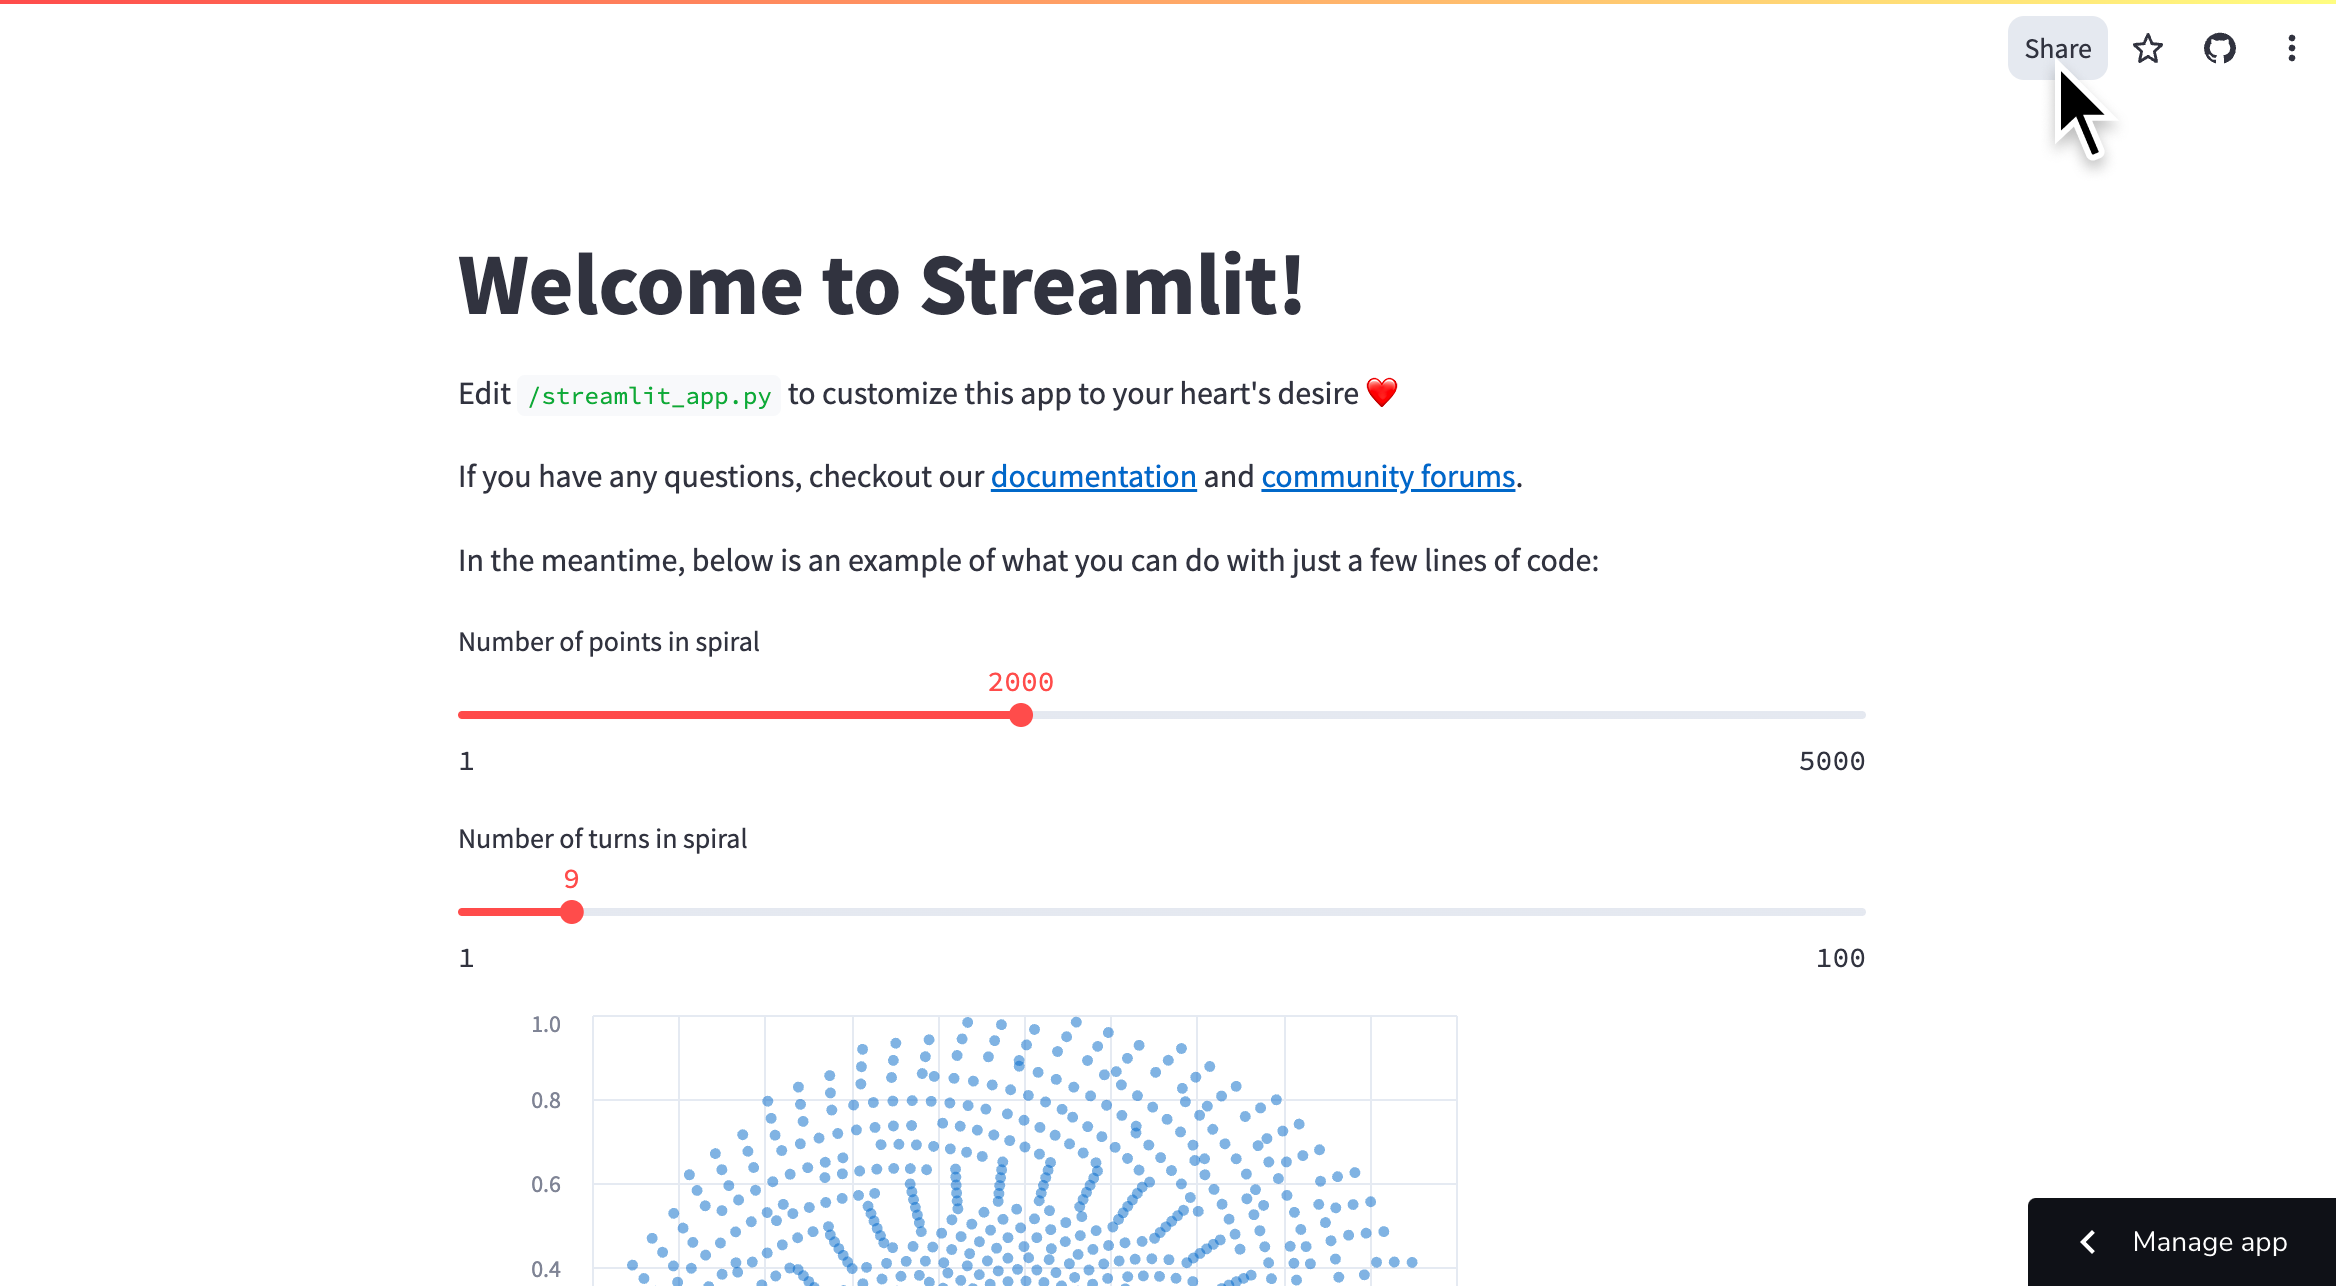
-
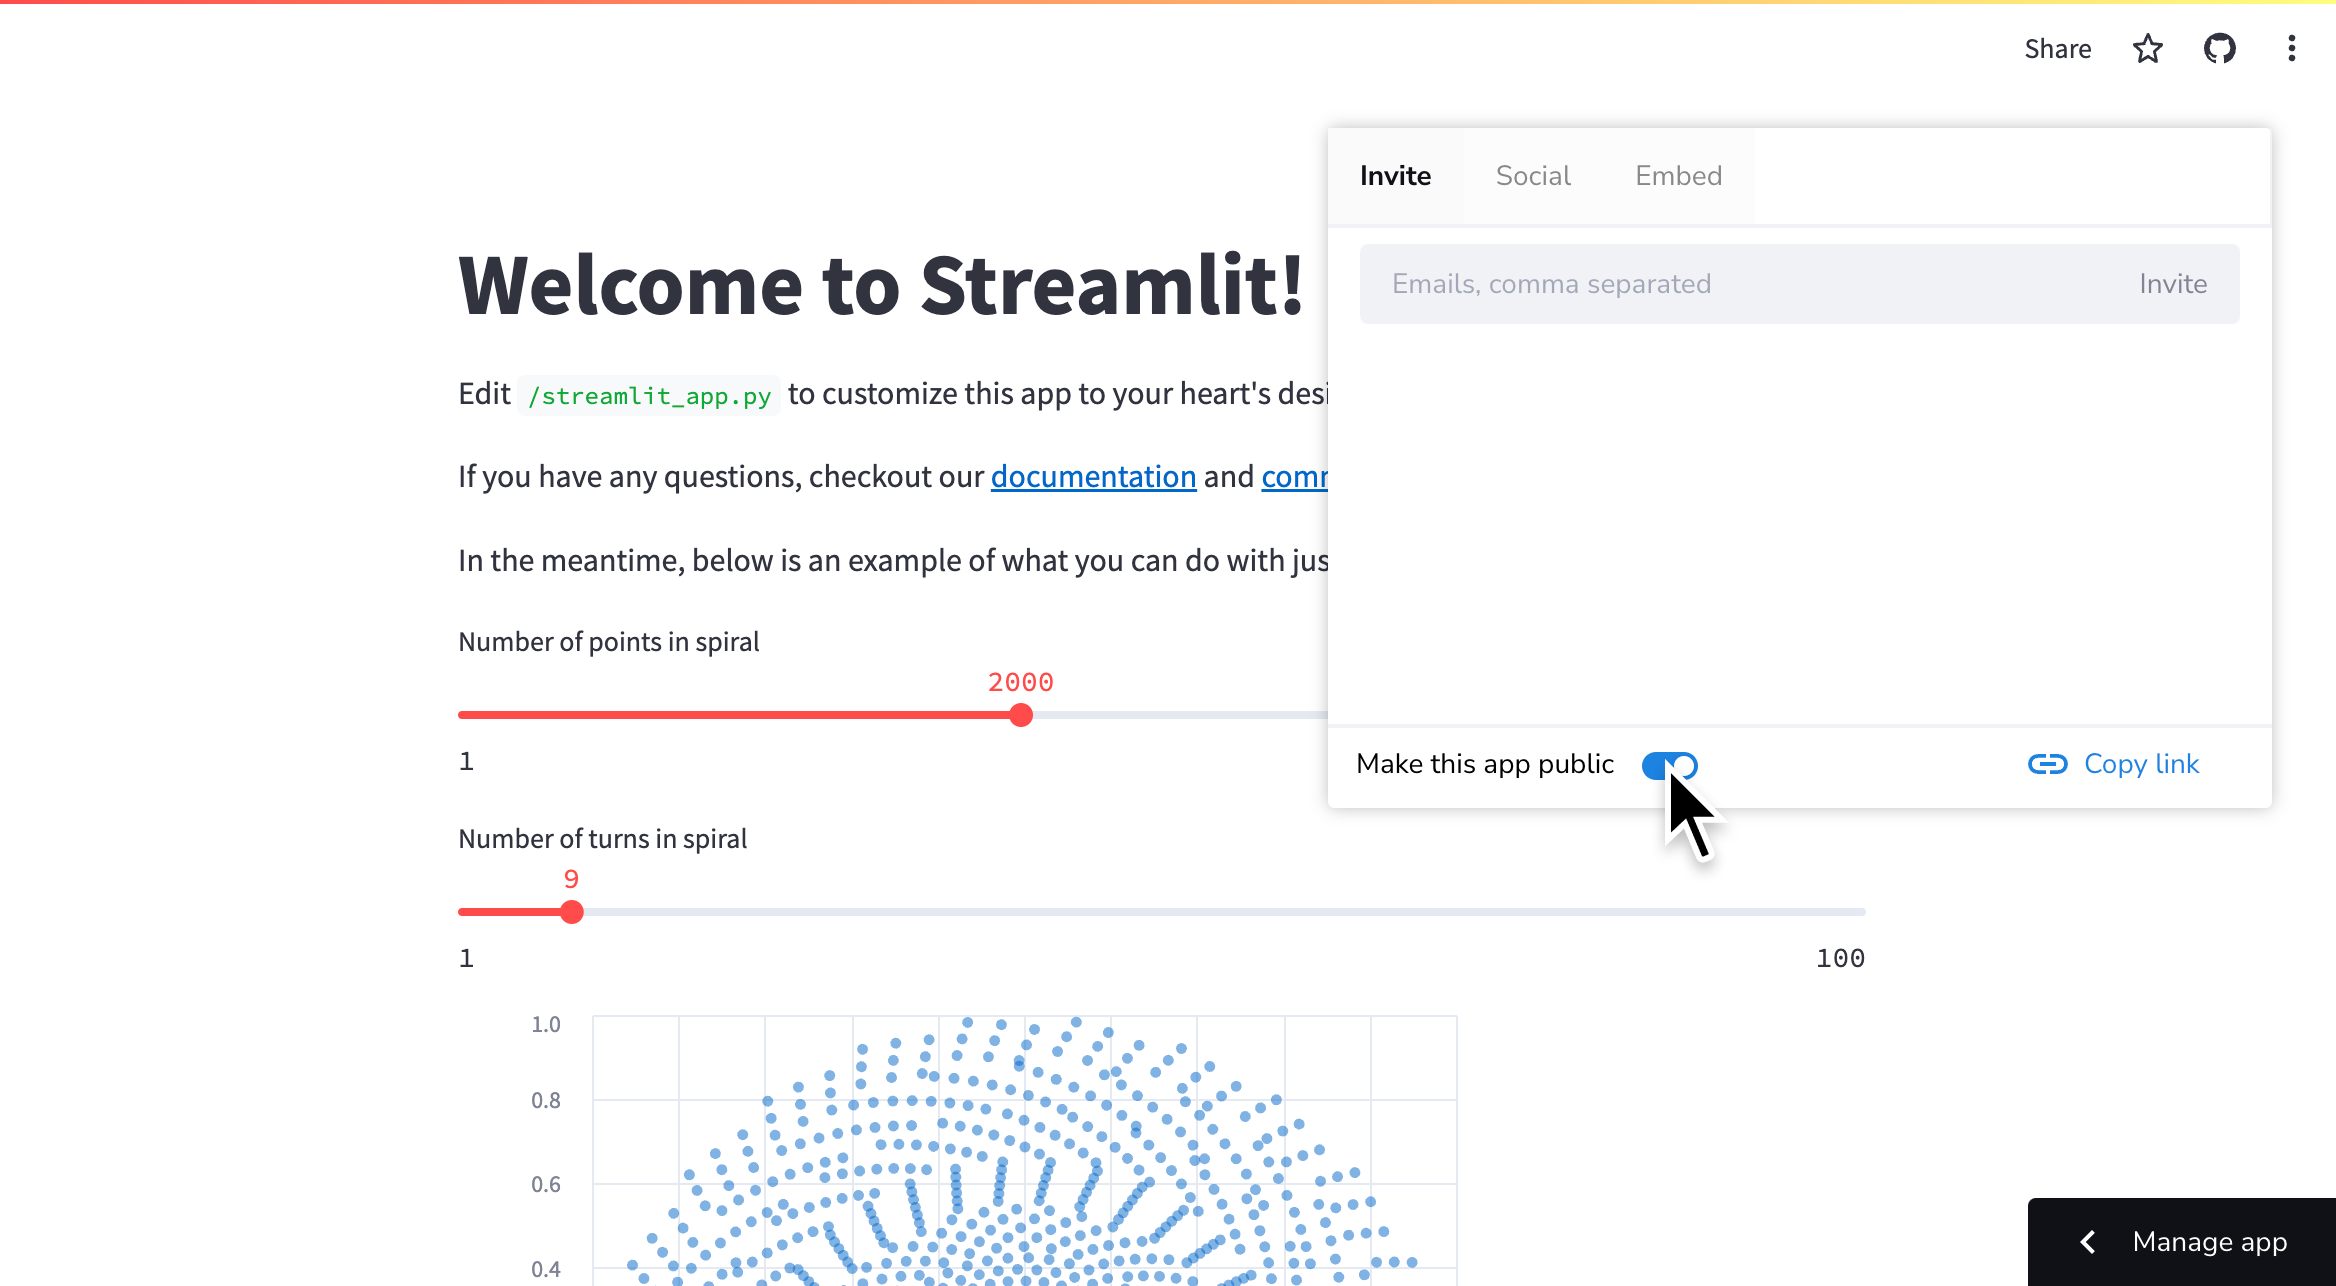
Toggle your app between public and private by clicking "Make this app public."
Share your public app
Once your app is public, just give anyone your app's URL and they view it! Streamlit Community Cloud has several convenient shortcuts for sharing your app.
Share your app on social media
-
From your app at
<your-custom-subdomain>.streamlit.app, click "Share" in the upper-right corner. -
Click "Social" to access convenient social media share buttons.
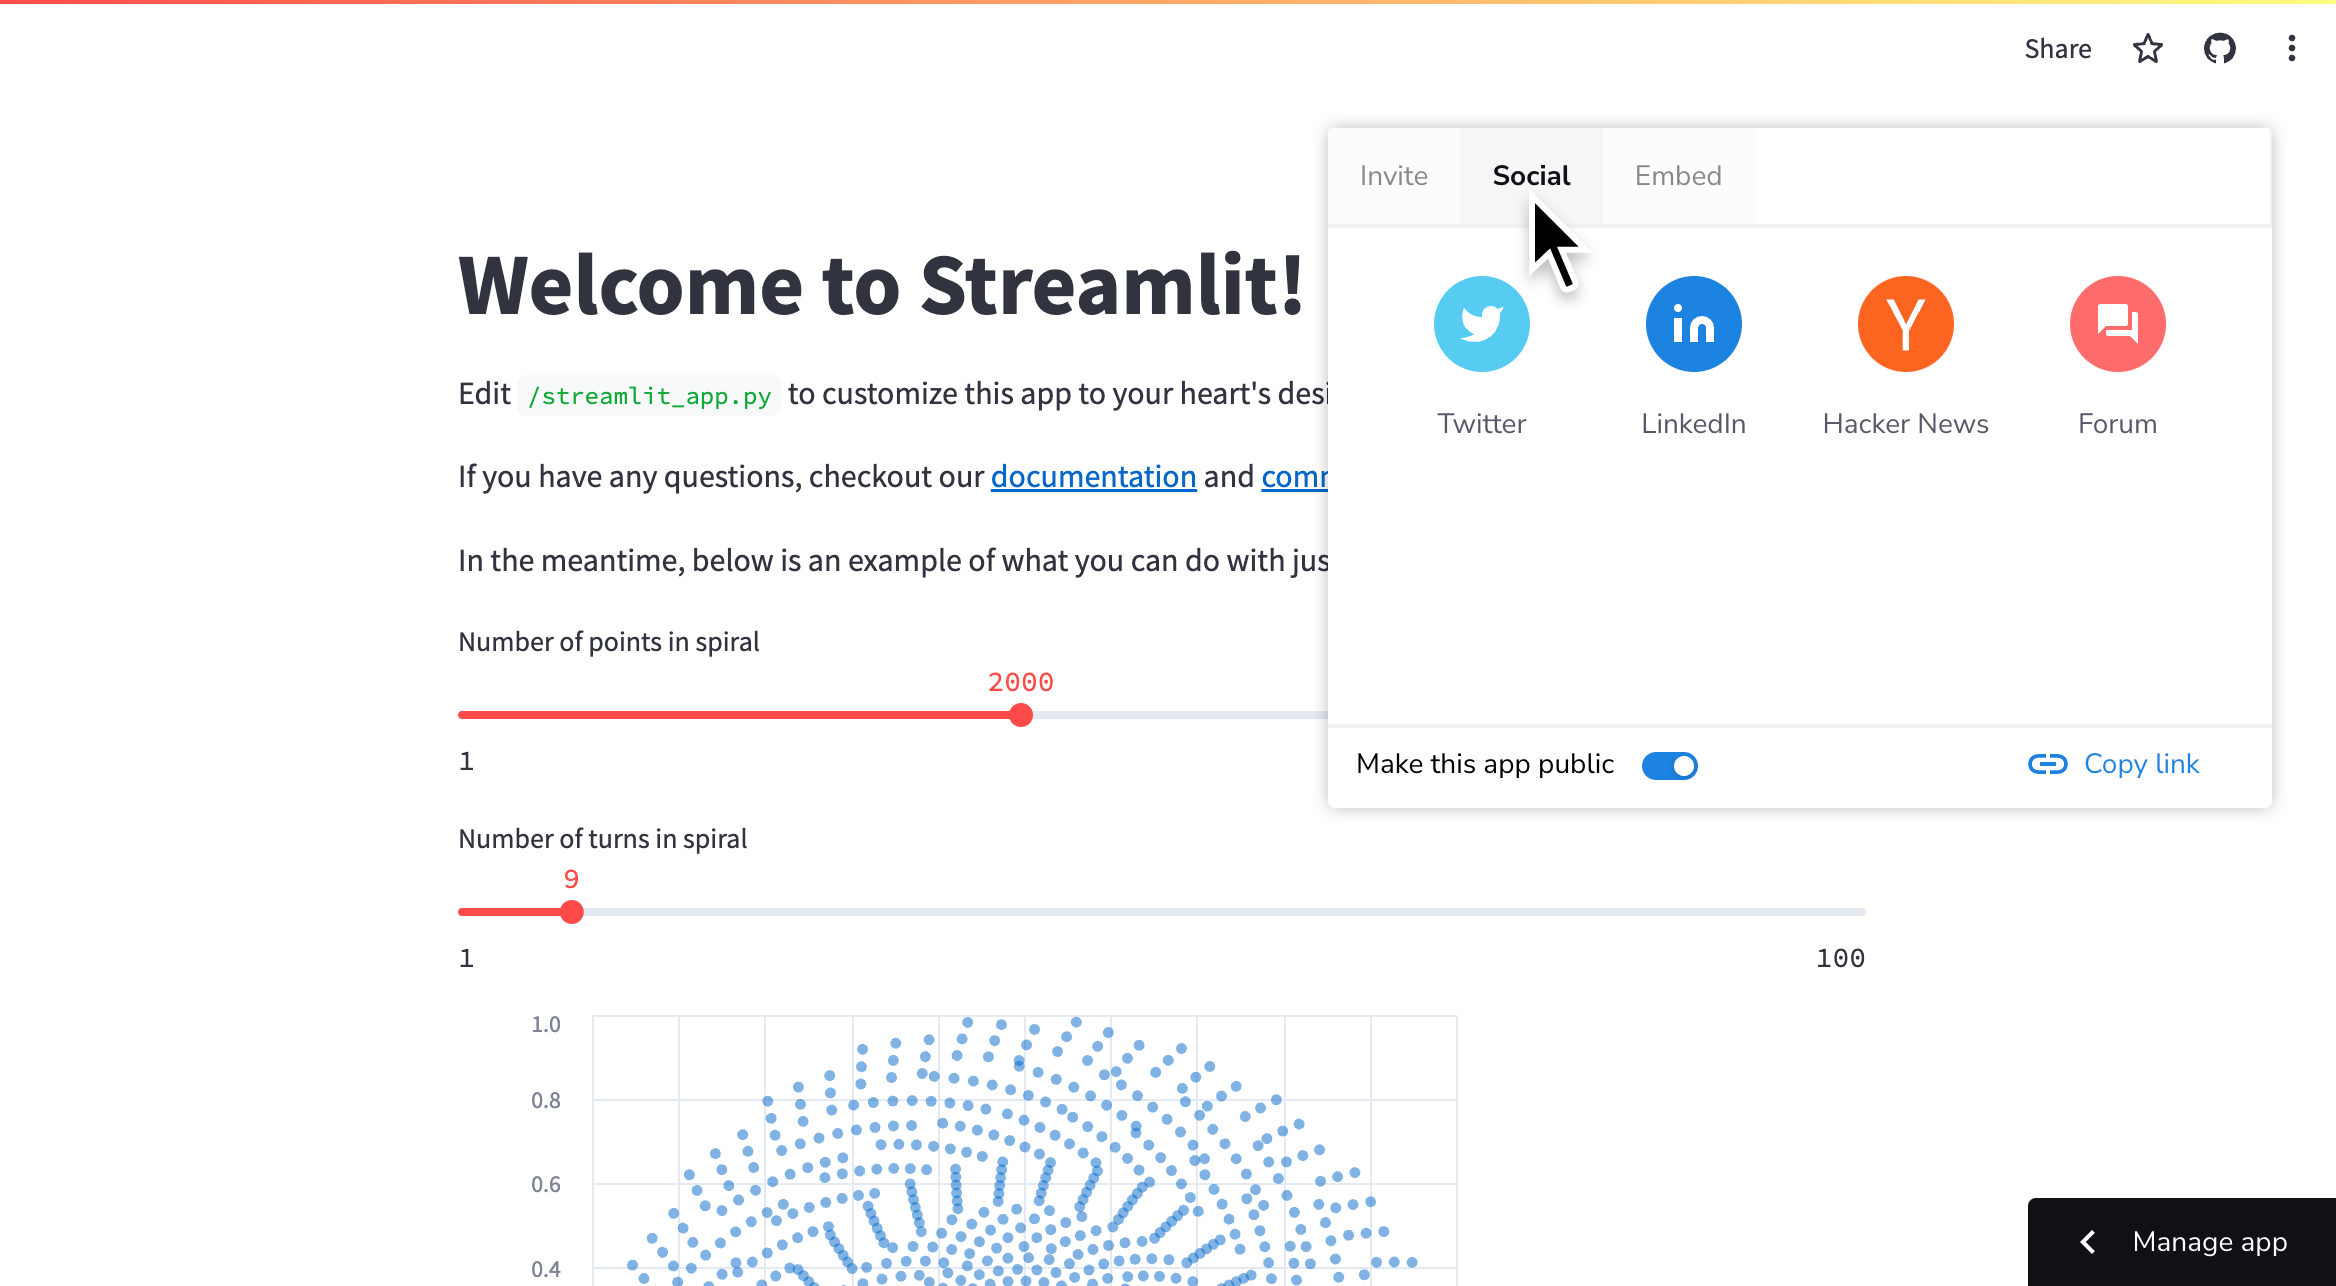
Tip
Use the social media sharing buttons to post your app on our forum! We'd love to see what you make and perhaps feature your app as our app of the month. 💖
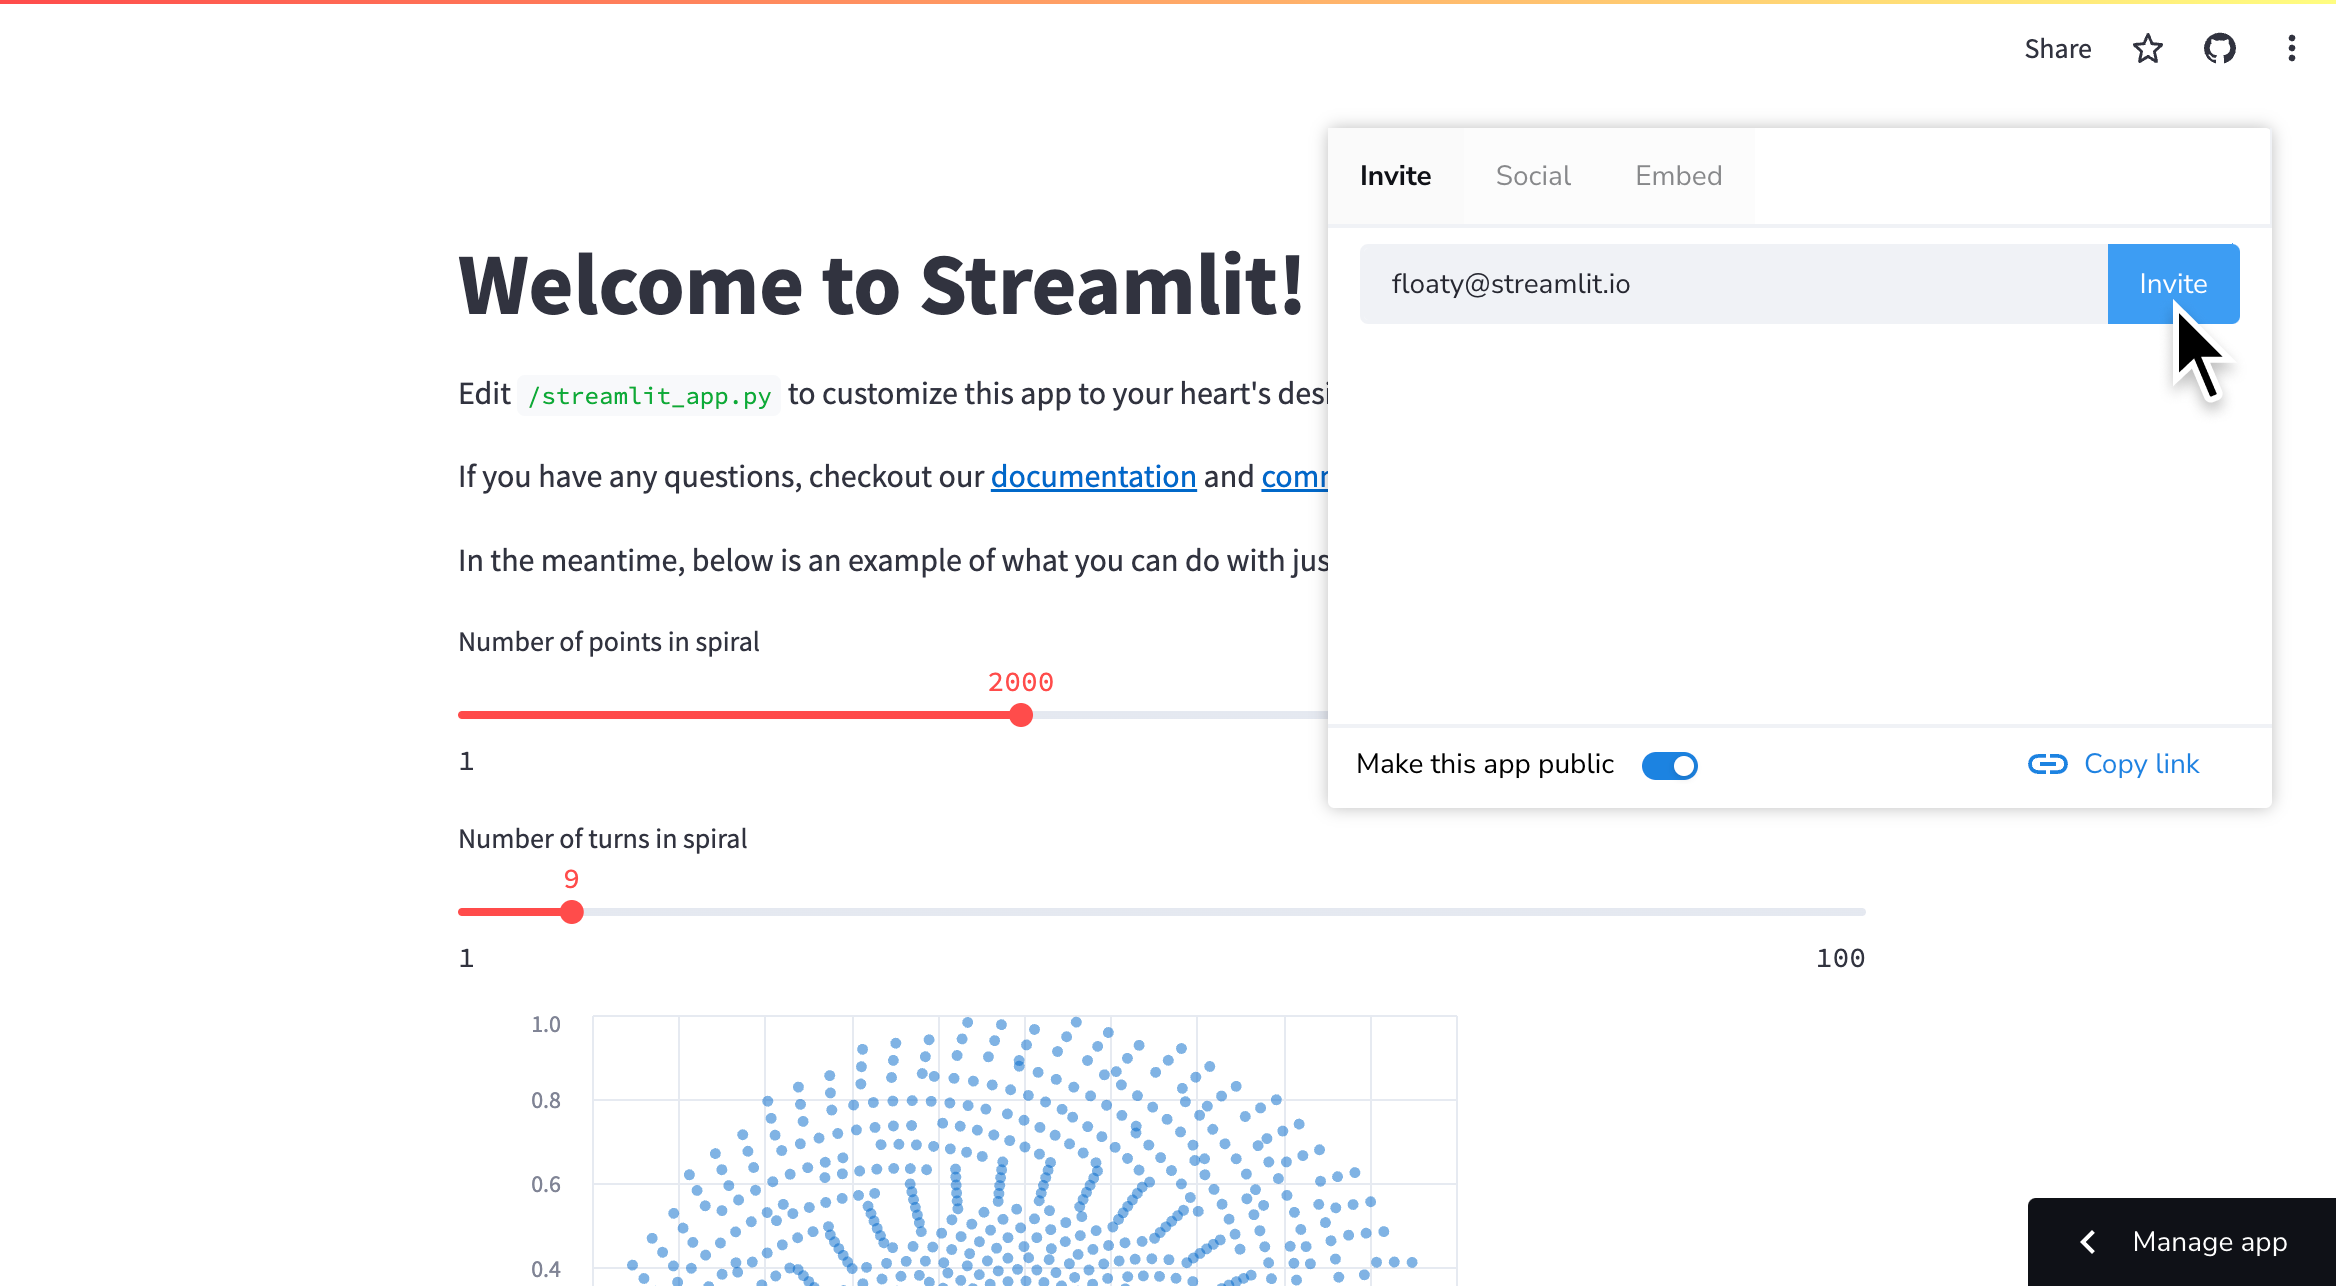
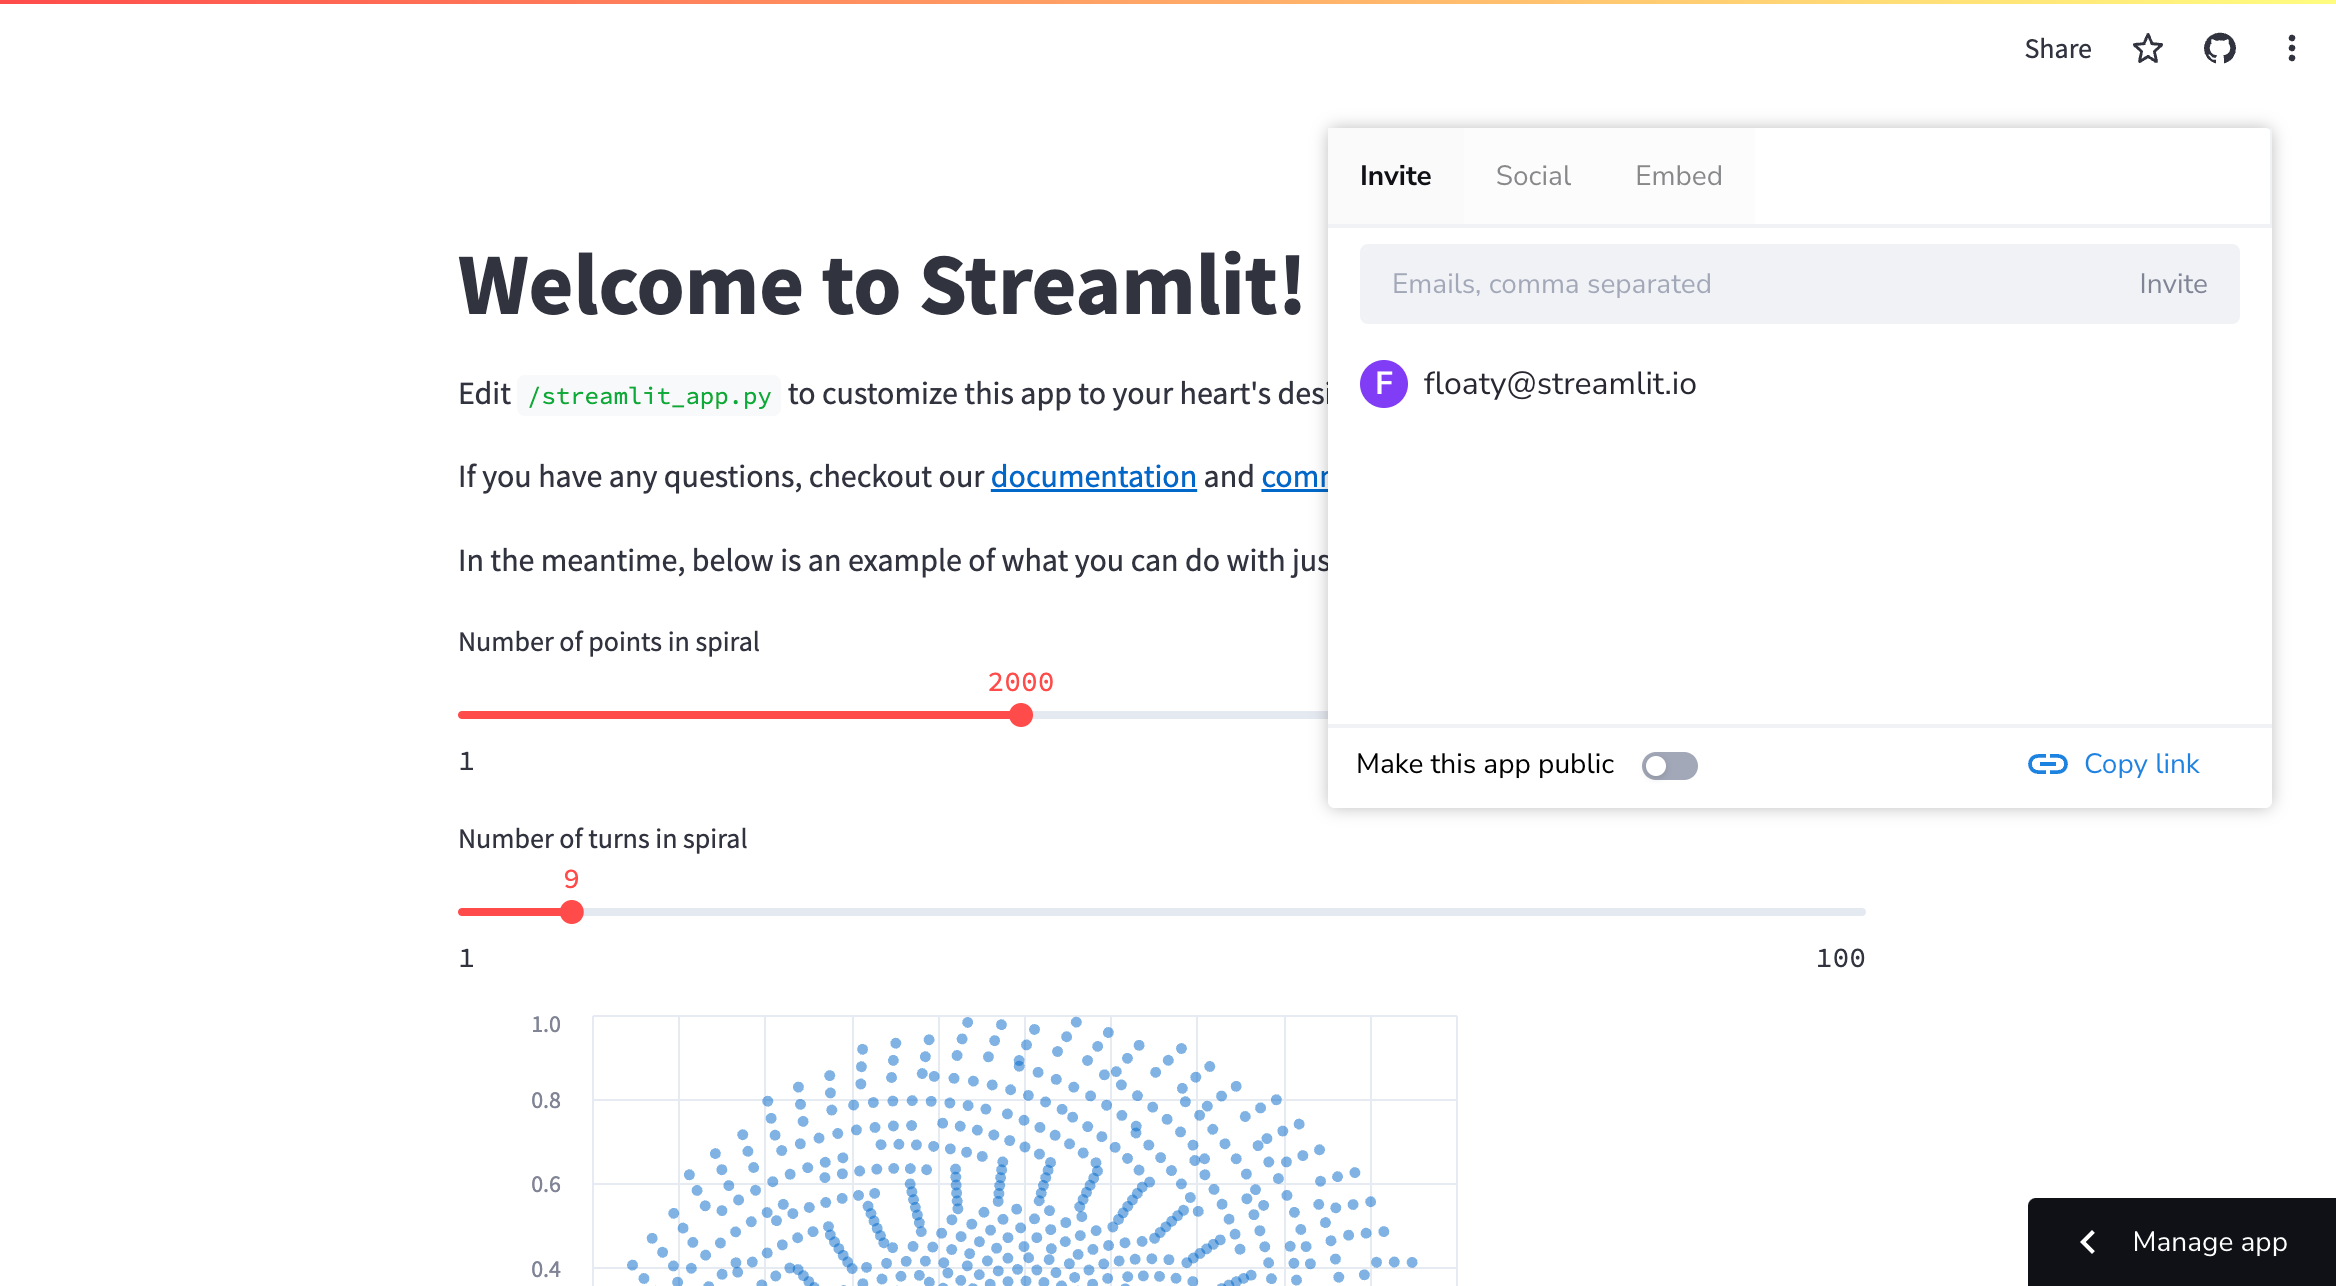
Invite viewers by email
Whether your app is public or private, you can send an email invite to your app directly from Streamlit Community Cloud. This grants the viewer access to analytics for all your public apps and the ability to invite other viewers to your workspace. Developers and invited viewers are identified by their email in analytics instead of appearing anonymously (if they view any of your apps while signed in). Read more about viewers in App analytics.
-
From your app at
<your-custom-subdomain>.streamlit.app, click "Share" in the upper-right corner. -
Enter an email address and click "Invite."
-
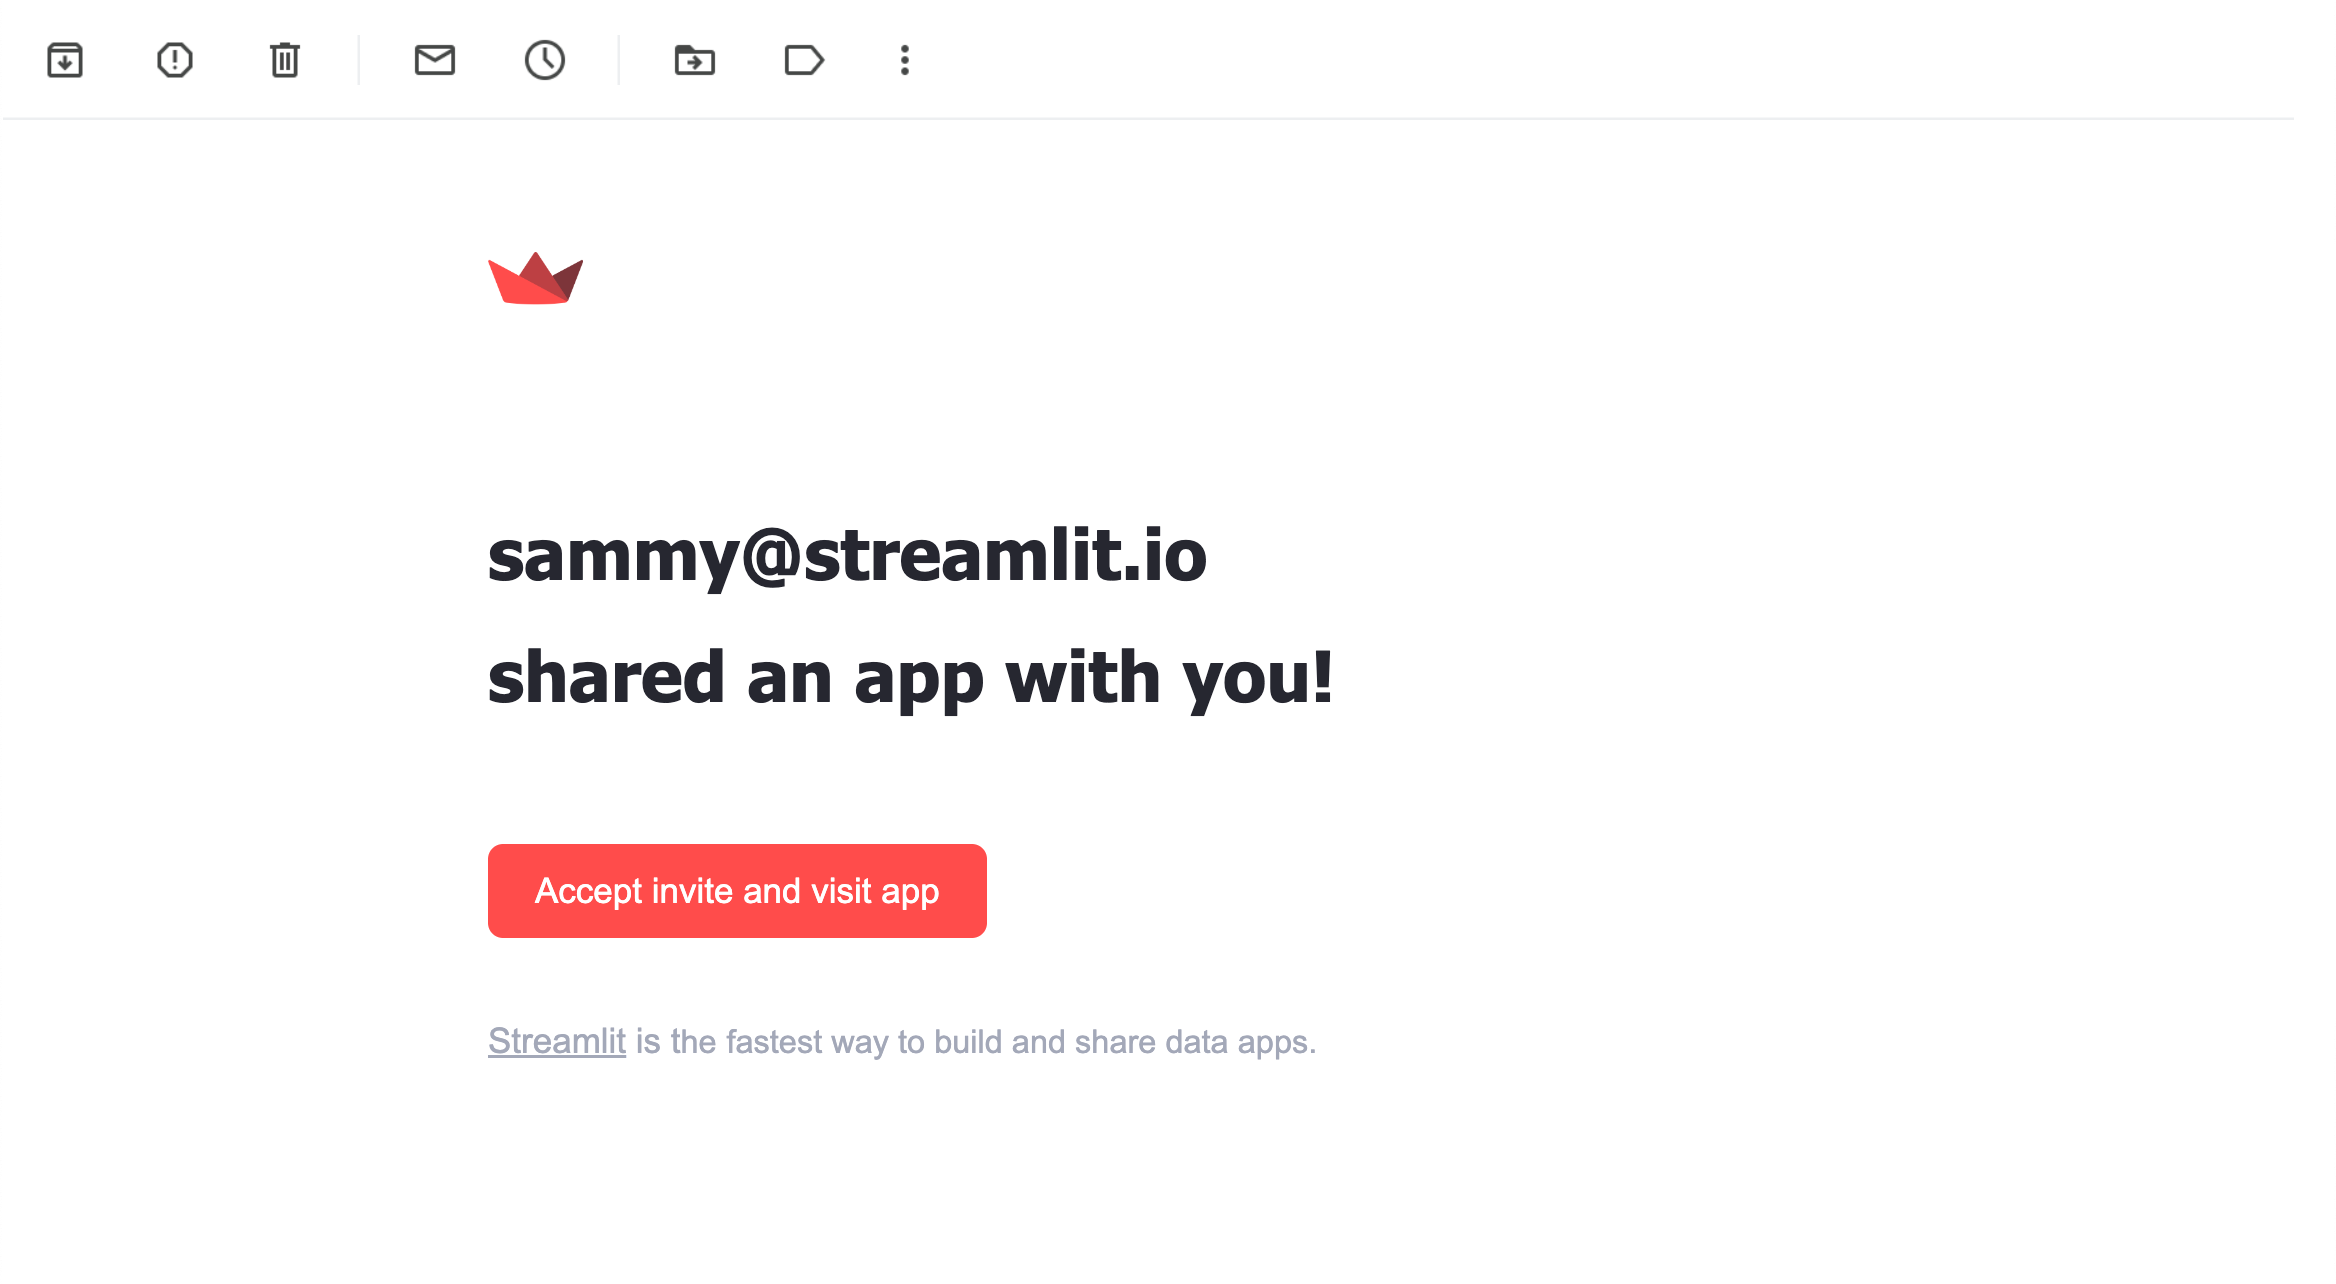
Invited users will get a direct link to your app in their inbox.
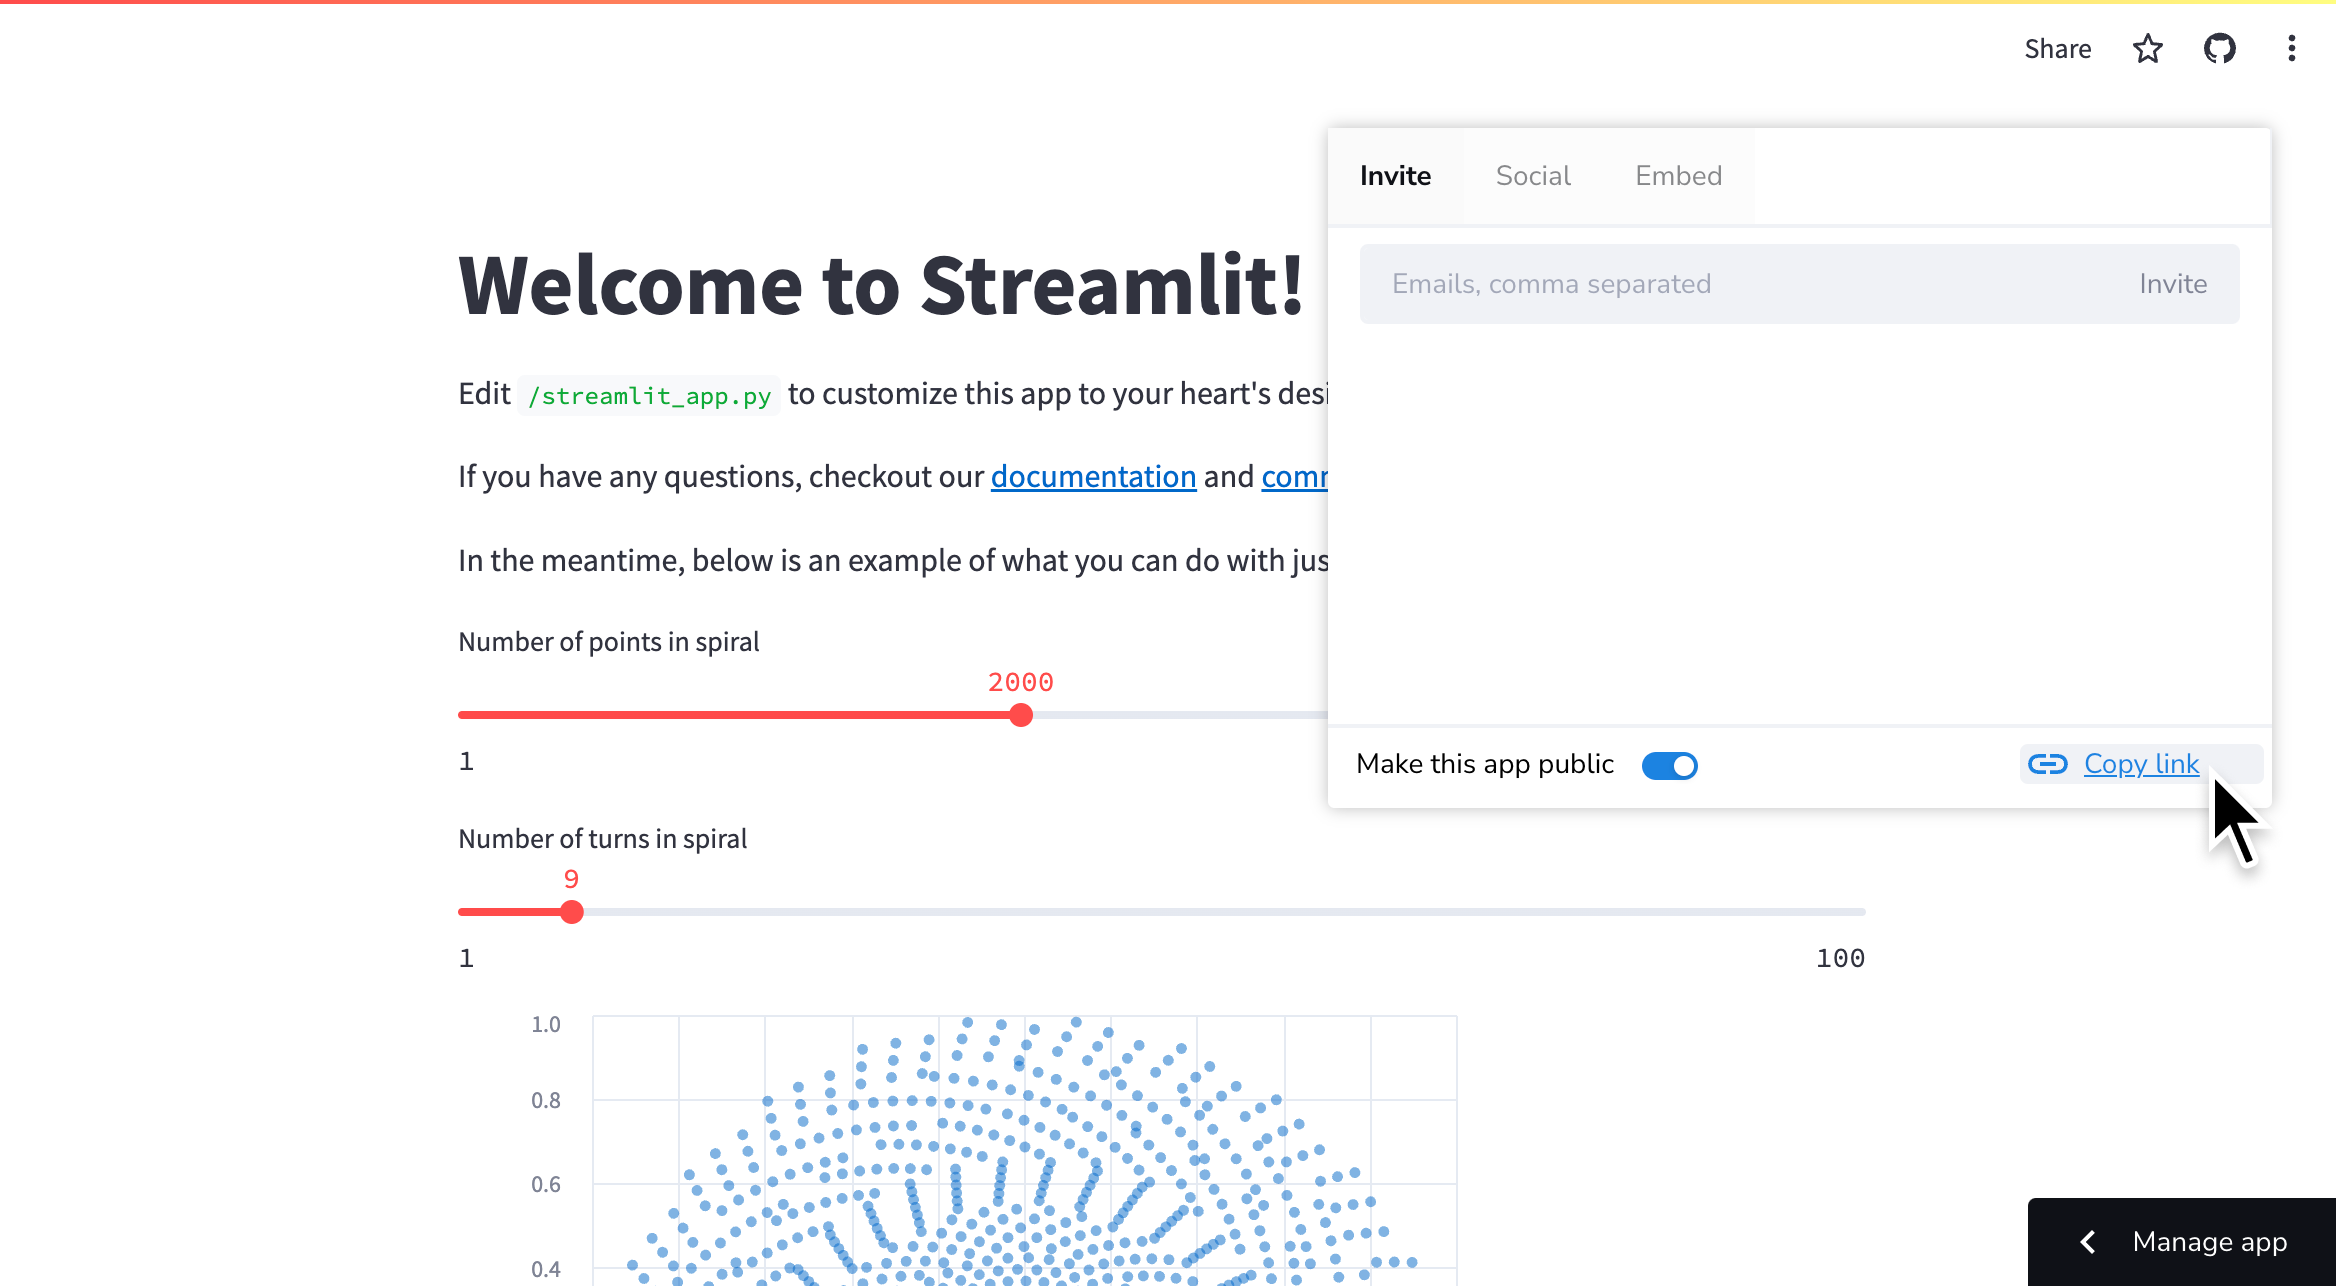
Copy your app's URL
From your app click "Share" in the upper-right corner then click "Copy link."
Add a badge to your GitHub repository
To help others find and play with your Streamlit app, you can add Streamlit's GitHub badge to your repo. Below is an enlarged example of what the badge looks like. Clicking on the badge takes you to—in this case—Streamlit's Roadmap.
Once you deploy your app, you can embed this badge right into your GitHub README.md by adding the following Markdown:
[](https://<your-custom-subdomain>.streamlit.app)
Note
Be sure to replace https://<your-custom-subdomain>.streamlit.app with the URL of your deployed app!
Share your private app
By default an app deployed from a private repository will be private to the developers in the workspace. A private app will not be visible to anyone else unless you grant them explicit permission. You can grant permission by adding them as a developer on GitHub or by adding them as a viewer on Streamlit Community Cloud.
Once you have added someone's email address to your app's viewer list, that person will be able to sign in and view your private app. If their email is associated with a Google account, they will be able to sign in with Google OAuth. Otherwise, they will be able to sign in with single-use, emailed links. Streamlit sends an email invitation with a link to your app every time you invite someone.
Important
When you add a viewer to any app in your workspace, they are granted access to analytics for that app as well as analytics for all your public apps. They can also pass these permissions to others by inviting more viewers. All viewers and developers in your workspace are identified by their email in analytics. Furthermore, their emails show in analytics for every app in your workspace and not just apps they are explicitly invited to. Read more about viewers in App analytics
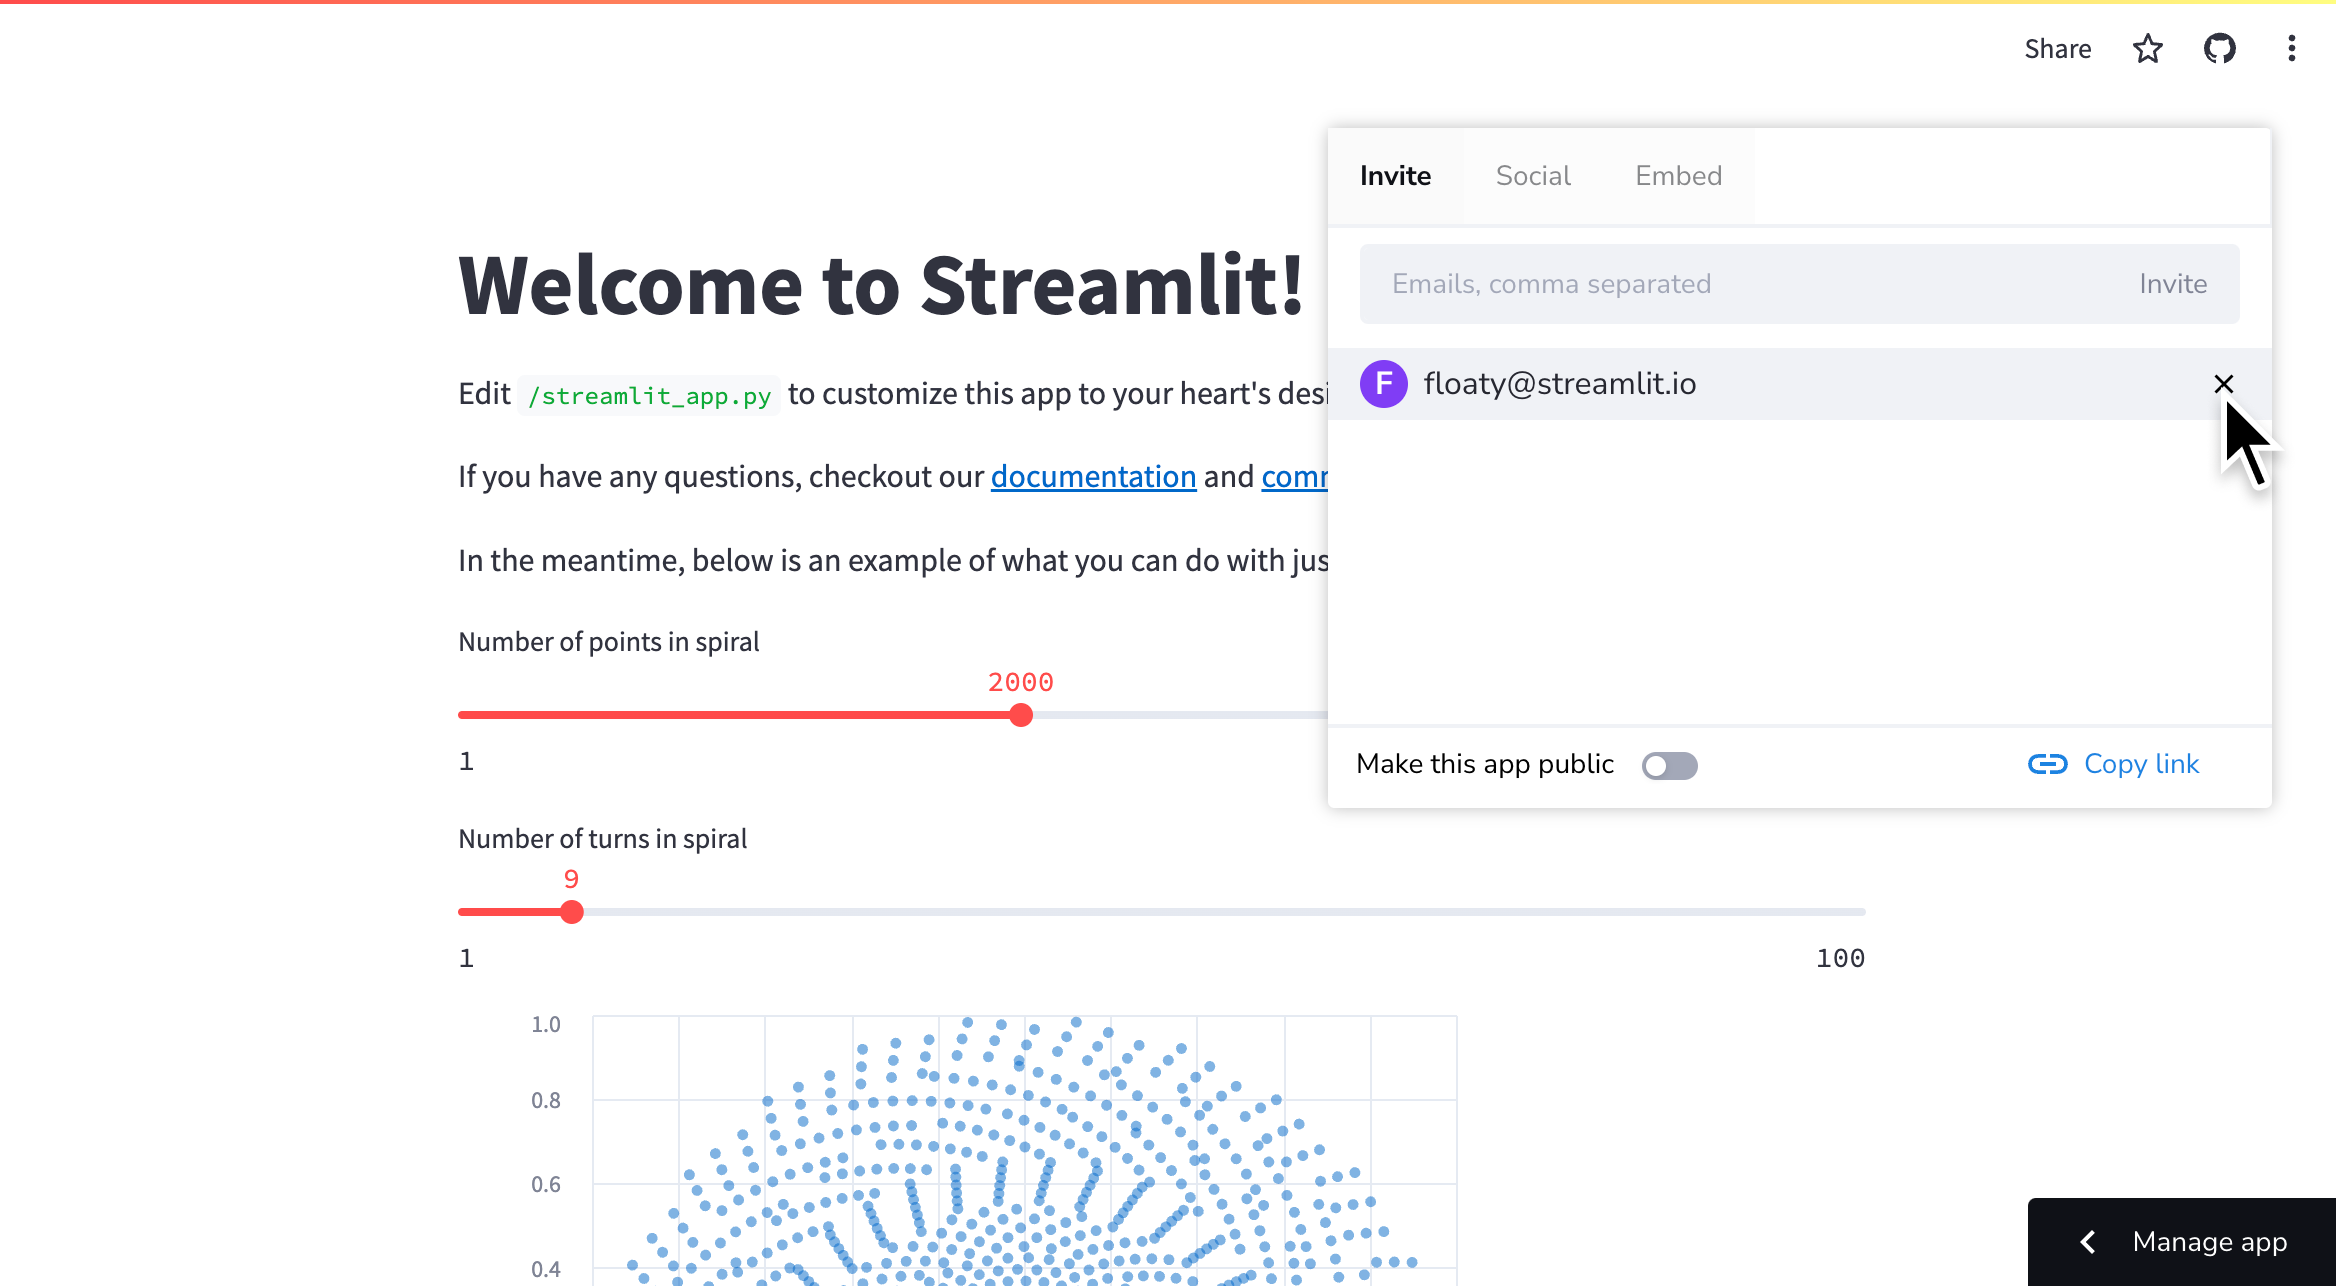
Invite viewers from the share button
-
From your app at
<your-custom-subdomain>.streamlit.app, click "Share" in the upper-right corner. -
Enter the email to send an invitation to and click "Invite."

-
Invited users appear in the list below.
-
Invited users will get a direct link to your app in their inbox.
-
To remove a viewer, simply access the share menu as above and click the close next to their name.
Invite viewers from your app settings
-
Access your App settings and go to the "Sharing" section.
-
Add or remove users from the list of viewers. Click "Save."

Still have questions?
Our forums are full of helpful information and Streamlit experts.