Use Streamlit in Snowflake to code in a secure environment
Snowflake is a single, global platform that powers the Data Cloud. If you want to use a secure platform with role-based access control, this is the option for you! This page walks you through creating a trial Snowflake account and building a "Hello world" app. Your trial account comes with an account credit so you can try out the service without entering any payment information.
Note
For more information, see Limitations and unsupported features in the Snowflake documentation.
Prerequisites
All you need is an email address! Everything else happens in your 30-day trial account.
Create an account
-
Go to signup.snowflake.com. (This link will open in a new tab.)
-
Fill in your information, and click "CONTINUE."
-
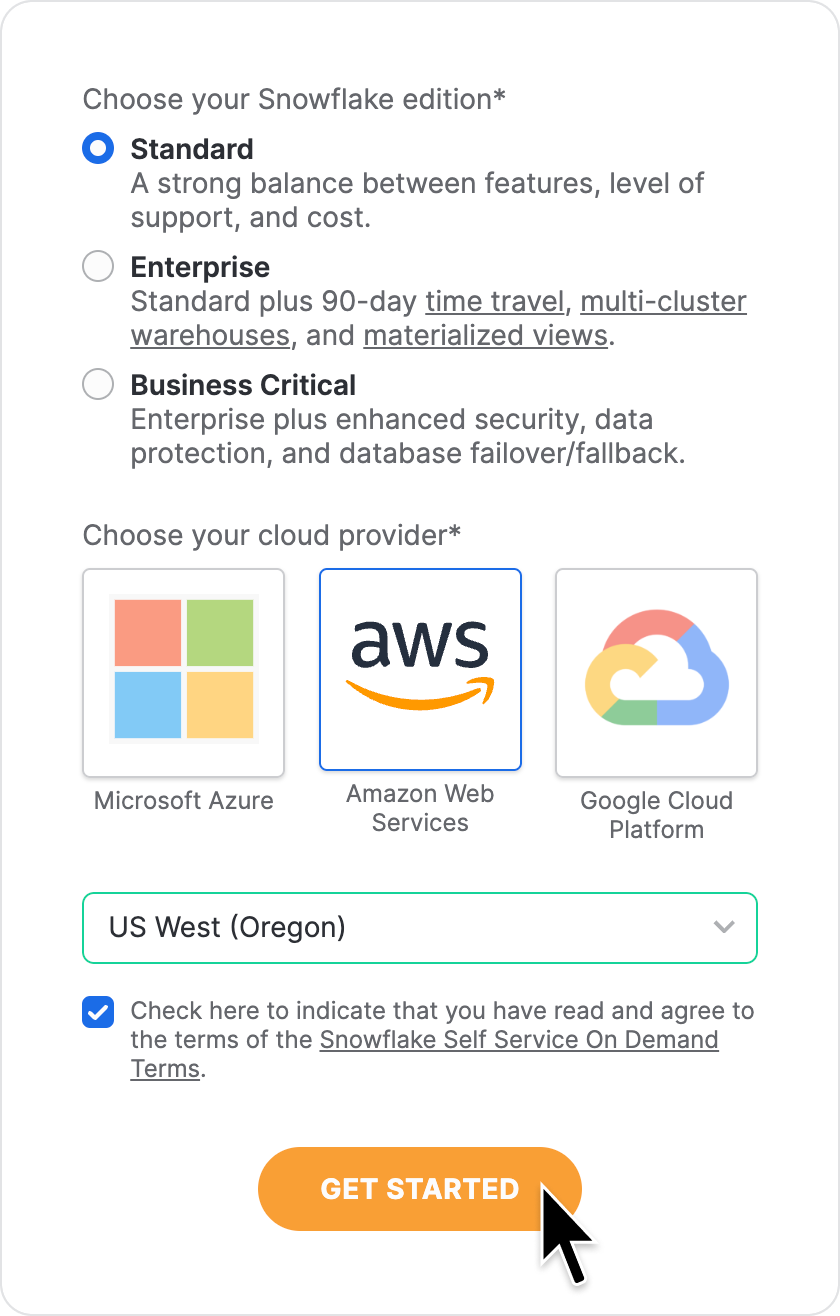
Select "Standard" for your Snowflake edition and "Amazon Web Services" for your cloud provider.
-
Choose the region nearest you, accept the terms, and click "GET STARTED."
-
Answer a few questions to let us know more about yourself, or skip them.
-
A message will display: "You're now signed up!" Go to your email, and click on the activation link. (Within your link, note the subdomain. This is your Snowflake account identifier.
https://<account_identifier>.snowflakecomputing.com) -
Set your username and password. This will be an admin user account within your Snowflake account. Your Snowflake account can have multiple users within it.
-
If you are not signed in after setting your password, follow the instructions to enter your Snowflake account identifier, and then enter your username and password. If you've accidentally closed your browser, you can sign in at app.snowflake.com.
Congratulations! You have a trial Snowflake account.
The displayed interface is called Snowsight. Snowsight provides a web-based, graphical user interface for your Snowflake account. The default page is "Home," which provides popular quick actions to get started. You can access your "Projects" in the left navigation or at the bottom of your "Home" page. "Projects" include worksheets, notebooks, Streamlit apps, and dashboards. Check out the Snowflake docs for a quick tour.)

Optional: Create a warehouse
Warehouses provide compute resources for tasks and apps in your Snowflake account. Your trial account already has an XS warehouse which you can use. This is named "COMPUTE_WH." However, if you want to use more compute resources, you can create another warehouse.
-
In the lower-left corner under your name, confirm that your current role is "ACCOUNTADMIN." If it isn't, click your name, hover over "Switch Role," and select "ACCOUNTADMIN."
-
In the left navigation, select "Admin" → "Warehouses."
-
In the upper-right corner, click the blue "add Warehouse" button.
-
Enter "STREAMLIT_WH" for the name and select a type and size. The default type and size are "Standard" and "X-Small," respectively. Click "Create Warehouse."
Create a database
Databases provide storage for data and apps in your Snowflake account. Your trial account comes with a shared database of sample data, but you must create a new database in your account to store your app files.
-
In the left navigation, select "Data" → "Databases."
-
In the upper-right corner, click the blue "add Database" button.
-
Enter "STREAMLIT_DB" for the name, and click "Create."
Yay! You now have a new database to hold all your Streamlit apps.
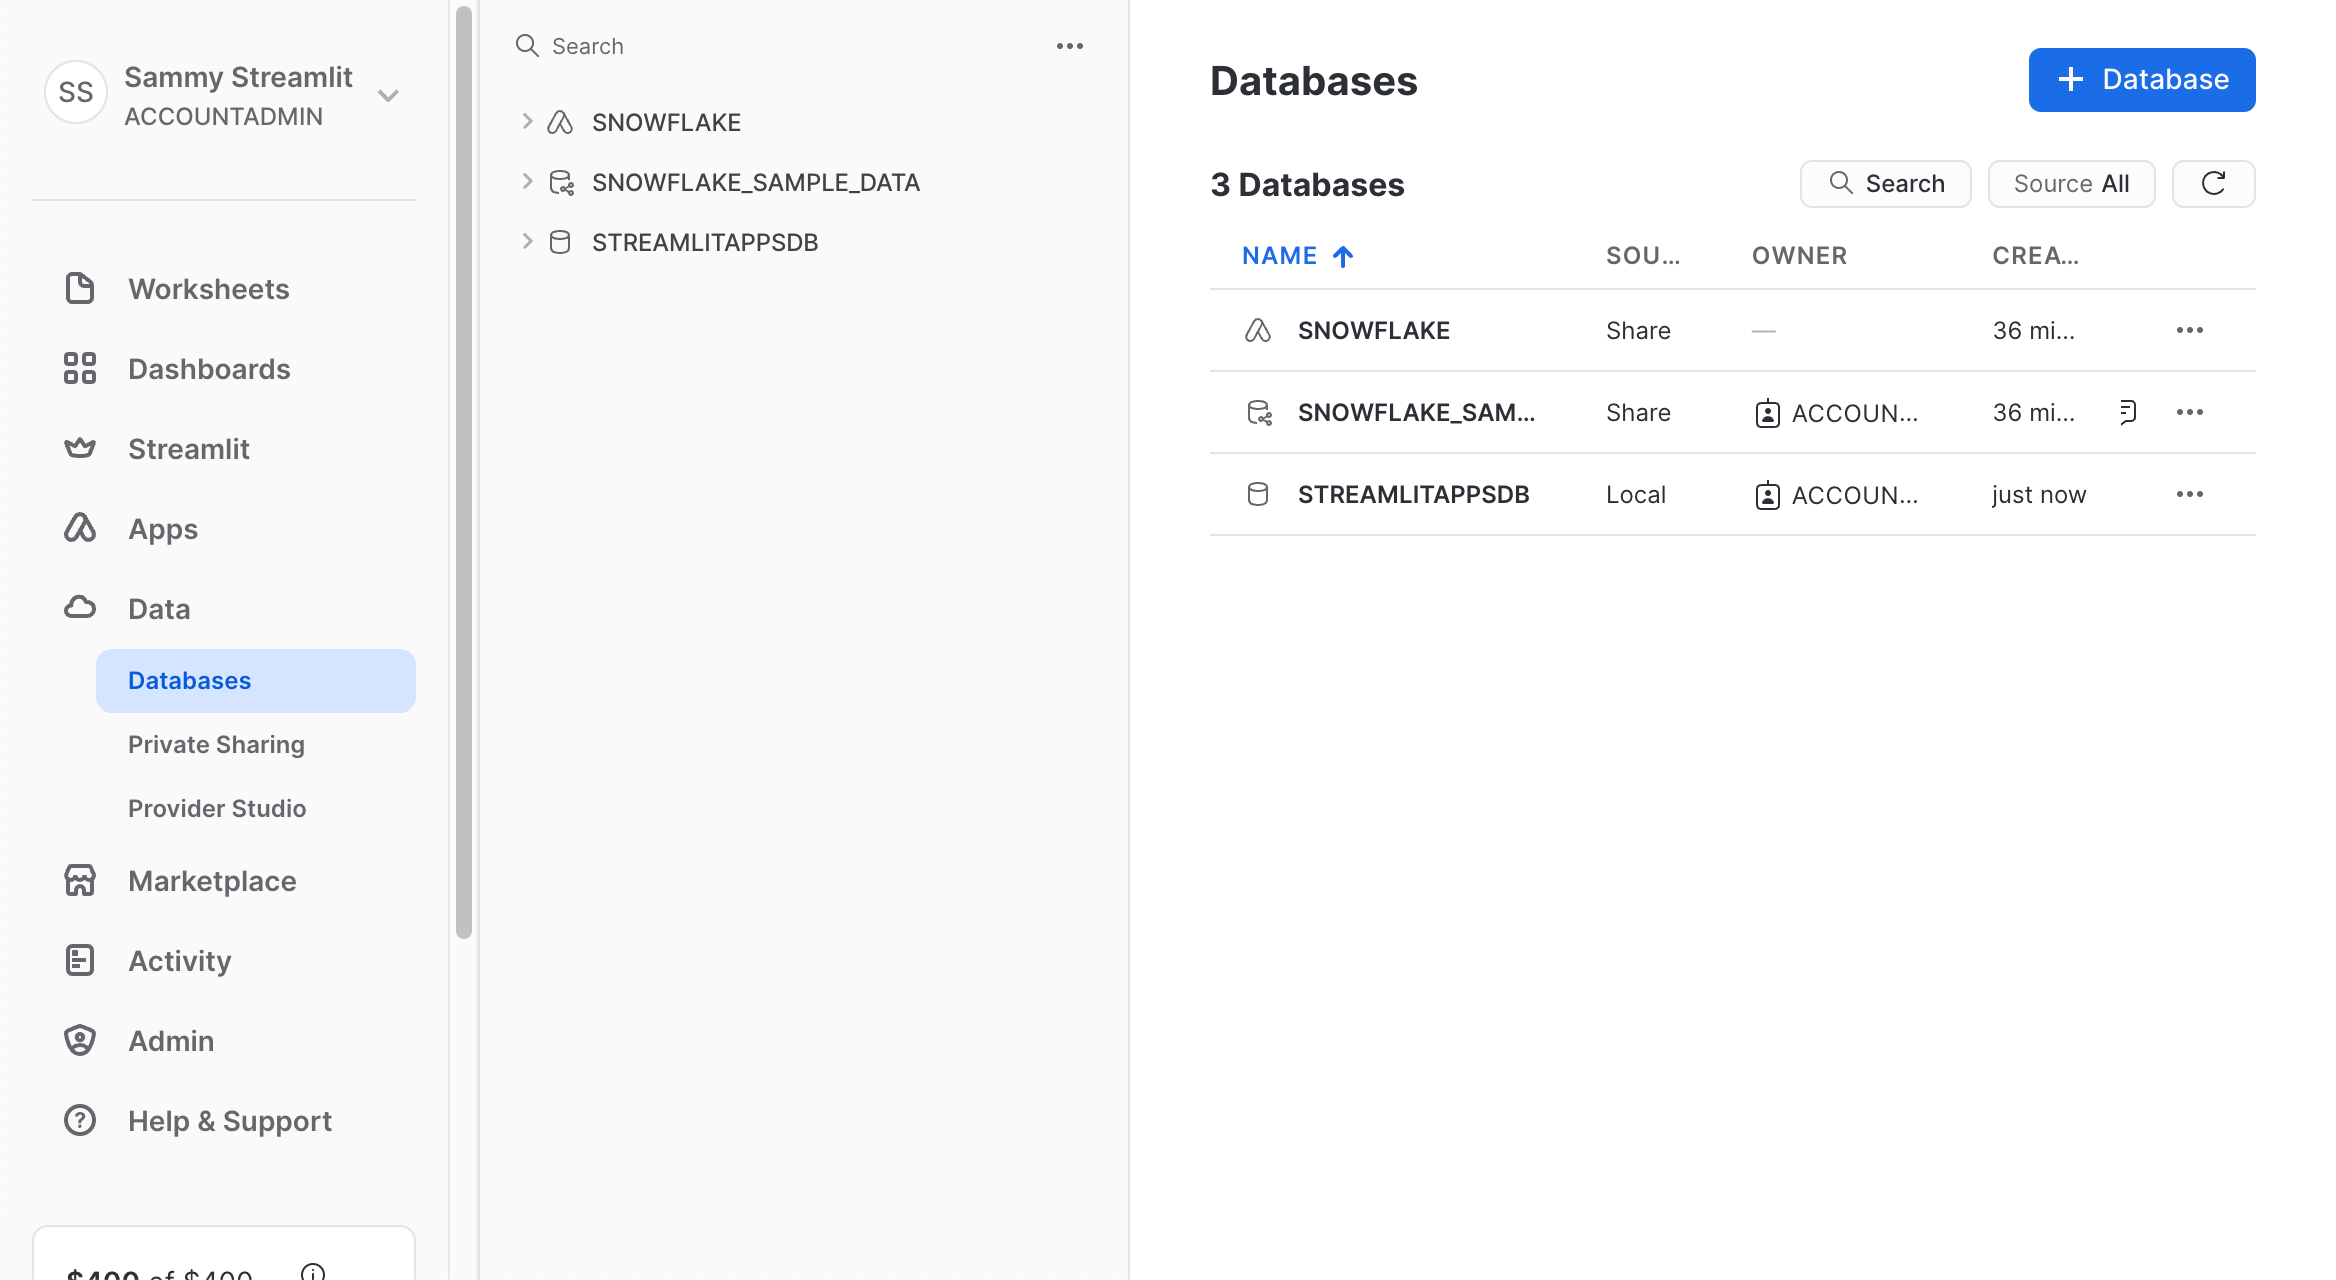
The databases in the above screenshot are as follows:
- "SNOWFLAKE:" A built-in database that stores meta data for your account.
- "SNOWFLAKE_SAMPLE_DATA:" A shared database with sample data.
- "STREAMLIT_DB:" Your new database where you'll put your Streamlit files.
Create a "Hello World" Streamlit app
-
In the left navigation, select "Projects" → "Streamlit."
-
In the upper-right corner, click the blue "add Streamlit App" button.
-
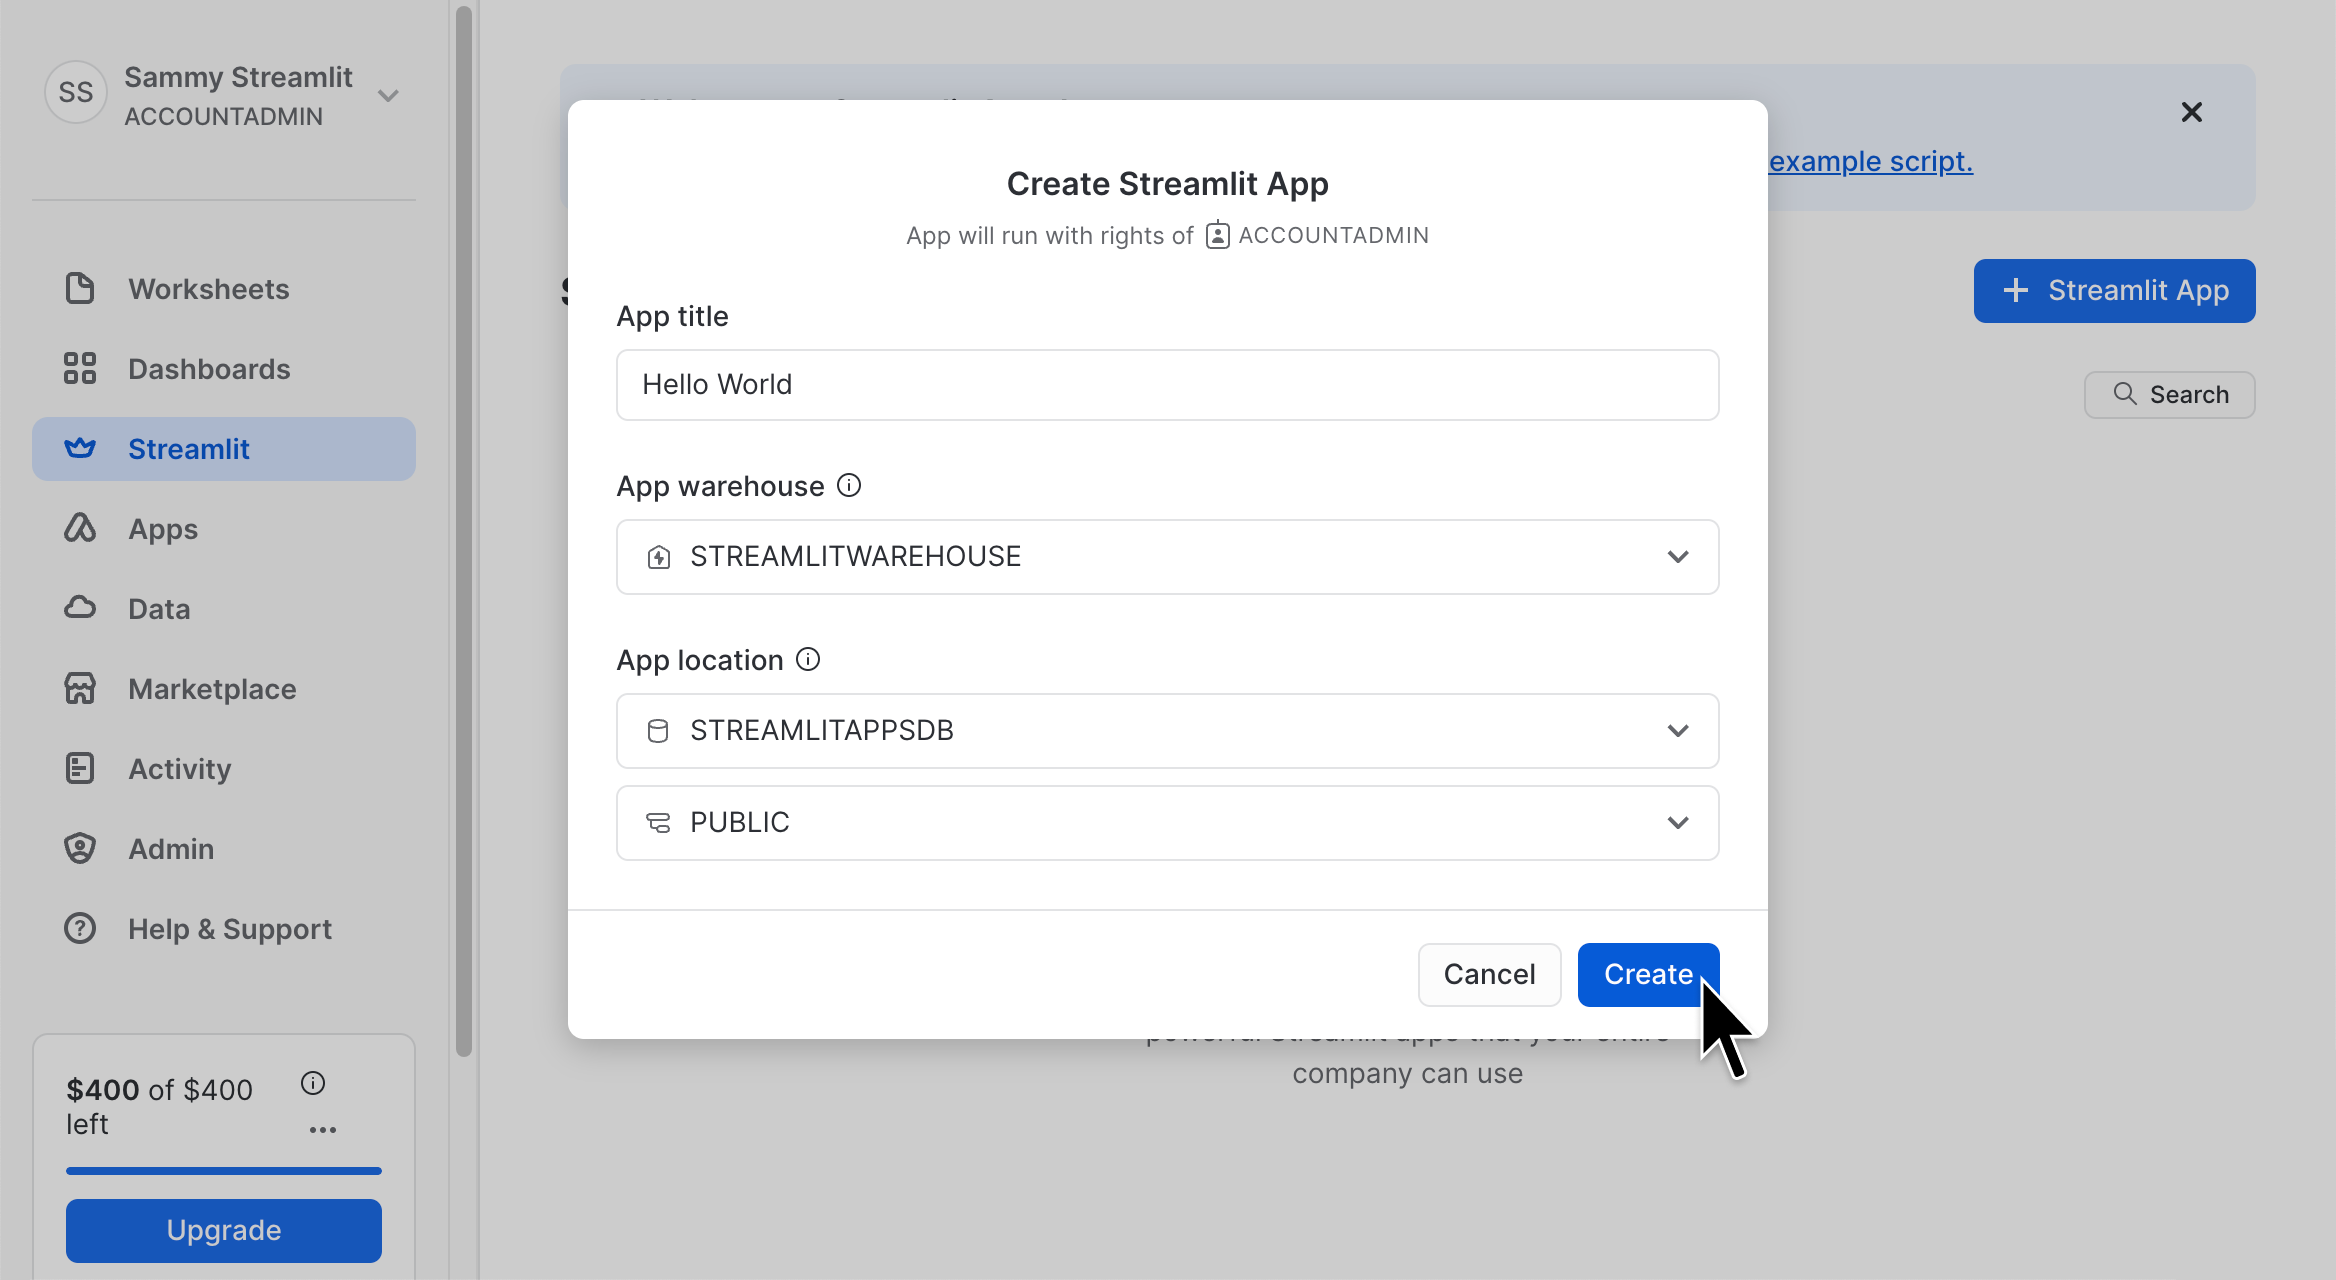
Enter your app details as follows:
- App title: "Hello World"
- App location: "STREAMLIT_DB" and "PUBLIC"
- App warehouse: "COMPUTE_WH" (default) or "STREAMLIT_WH" (if you created a new warehouse)
If you can't select your database, refresh the page to ensure that the interface is displaying current information.
-
Click "Create." (Note that the app will run with the rights of "ACCOUNTADMIN" for simplicity. You can curate your roles and permissions to choose who can create and access apps.)
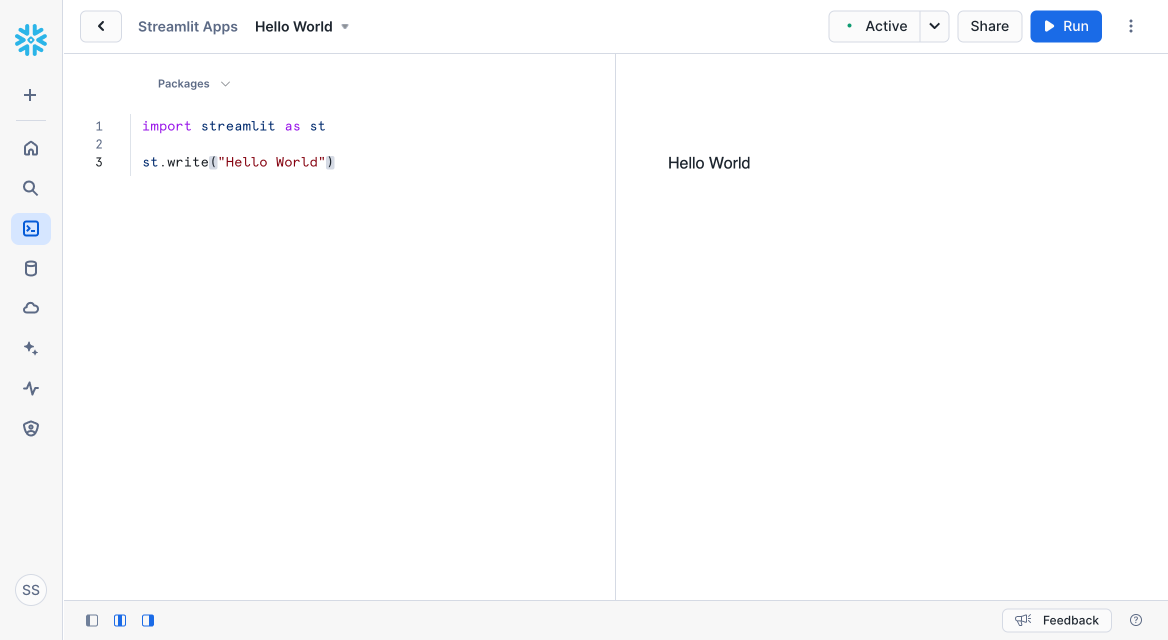
Your new app is prefilled with example code and opens in editing mode. The left panel shows your code. The right panel shows the resulting app.
-
Optional: Explore the example app.
-
In the left code editor, delete everything, and replace it with the following:
Pythonimport streamlit as st st.write("Hello World")If you want to return to the sample code later, you can always make another app to edit the same example again.
-
In the upper-right corner, click the blue "play_arrow Run" button to make the running app reflect your changes.
Hooray! You just wrote a Streamlit app.
star Tip
In the lower-left corner of the editing interface, you can click the splitscreen icons to toggle the visibility of your file navigation, code editor, and app preview.
-
Change
st.writetost.title:Pythonimport streamlit as st st.title("Hello World") -
In the upper-right corner, click the blue "play_arrow Run" button to make the running app reflect your changes.
Your app now displays the larger title text.
-
Optional: Make more edits to your app. You must interact with your app or click the blue "play_arrow Run" button to display the changes. This is different from a local environment where you can save your changes to trigger a rerun.
-
To return to Snowsight, in the upper-left corner, click "chevron_left Streamlit Apps."
Return to your app
When you want to view or edit your app again, you can return to it through Snowsight. If you are returning to the site, you can sign in at app.snowflake.com.
-
In the left navigation, select "Projects" → "Streamlit."
-
In your list of apps, click "Hello World."
If you don't see your app, check that your role is set to "ACCOUNTADMIN" as described in Optional: Create a warehouse.
-
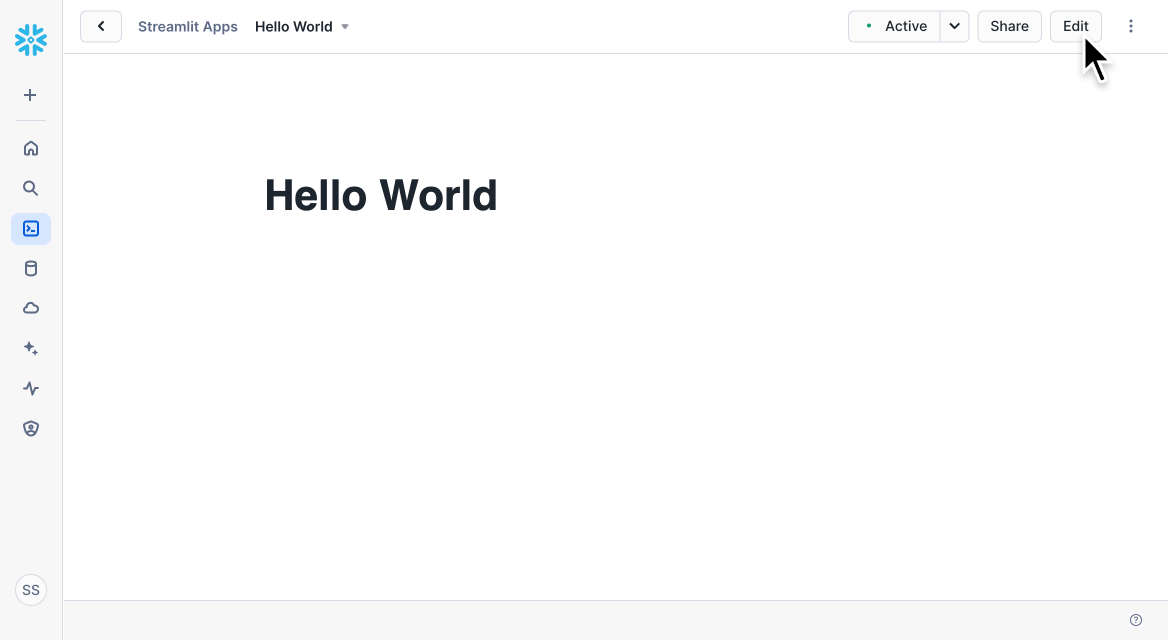
Your app will open in viewing mode. To edit your app, in the upper-right corner, click "Edit."
What's next?
Read about our Basic concepts and try out more commands in your app. Or, create more apps in Snowflake! You can reuse your warehouse and database, so you don't need to repeat those steps.
For more information about creating and managing Streamlit in Snowflake apps, check out the Snowflake docs.
Still have questions?
Our forums are full of helpful information and Streamlit experts.