The app chrome
Your Streamlit app has a few widgets in the top right to help you as you develop. These widgets also help your viewers as they use your app. We call this things “the app chrome”. The chrome includes a status area, toolbar, and app menu.
Your app menu is configurable. By default, you can access developer options from the app menu when viewing an app locally or on Streamlit Community Cloud while logged into an account with administrative access. While viewing an app, click the icon in the upper-right corner to access the menu.

Menu options
The menu is split into two sections. The upper section contains options available to all viewers and the lower section contains options for developers. Read more about customizing this menu at the end of this page.
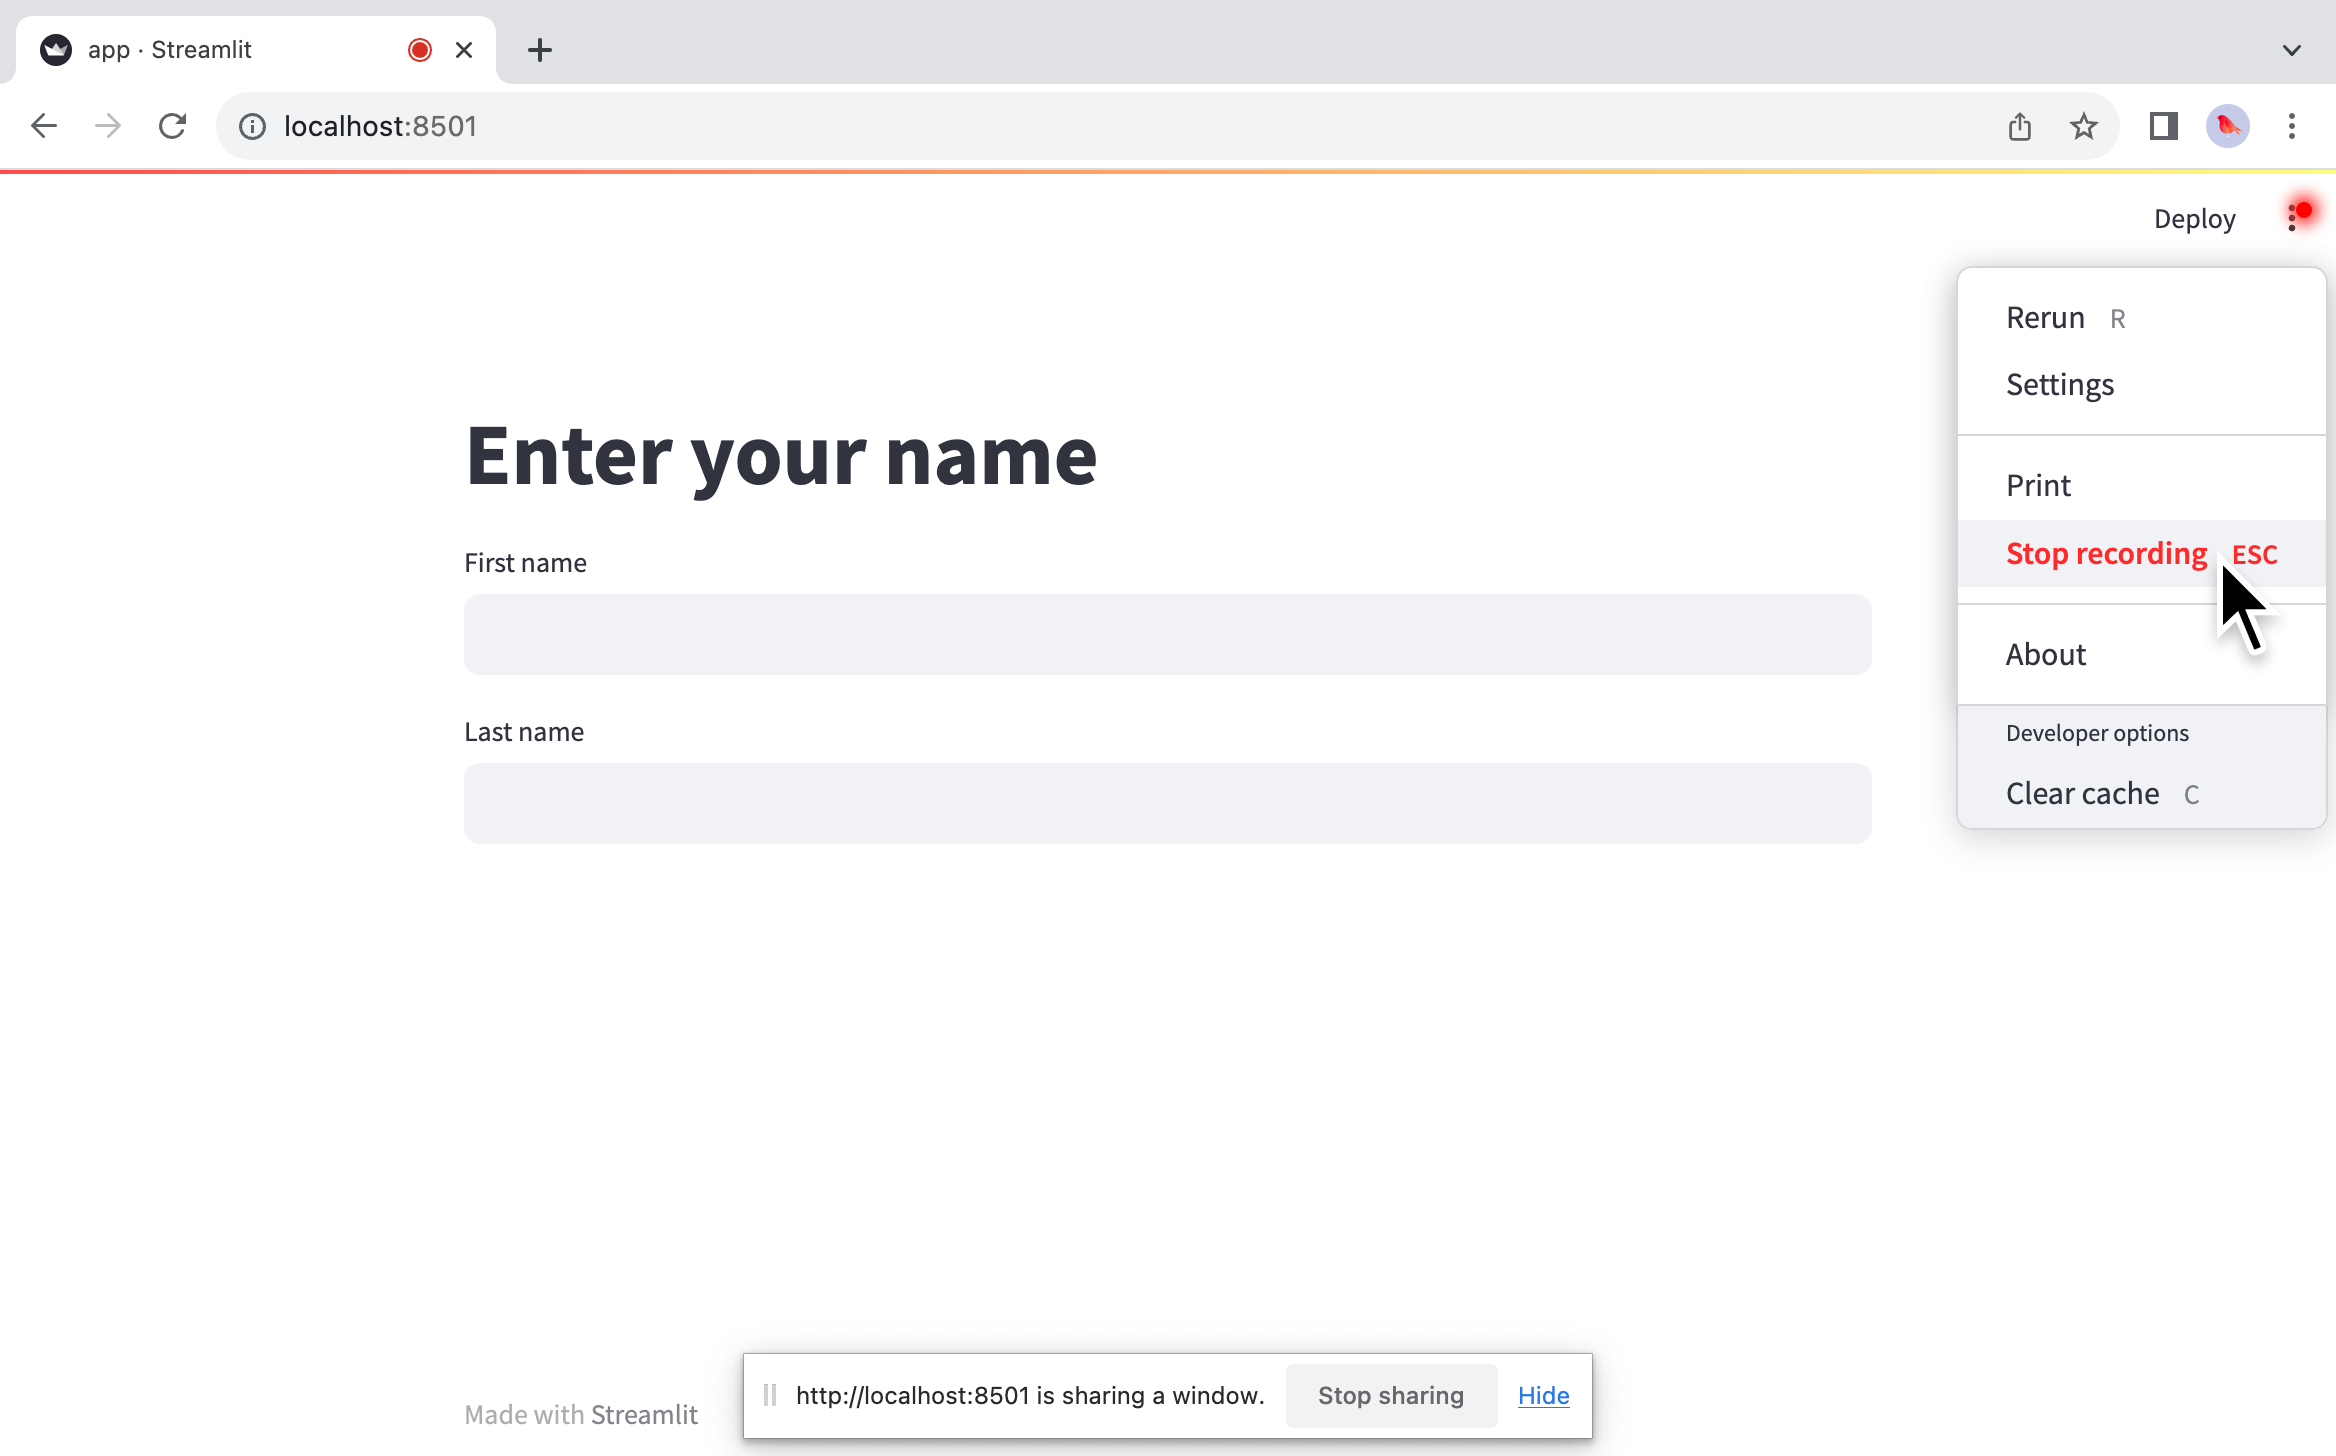
Rerun
You can manually trigger a rerun of your app by clicking "Rerun" from the app menu. This rerun will not reset your session. Your widget states and values stored in st.session_state will be preserved. As a shortcut, without opening the app menu, you can rerun your app by pressing "R" on your keyboard (if you aren't currently focused on an input element).
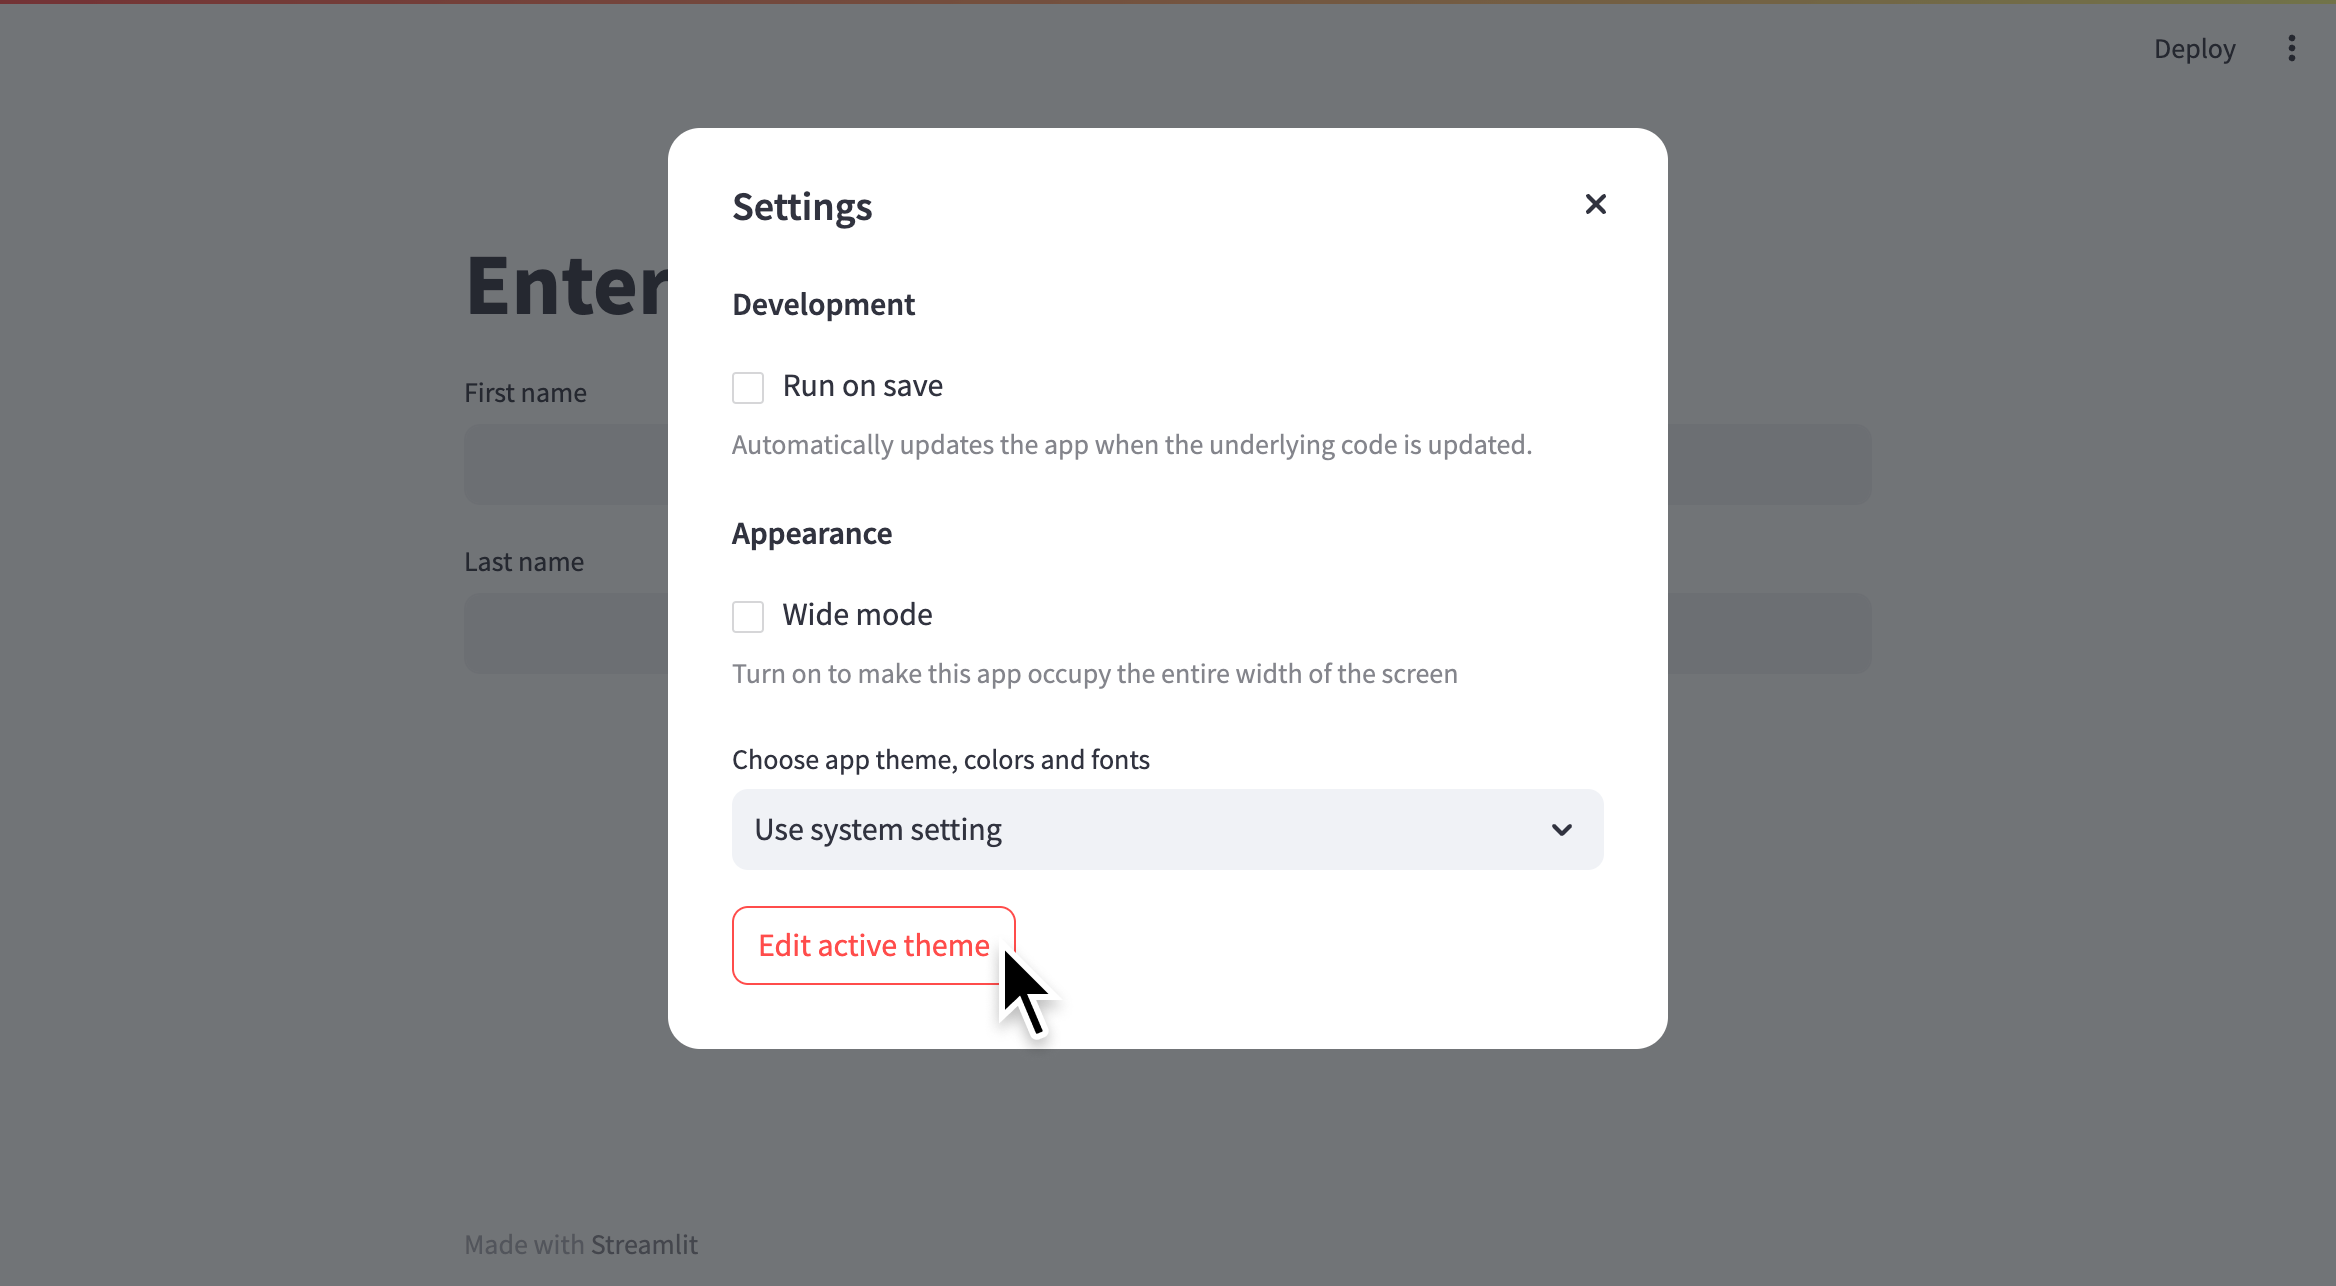
Settings
With the "Settings" option, you can control the appearance of your app while it is running. If viewing the app locally, you can set how your app responds to changes in your source code. See more about development flow in Basic concepts. You can also force your app to appear in wide mode, even if not set within the script using st.set_page_config.
Theme settings
After clicking "Settings" from the app menu, you can choose between "Light", "Dark", or "Use system setting" for the app's base theme. Click "Edit active theme" to modify the theme, color-by-color.

Click "Print" or use keyboard shortcuts (⌘+P or Ctrl+P) to open a print dialog. This option uses your browser's built-in print-to-pdf function. To modify the appearance of your print, you can do the following:
- Expand or collapse the sidebar before printing to respectively include or exclude it from the print.
- Resize the sidebar in your app by clicking and dragging its right border to achieve your desired width.
- You may need to enable "Background graphics" in your print dialog if you are printing in dark mode.
- You may need to disable wide mode in Settings or adjust the print scale to prevent elements from clipping off the page.
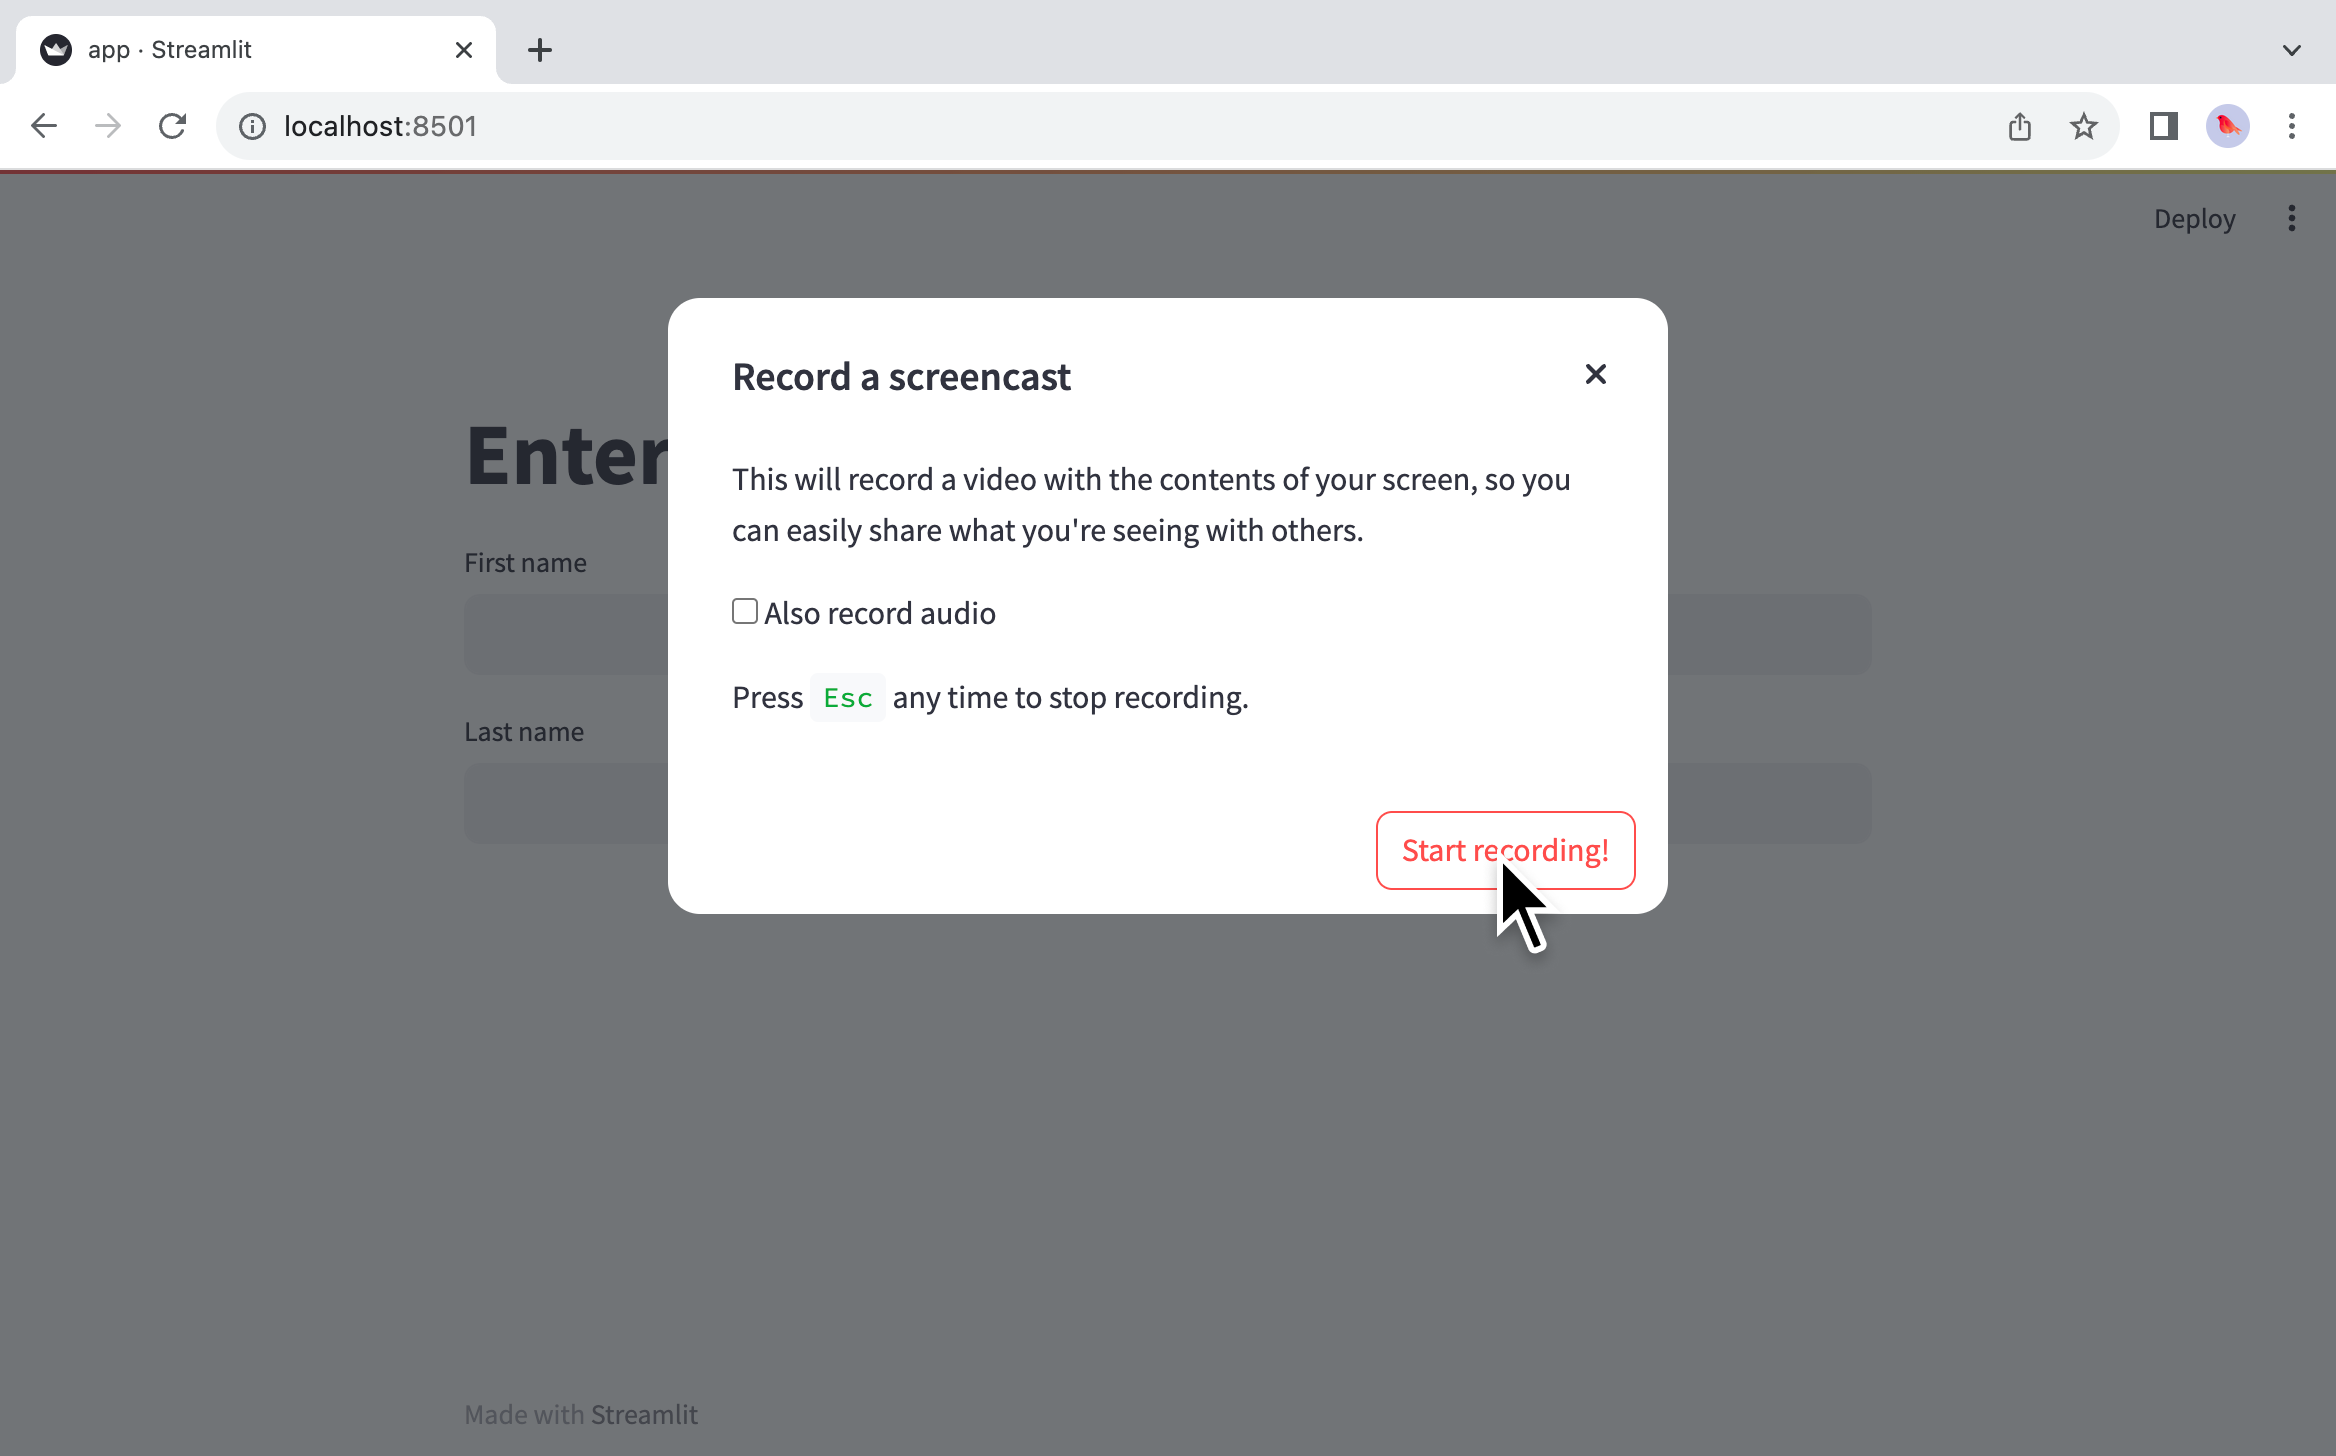
Record a screencast
You can easily make screen recordings right from your app! Screen recording is supported in the latest versions of Chrome, Edge, and Firefox. Ensure your browser is up-to-date for compatibility. Depending on your current settings, you may need to grant permission to your browser to record your screen or to use your microphone if recording a voiceover.
- While viewing your app, open the app menu from the upper-right corner.
- Click "Record a screencast."
- If you want to record audio through your microphone, check "Also record audio."
- Click "Start recording." (You may be prompted by your OS to permit your browser to record your screen or use your microphone.)
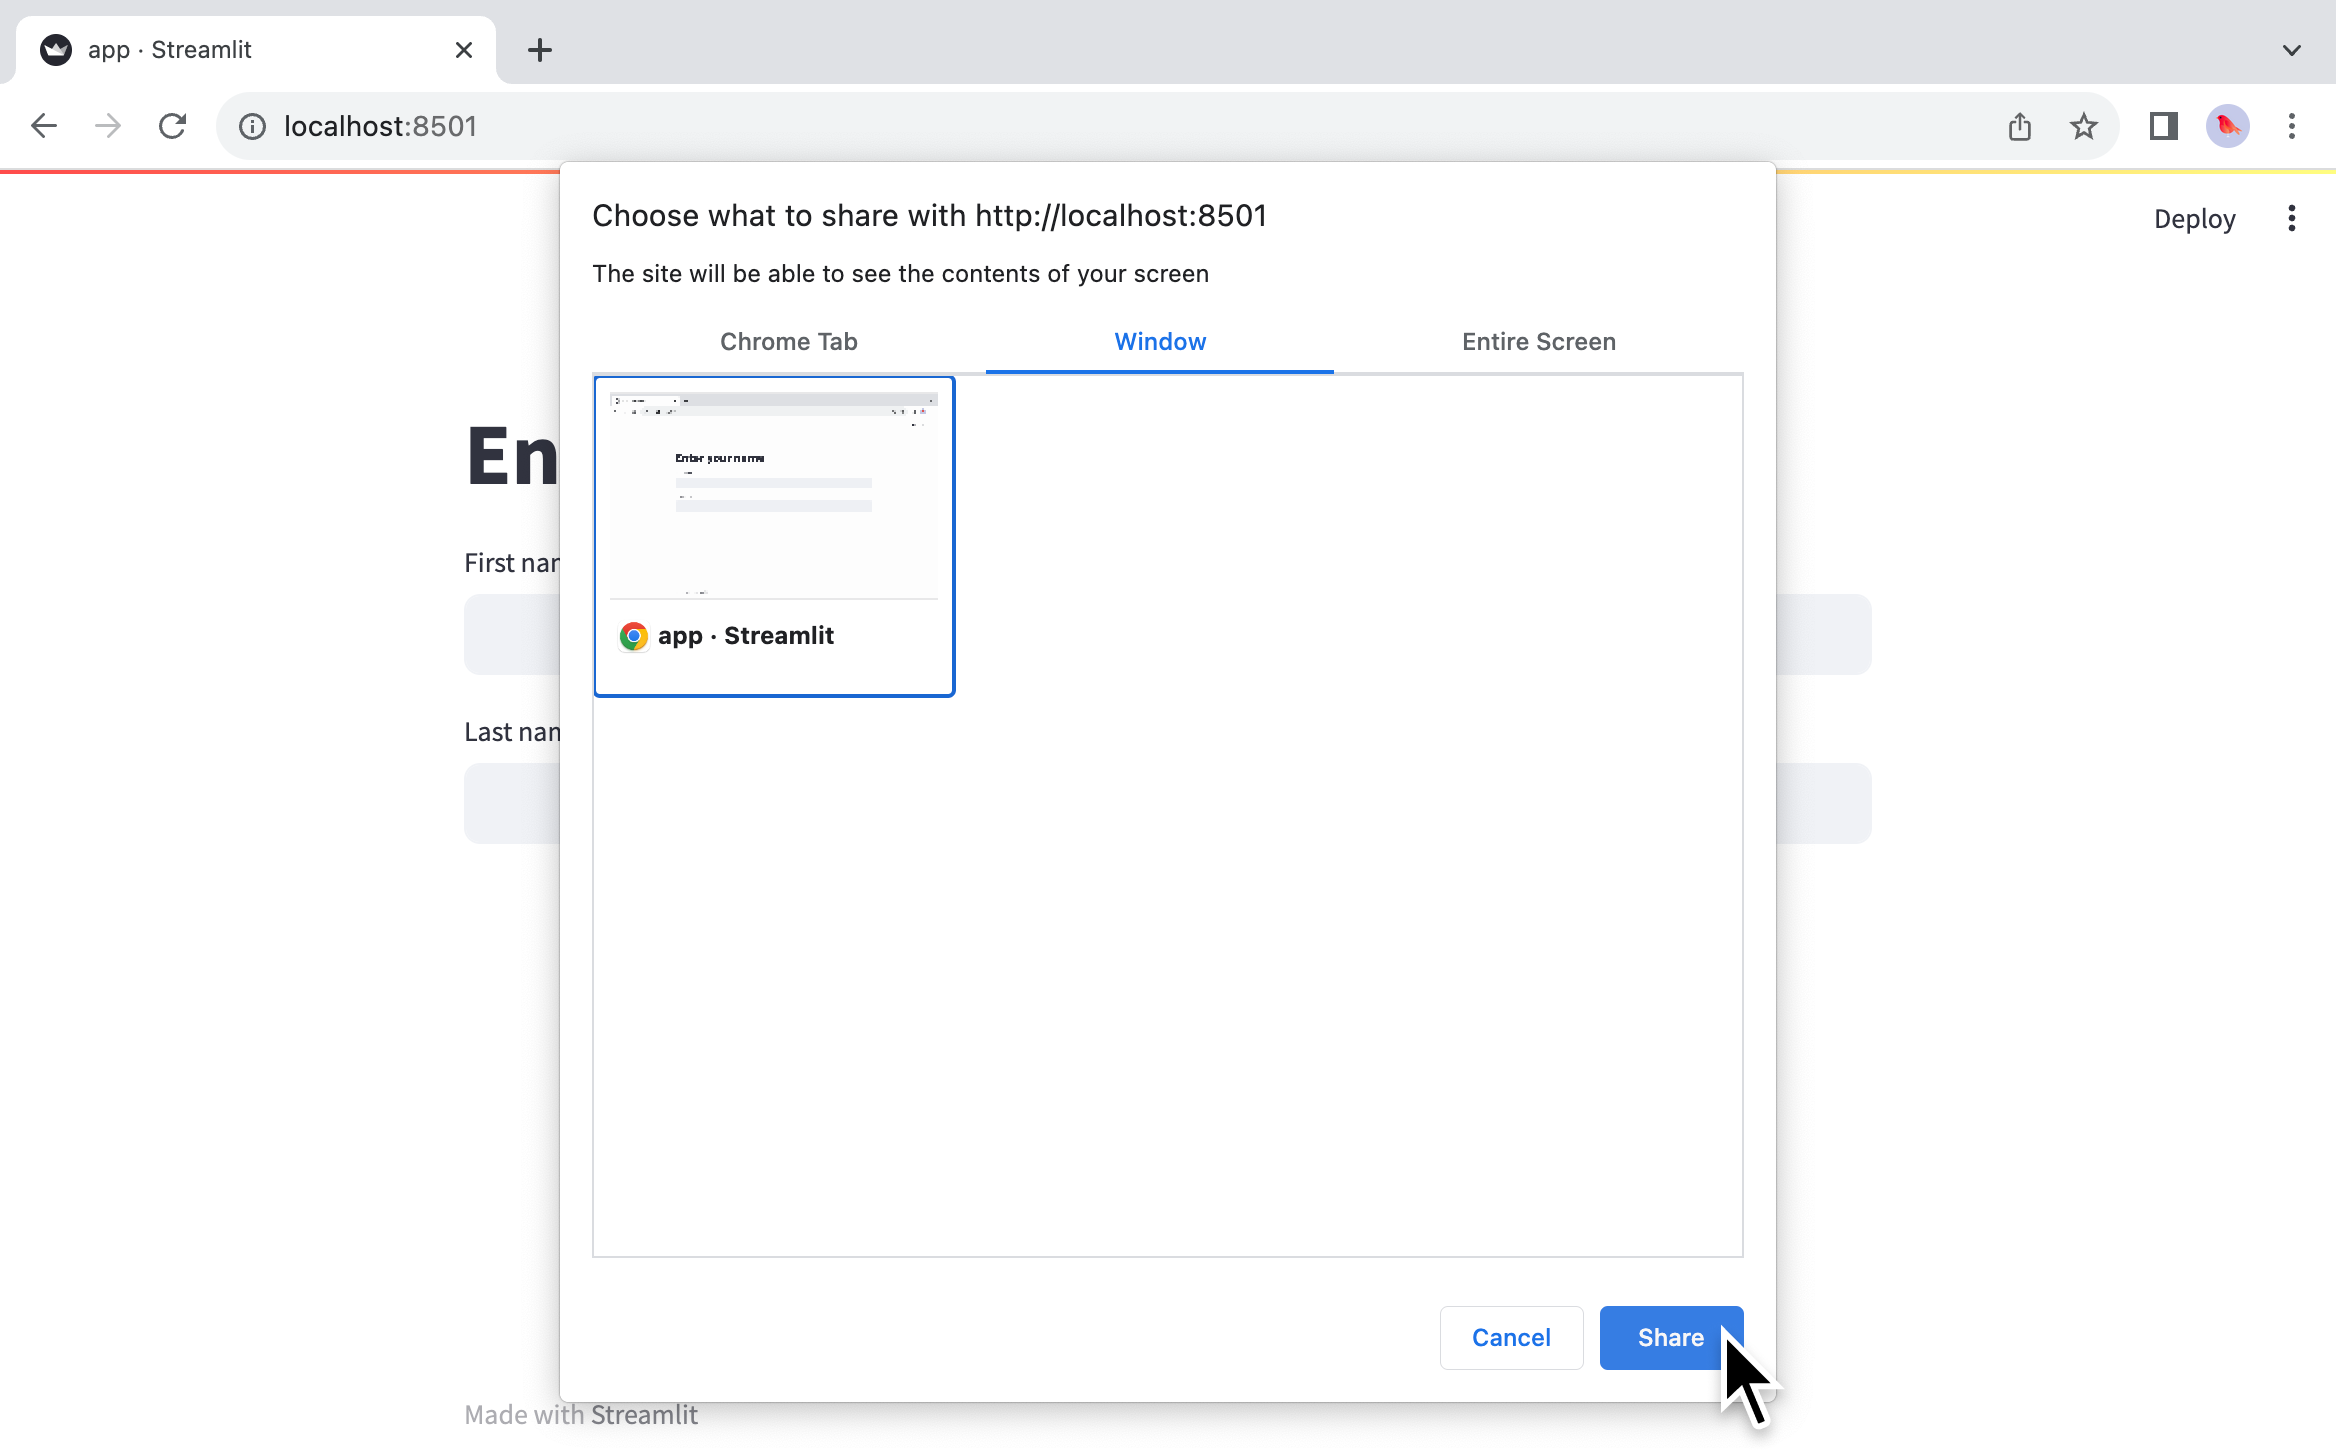
- Select which tab, window, or monitor you want to record from the listed options. The interface will vary depending on your browser.
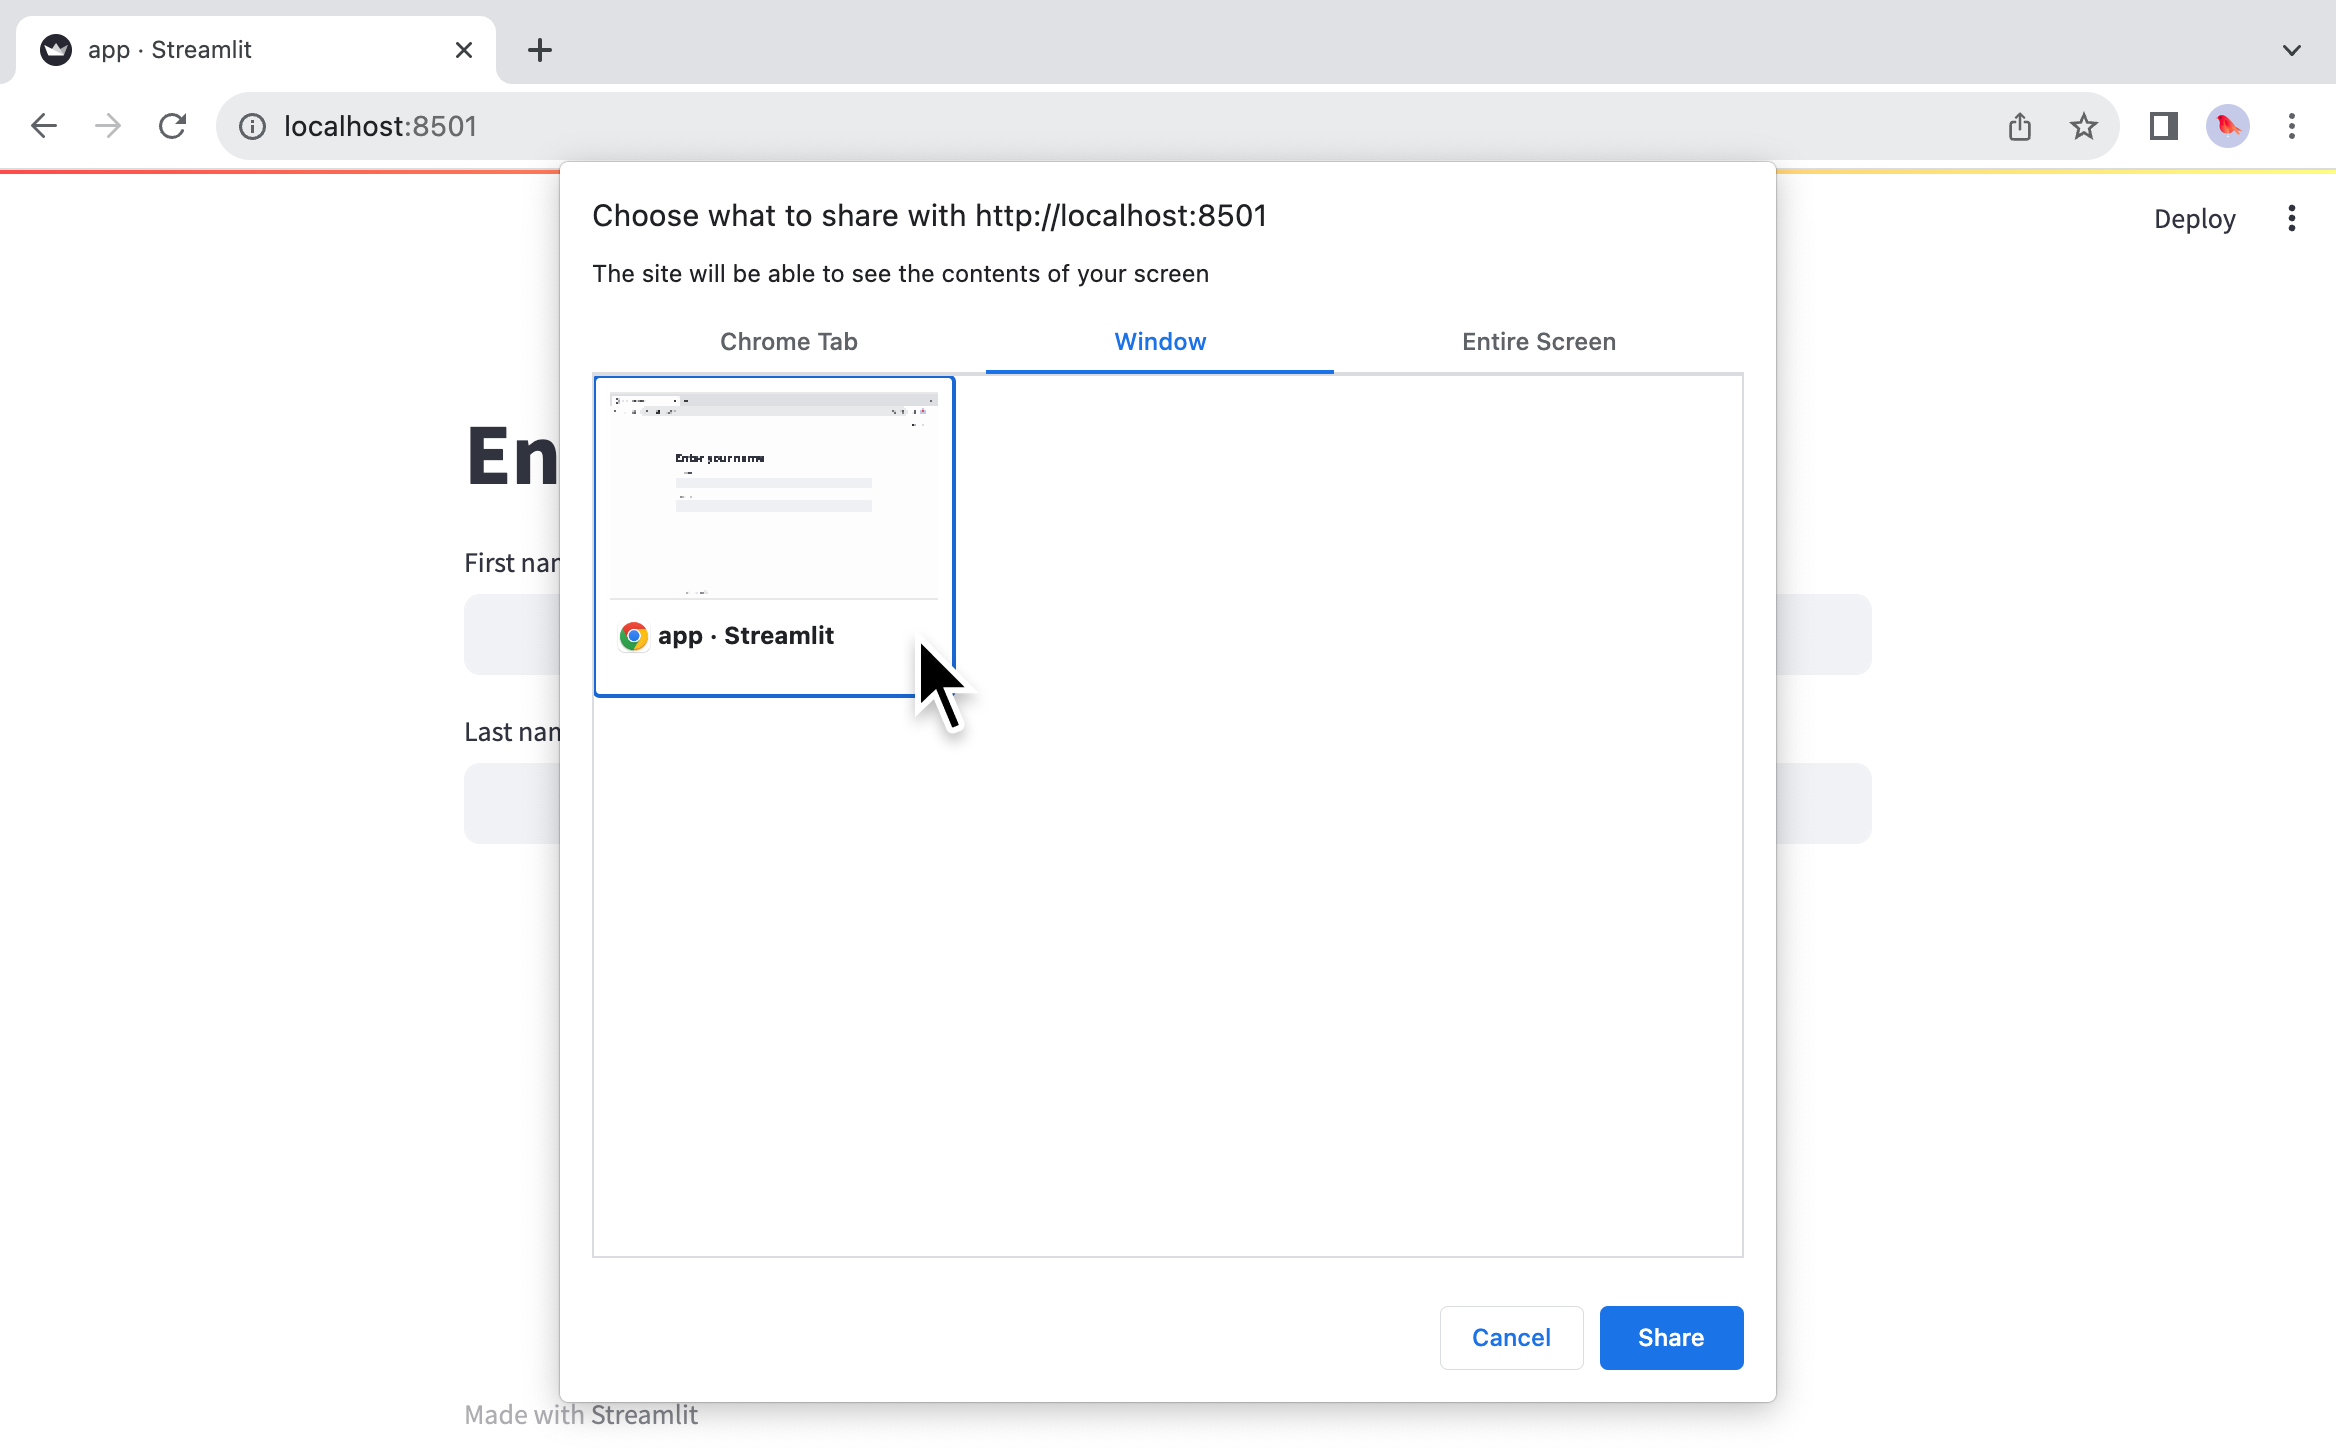
- Click "Share."
- While recording, you will see a red circle on your app's tab and on the app menu icon. If you want to cancel the recording, click "Stop sharing" at the bottom of your app.
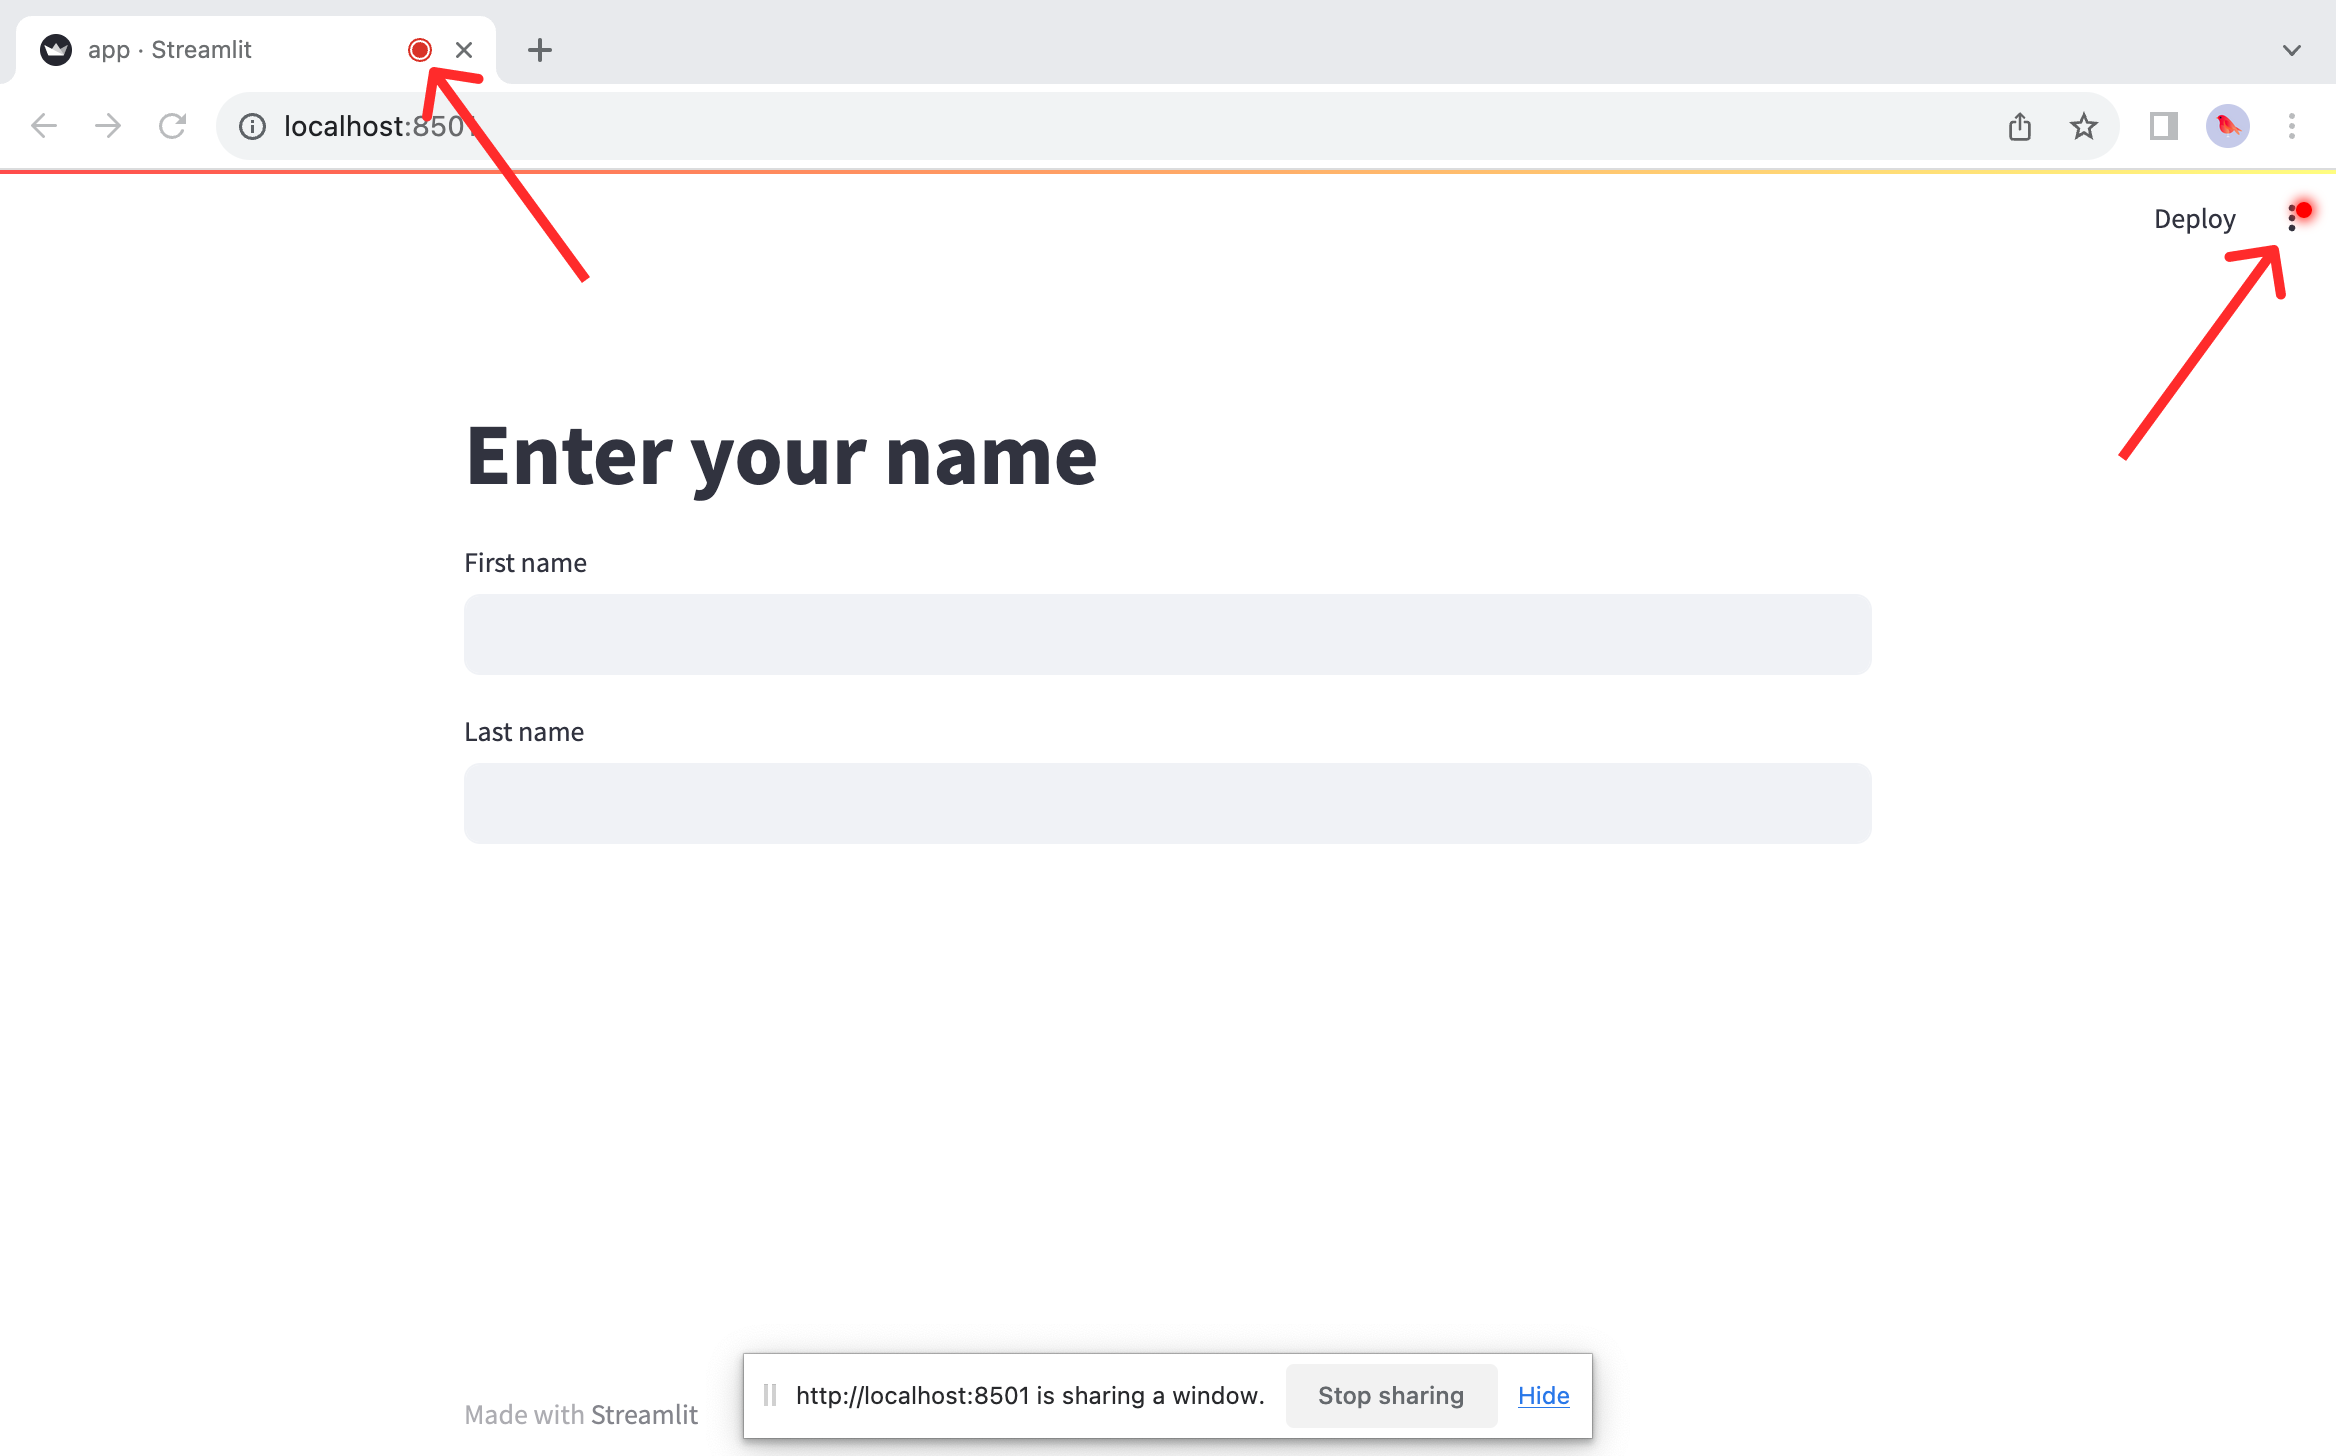
- When you are done recording, press "Esc" on your keyboard or click "Stop recording" from your app's menu.
- Follow your browser's instructions to save your recording. Your saved recording will be available where your browser saves downloads.
The whole process looks like this:
About
You can conveniently check what version of Streamlit is running from the "About" option. Developers also have the option to customize the message shown here using st.set_page_config.
Developer options
By default, developer options only show when viewing an app locally or when viewing a Community Cloud app while logged in with administrative permission. You can customize the menu if you want to make these options available for all users.
Clear cache
Reset your app's cache by clicking "Clear cache" from the app's menu or by pressing "C" on your keyboard while not focused on an input element. This will remove all cached entries for @st.cache_data and @st.cache_resource.
Deploy this app
If you are running an app locally from within a git repo, you can deploy your app to Streamlit Community Cloud in a few easy clicks! Make sure your work has been pushed to your online GitHub repository before beginning. For the greatest convenience, make sure you have already created your Community Cloud account and are signed in.
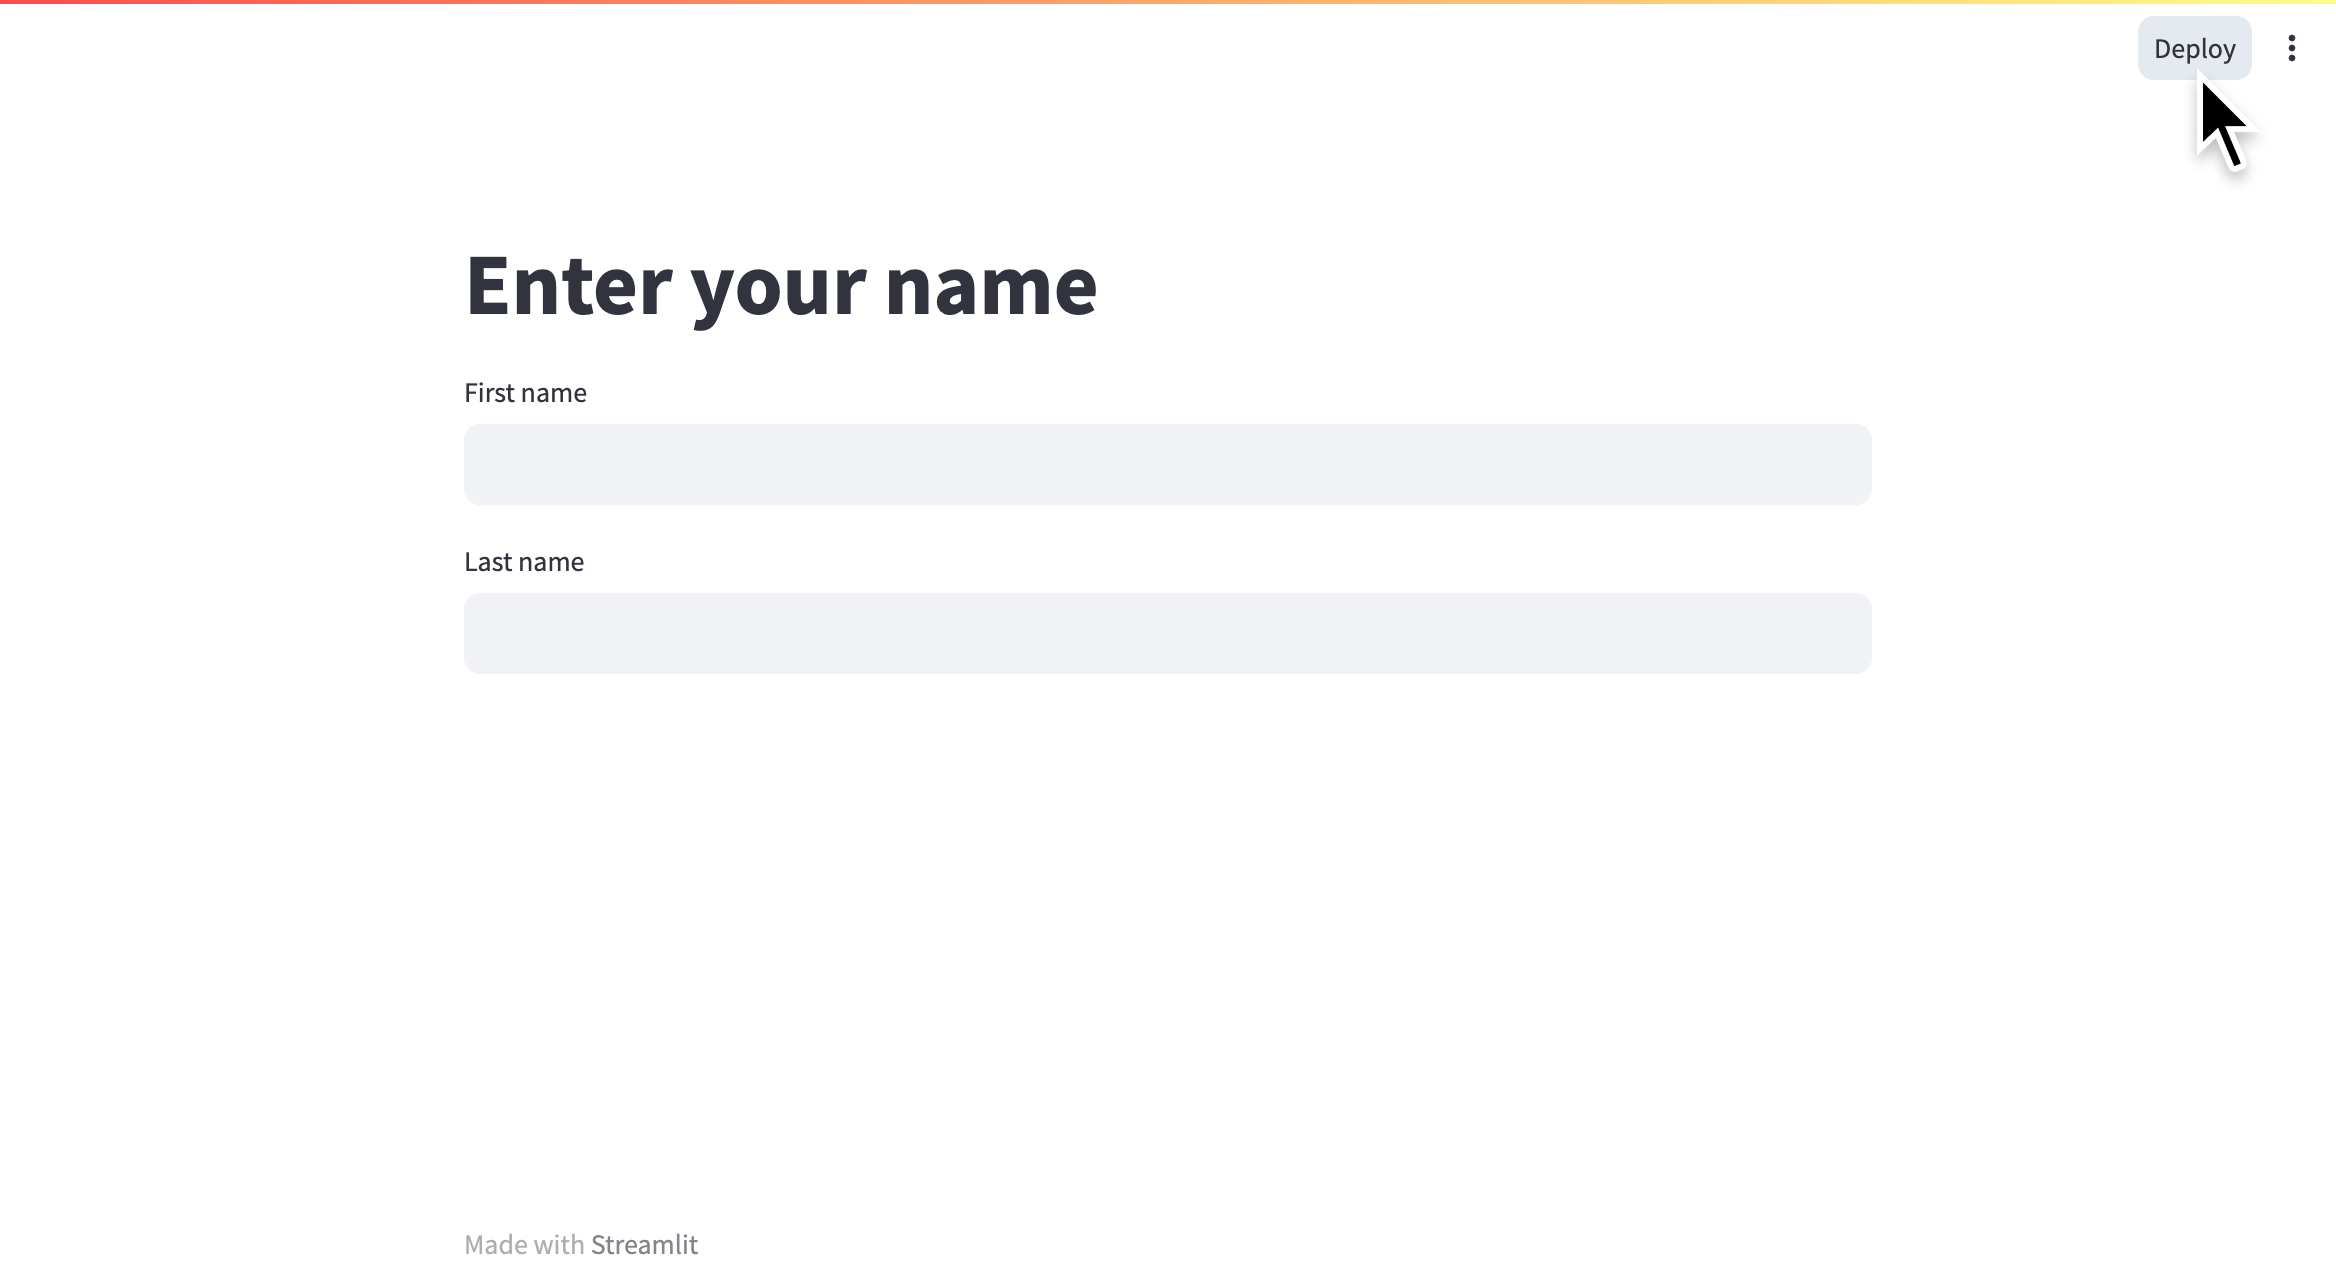
- Click "Deploy" next to the app menu icon (more_vert).
- Click "Deploy now."
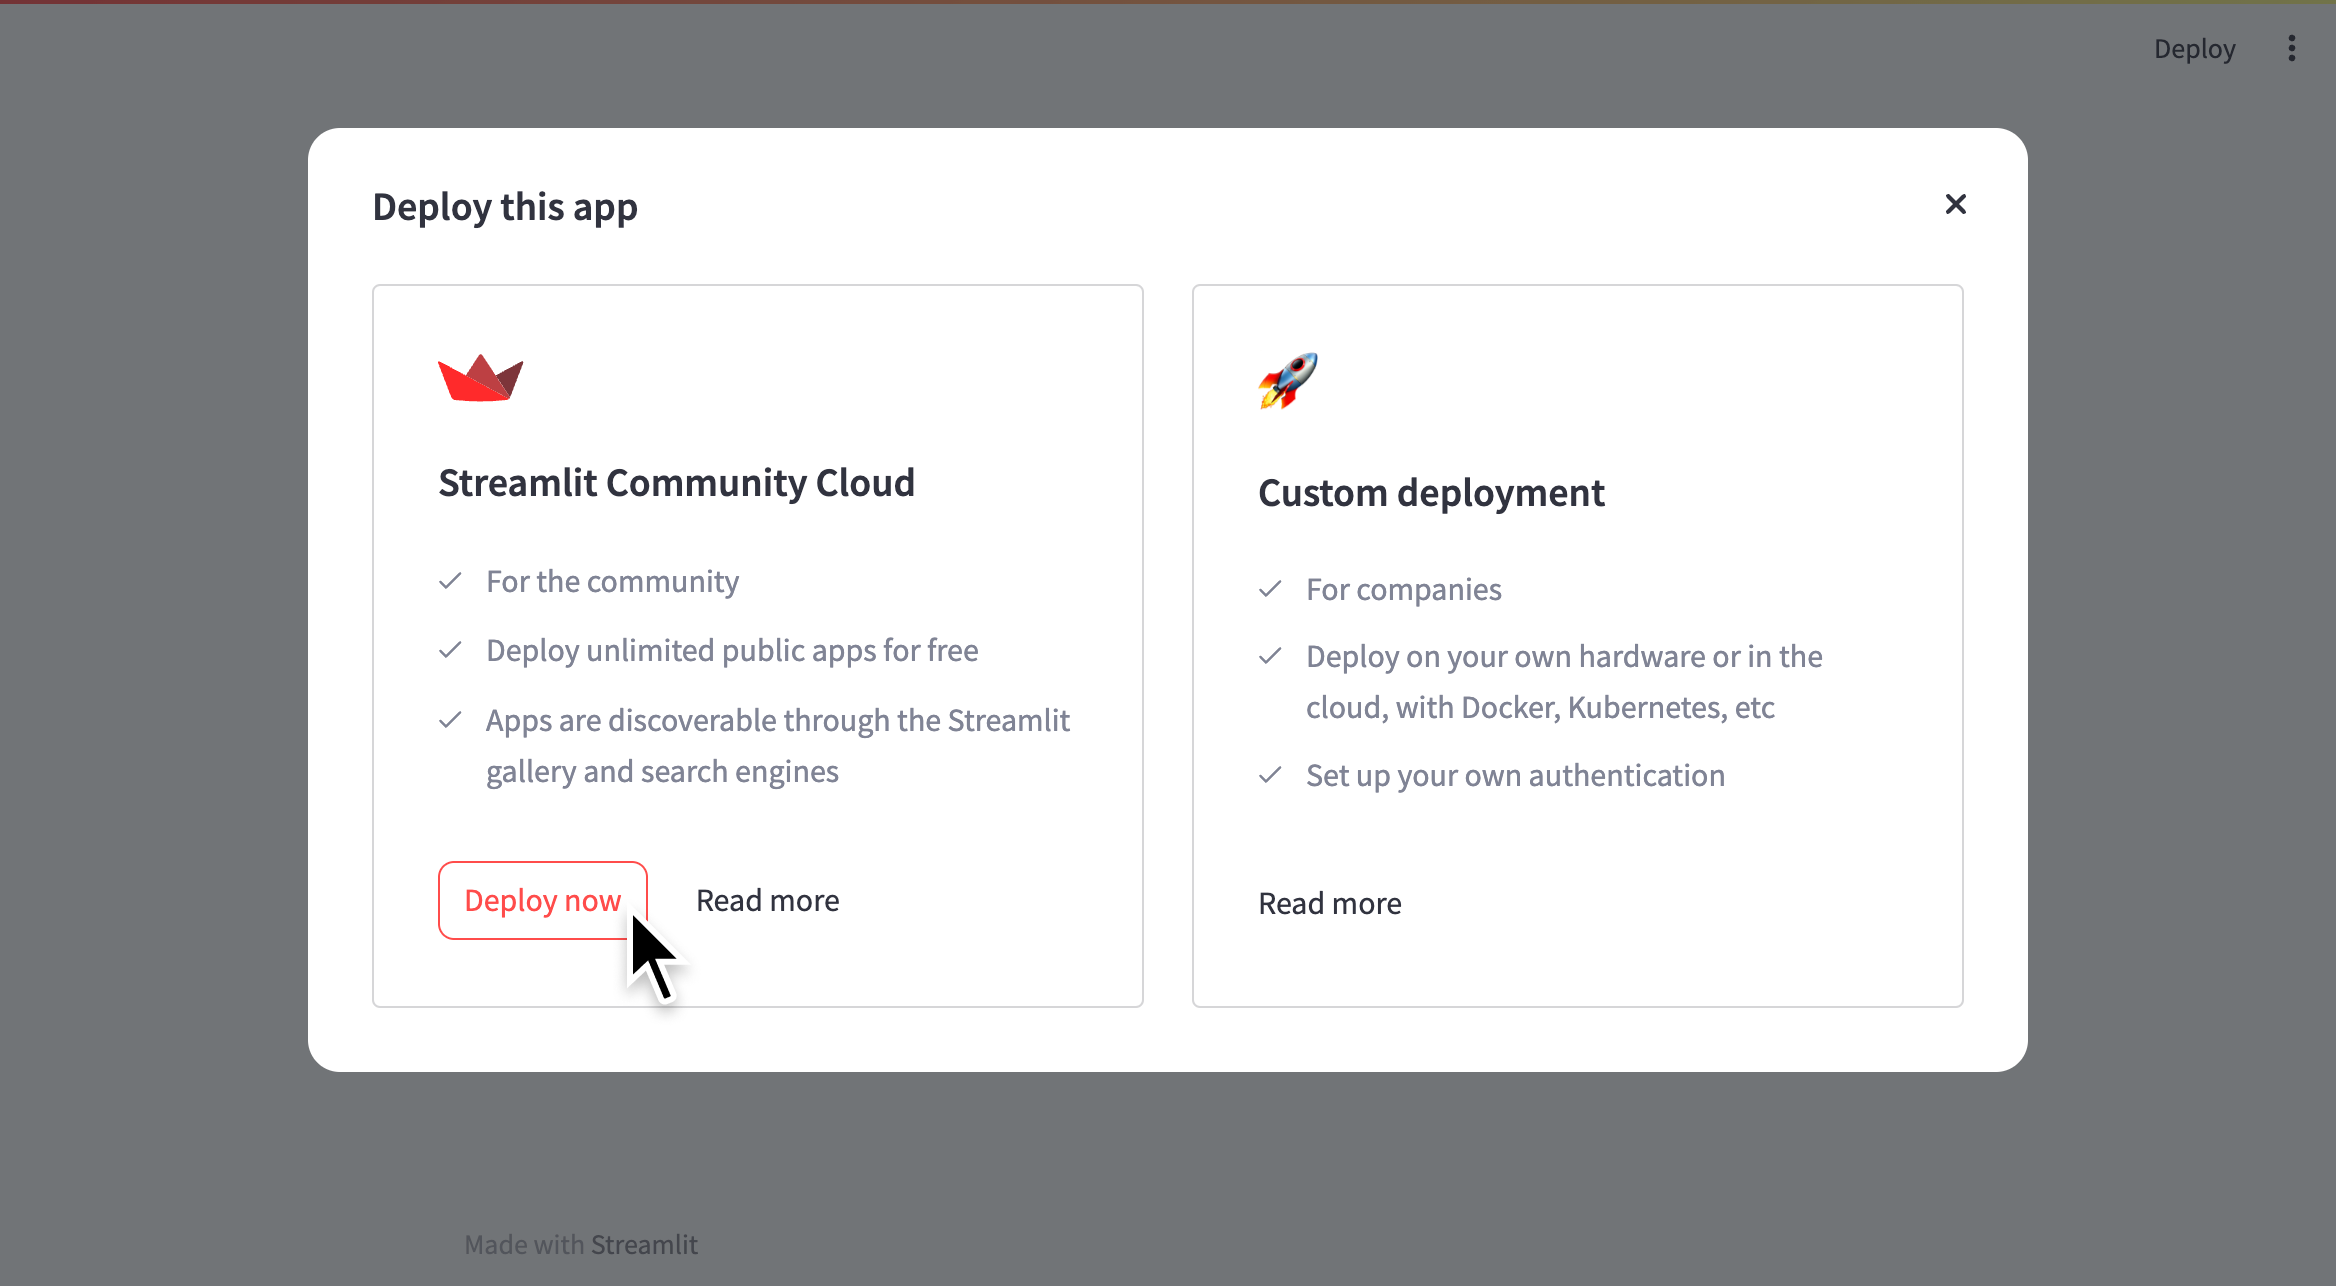
- You will be taken to Community Cloud's "Deploy an app" page. Your app's repository, branch, and file name will be prefilled to match your current app! Learn more about deploying an app on Streamlit Community Cloud.
The whole process looks like this:
Customize the menu
Using client.toolbarMode in your app's configuration, you can make the app menu appear in the following ways:
"developer"— Show the developer options to all viewers."viewer"— Hide the developer options from all viewers."minimal"— Show only those options set externally. These options can be declared throughst.set_page_configor populated through Streamlit Community Cloud."auto"— This is the default and will show the developer options when accessed through localhost or through Streamlit Community Cloud when logged into an administrative account for the app. Otherwise, the developer options will not show.
Still have questions?
Our forums are full of helpful information and Streamlit experts.