Get started with app testing
This guide will cover a simple example of how tests are structured within a project and how to execute them with pytest. After seeing the big picture, keep reading to learn about the Fundamentals of app testing:
- Initializing and running a simulated app
- Retrieving elements
- Manipulating widgets
- Inspecting the results
Streamlit's app testing framework is not tied to any particular testing tool, but we'll use pytest for our examples since it is one of the most common Python test frameworks. To try out the examples in this guide, be sure to install pytest into your Streamlit development environment before you begin:
pip install pytest
A simple testing example with pytest
This section explains how a simple test is structured and executed with pytest. For a comprehensive introduction to pytest, check out Real Python's guide to Effective Python testing with pytest.
How pytest is structured
pytest uses a naming convention for files and functions to execute tests conveniently. Name your test scripts of the form test_<name>.py or <name>_test.py. For example, you can use test_myapp.py or myapp_test.py. Within your test scripts, each test is written as a function. Each function is named to begin or end with test. We will prefix all our test scripts and test functions with test_ for our examples in this guide.
You can write as many tests (functions) within a single test script as you want. When calling pytest in a directory, all test_<name>.py files within it will be used for testing. This includes files within subdirectories. Each test_<something> function within those files will be executed as a test. You can place test files anywhere in your project directory, but it is common to collect tests into a designated tests/ directory. For other ways to structure and execute tests, check out How to invoke pytest in the pytest docs.
Example project with app testing
Consider the following project:
myproject/
├── app.py
└── tests/
    └── test_app.py
Main app file:
"""app.py"""
import streamlit as st

# Initialize st.session_state.beans
st.session_state.beans = st.session_state.get("beans", 0)

st.title("Bean counter :paw_prints:")

addend = st.number_input("Beans to add", 0, 10)
if st.button("Add"):
    st.session_state.beans += addend
st.markdown(f"Beans counted: {st.session_state.beans}")
Testing file:
"""test_app.py"""
from streamlit.testing.v1 import AppTest

def test_increment_and_add():
    """A user increments the number input, then clicks Add"""
    at = AppTest.from_file("app.py").run()
    at.number_input[0].increment().run()
    at.button[0].click().run()
    assert at.markdown[0].value == "Beans counted: 1"
Let's take a quick look at what's in this app and test before we run it. The main app file (app.py) contains four elements when rendered: st.title, st.number_input, st.button, and st.markdown. The test script (test_app.py) includes a single test (the function named test_increment_and_add). We'll cover test syntax in more detail in the latter half of this guide, but here's a brief explanation of what this test does:
- Initialize the simulated app and execute the first script run.
Python
at = AppTest.from_file("app.py").run() - Simulate a user clicking the plus icon (add) to increment the number input (and the resulting script rerun).
Python
at.number_input[0].increment().run() - Simulate a user clicking the "Add" button (and the resulting script rerun).
Python
at.button[0].click().run() - Check if the correct message is displayed at the end.
Python
assert at.markdown[0].value == "Beans counted: 1"
Assertions are the heart of tests. When the assertion is true, the test passes. When the assertion is false, the test fails. A test can have multiple assertions, but keeping tests tightly focused is good practice. When tests focus on a single behavior, it is easier to understand and respond to failure.
Try out a simple test with pytest
- Copy the files above into a new "myproject" directory.
- Open a terminal and change directory to your project.
Terminal
cd myproject - Execute
pytest:Terminalpytest
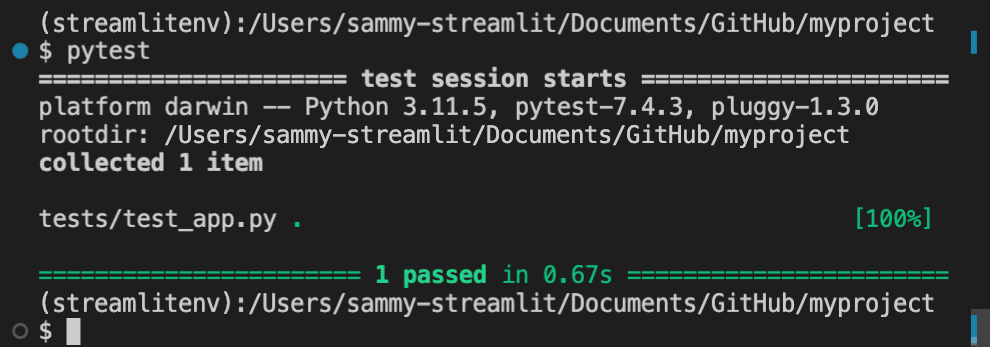
The test should execute successfully. Your terminal should show something like this:
By executing pytest at the root of your project directory, all Python files with the test prefix (test_<name>.py) will be scanned for test functions. Within each test file, each function with the test prefix will be executed as a test. pytest then counts successes and itemizes failures. You can also direct pytest to only scan your testing directory. For example, from the root of your project directory, execute:
pytest tests/
Handling file paths and imports with pytest
Imports and paths within a test script should be relative to the directory where pytest is called. That is why the test function uses the path app.py instead of ../app.py even though the app file is one directory up from the test script. You'll usually call pytest from the directory containing your main app file. This is typically the root of your project directory.
Additionally, if .streamlit/ is present in the directory where you call pytest, any config.toml and secrets.toml within it will be accessible to your simulated app. For example, your simulated app will have access to the config.toml and secrets.toml files in this common setup:
Project structure:
myproject/
├── .streamlit/
│   ├── config.toml
│   └── secrets.toml
├── app.py
└── tests/
    └── test_app.py
Initialization within test_app.py:
# Path to app file is relative to myproject/
at = AppTest.from_file("app.py").run()
Command to execute tests:
cd myproject
pytest tests/
Fundamentals of app testing
Now that you understand the basics of pytest let's dive into using Streamlit's app testing framework. Every test begins with initializing and running your simulated app. Additional commands are used to retrieve, manipulate, and inspect elements.
On the next page, we'll go Beyond the basics and cover more advanced scenarios like working with secrets, Session State, or multipage apps.
How to initialize and run a simulated app
To test a Streamlit app, you must first initialize an instance of AppTest with the code for one page of your app. There are three methods for initializing a simulated app. These are provided as class methods to AppTest. We will focus on AppTest.from_file() which allows you to provide a path to a page of your app. This is the most common scenario for building automated tests during app development. AppTest.from_string() and AppTest.from_function() may be helpful for some simple or experimental scenarios.
Let's continue with the example from above.
Recall the testing file:
"""test_app.py"""
from streamlit.testing.v1 import AppTest

def test_increment_and_add():
    """A user increments the number input, then clicks Add"""
    at = AppTest.from_file("app.py").run()
    at.number_input[0].increment().run()
    at.button[0].click().run()
    assert at.markdown[0].value == "Beans counted: 1"
Look at the first line in the test function:
at = AppTest.from_file("app.py").run()
This is doing two things and is equivalent to:
# Initialize the app.
at = AppTest.from_file("app.py")
# Run the app.
at.run()
AppTest.from_file() returns an instance of AppTest, initialized with the contents of app.py. The .run() method is used to run the app for the first time. Looking at the test, notice that the .run() method manually executes each script run. A test must explicitly run the app each time. This applies to the app's first run and any rerun resulting from simulated user input.
How to retrieve elements
The attributes of the AppTest class return sequences of elements. The elements are sorted according to display order in the rendered app. Specific elements can be retrieved by index. Additionally, widgets with keys can be retrieved by key.
Retrieve elements by index
Each attribute of AppTest returns a sequence of the associated element type. Specific elements can be retrieved by index. In the above example, at.number_input returns a sequence of all st.number_input elements in the app. Thus, at.number_input[0] is the first such element in the app. Similarly, at.markdown returns a collection of all st.markdown elements where at.markdown[0] is the first such element.
Check out the current list of supported elements in the "Attributes" section of the AppTest class or the App testing cheat sheet. You can also use the .get() method and pass the attribute's name. at.get("number_input") and at.get("markdown") are equivalent to at.number_input and at.markdown, respectively.
The returned sequence of elements is ordered by appearance on the page. If containers are used to insert elements in a different order, these sequences may not match the order within your code. Consider the following example where containers are used to switch the order of two buttons on the page:
import streamlit as st

first = st.container()
second = st.container()

second.button("A")
first.button("B")
If the above app was tested, the first button (at.button[0]) would be labeled "B" and the second button (at.button[1]) would be labeled "A." As true assertions, these would be:
assert at.button[0].label == "B"
assert at.button[1].label == "A"
Retrieve widgets by key
You can retrieve keyed widgets by their keys instead of their order on the page. The key of the widget is passed as either an arg or kwarg. For example, look at this app and the following (true) assertions:
import streamlit as st

st.button("Next", key="submit")
st.button("Back", key="cancel")
assert at.button(key="submit").label == "Next"
assert at.button("cancel").label == "Back"
Retrieve containers
You can also narrow down your sequences of elements by retrieving specific containers. Each retrieved container has the same attributes as AppTest. For example, at.sidebar.checkbox returns a sequence of all checkboxes in the sidebar. at.main.selectbox returns the sequence of all selectboxes in the main body of the app (not in the sidebar).
For AppTest.columns and AppTest.tabs, a sequence of containers is returned. So at.columns[0].button would be the sequence of all buttons in the first column appearing in the app.
How to manipulate widgets
All widgets have a universal .set_value() method. Additionally, many widgets have specific methods for manipulating their value. The names of Testing element classes closely match the names of the AppTest attributes. For example, look at the return type of AppTest.button to see the corresponding class of Button. Aside from setting the value of a button with .set_value(), you can also use .click(). Check out each testing element class for its specific methods.
How to inspect elements
All elements, including widgets, have a universal .value property. This returns the contents of the element. For widgets, this is the same as the return value or value in Session State. For non-input elements, this will be the value of the primary contents argument. For example, .value returns the value of body for st.markdown or st.error. It returns the value of data for st.dataframe or st.table.
Additionally, you can check many other details for widgets like labels or disabled status. Many parameters are available for inspection, but not all. Use linting software to see what is currently supported. Here's an example:
import streamlit as st

st.selectbox("A", [1,2,3], None, help="Pick a number", placeholder="Pick me")
assert at.selectbox[0].value == None
assert at.selectbox[0].label == "A"
assert at.selectbox[0].options == ["1","2","3"]
assert at.selectbox[0].index == None
assert at.selectbox[0].help == "Pick a number"
assert at.selectbox[0].placeholder == "Pick me"
assert at.selectbox[0].disabled == False
Tip
Note that the options for st.selectbox were declared as integers but asserted as strings. As noted in the documentation for st.selectbox, options are cast internally to strings. If you ever find yourself getting unexpected results, check the documentation carefully for any notes about recasting types internally.
Still have questions?
Our forums are full of helpful information and Streamlit experts.