Edit your app
You can edit your app from any development environment of your choice. Streamlit Community Cloud will monitor your repository and automatically copy any file changes you commit. You will immediately see commits reflected in your deployed app for most changes (such as edits to your app's Python files).
Community Cloud also makes it easy to skip the work of setting up a development environment. With a few simple clicks, you can configure a development environment using GitHub Codespaces.
Edit your app with GitHub Codespaces
Spin up a cloud-based development environment for your deployed app in minutes. You can run your app within your codespace to enjoy experimenting in a safe, sandboxed environment. When you are done editing your code, you can commit your changes to your repo or just leave them in your codespace to return to later.
Create a codespace for your deployed app
-
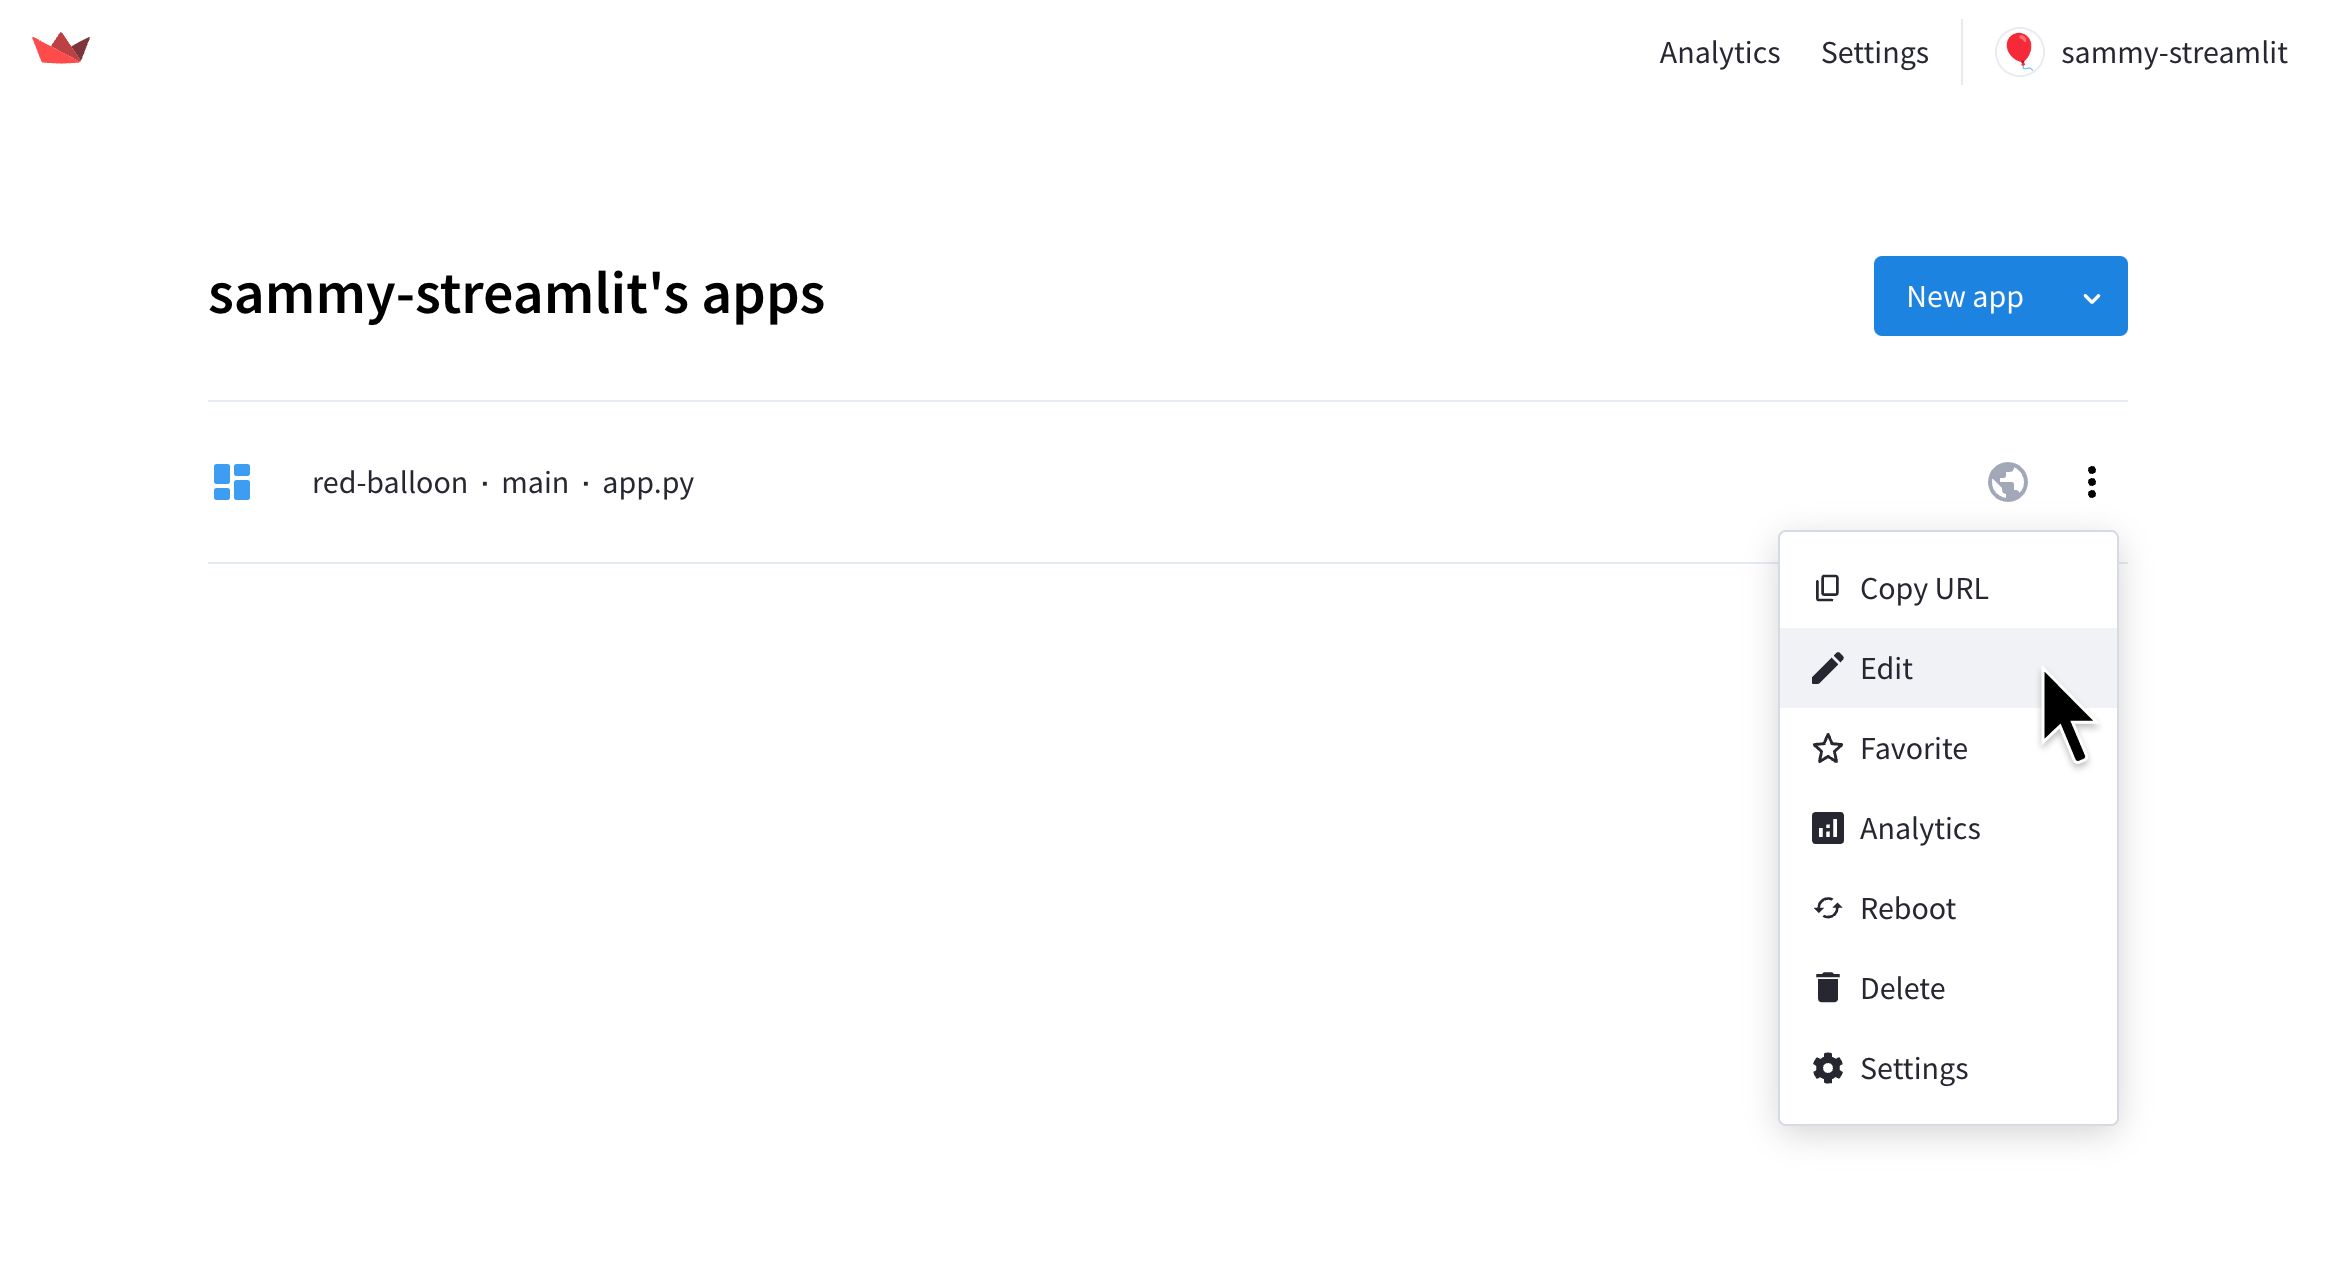
From your workspace at share.streamlit.io, click the overflow icon (more_vert) next to your app. Click "Edit with Codespaces."
Community Cloud will add a
.devcontainer/devcontainer.jsonfile to your repository. If you already have a file of the same name in your repository, it will not be changed. If you want your repository to receive the instance created by Community Cloud, delete or rename your existing devcontainer configuration. -
Wait for GitHub to set up your codespace.
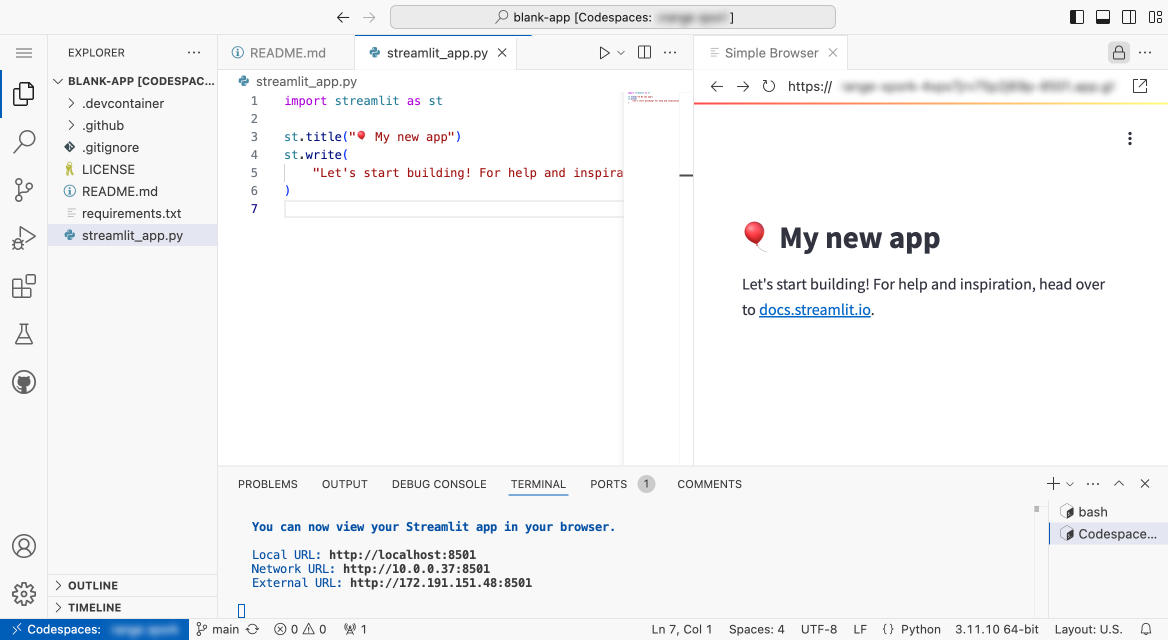
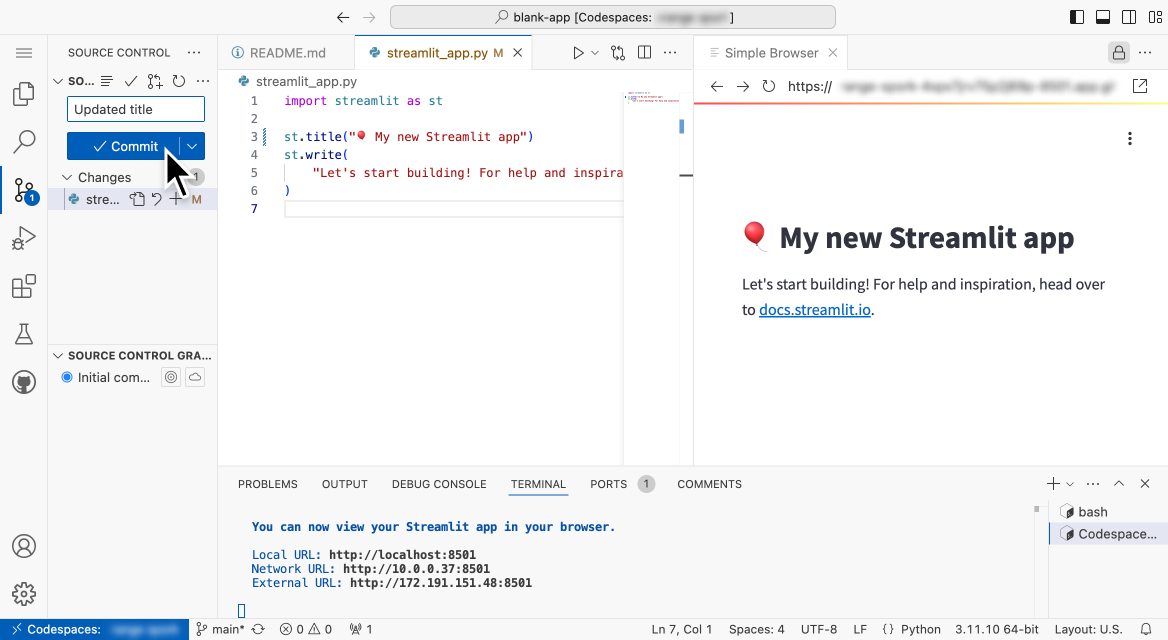
It can take several minutes to fully initialize your codespace. After the Visual Studio Code editor appears in your codespace, it can take several minutes to install Python and start the Streamlit server. When complete, a split screen view displays a code editor on the left and a running app on the right. The code editor opens two tabs by default: the repository's readme file and the app's entrypoint file.
-
Optional: For more room to work, open the app preview in another tab.
If you have multiple monitors and want a little more room to work, open your app preview in another tab instead of using the Simple Browser within Visual Studio Code. Just copy the URL from the Simple Browser into another tab, and then close the Simple Browser. Now you have more room to edit your code. The remaining steps on this page will continue to display the split-screen view in Visual Studio Code.
-
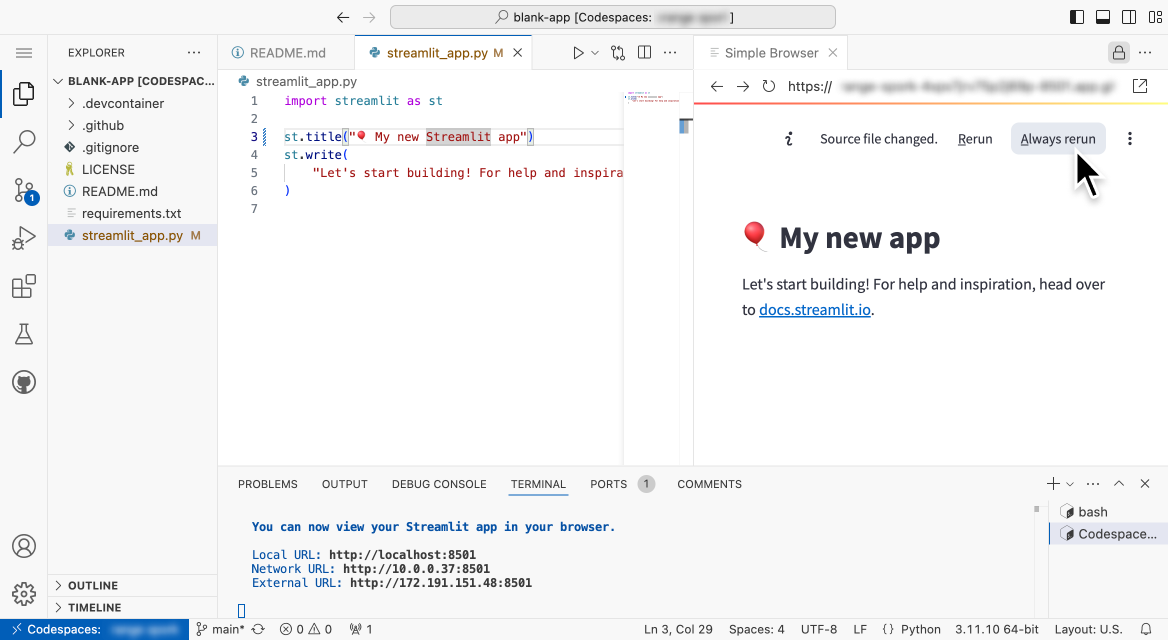
Make a change to your app.
When you make changes to your app, the file is automatically saved within your codespace. Your edits do not affect your repository or deployed app until you commit those changes, which is explained in a later step. The app preview shown on the right is local to your codespace.
-
In order to see updates automatically reflected on the right, click "Always rerun" when prompted after your first edit.
Alternatively, you can click "Rerun" to avoid unnecessary reruns while writing code. Because your code is continually saved, automatically rerunning the app will raises errors when you pause partway through a line of code. Regardless of which you choose, you can change the setting through the app chrome. Just click the overflow icon (more_vert) in the upper-right corner of your preview app, click "Settings," and then toggle "Run on save."
-
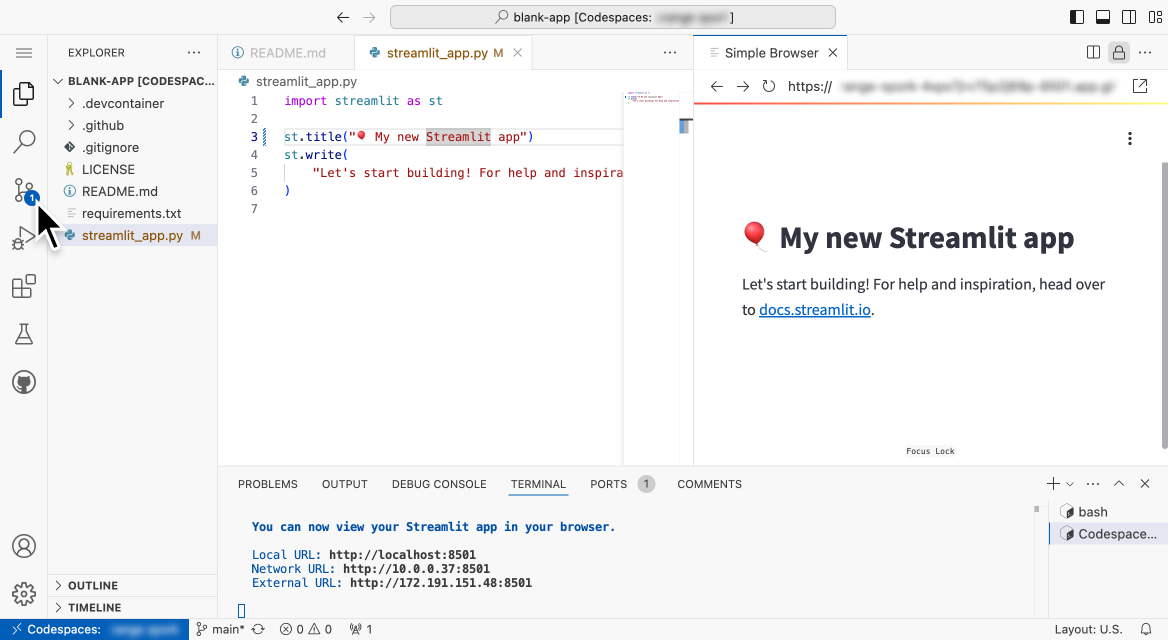
Continue to edit your app. Your codespace will continue to automatically save your files as you work with them, and the preview will continue to update as the app reruns.
Optional: Publish your changes
After making edits to your app, you can choose to commit your edits to your repository to update your deployed app instantly. If you just want to keep your edits in your codespace to return to later, skip to Stop or delete your codespace.
-
In the left navigation bar, click the source control icon.
-
In the source control sidebar on the left, enter a name for your commit.
-
Click "check Commit."
-
To stage and commit all your changes, in the confirmation dialog, click "Yes." Your changes are committed locally in your codespace.
-
To push your commit to GitHub, in the source control sidebar on the left, click "cached 1 arrow_upward."
-
To push commits to "origin/main," in the confirmation dialog, click "OK."
Your changes are now saved to your GitHub repository. Community Cloud will immediately reflect the changes in your deployed app.
-
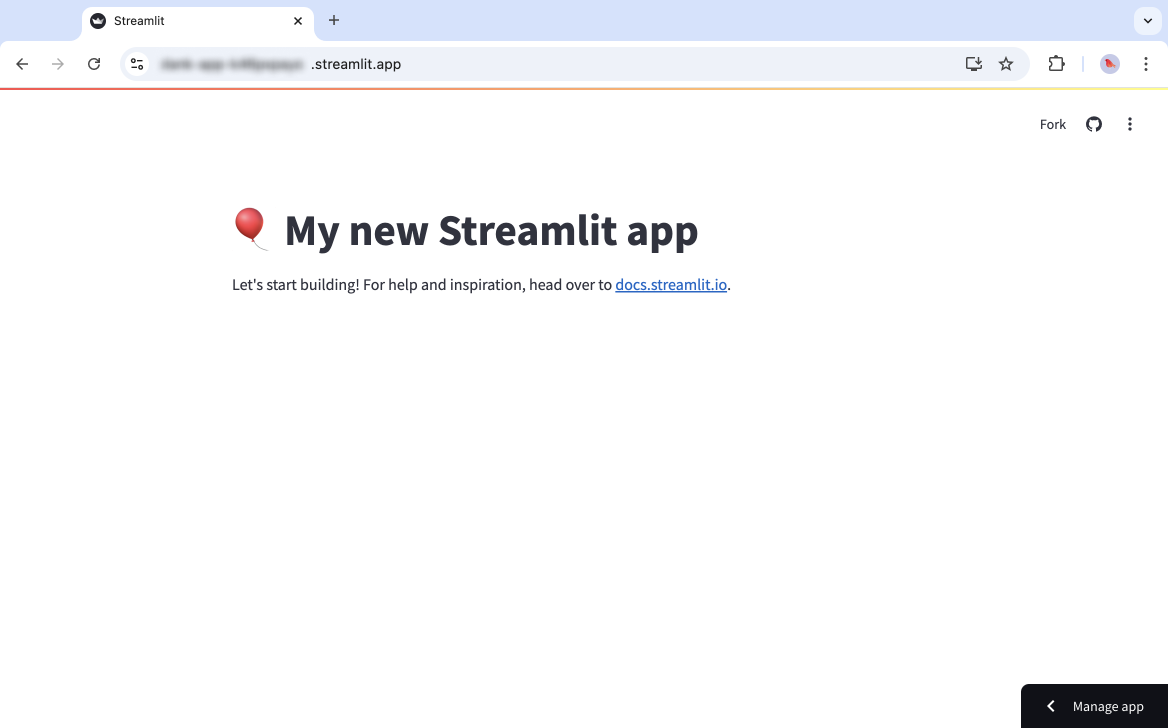
Optional: To see your updated, published app, return to the "My apps" section of your workspace at share.streamlit.io, and click on your app.
Stop or delete your codespace
When you stop interacting with your codespace, GitHub will generally stop your codespace for you. However, the surest way to avoid undesired use of your capacity is to stop or delete your codespace when you are done.
-
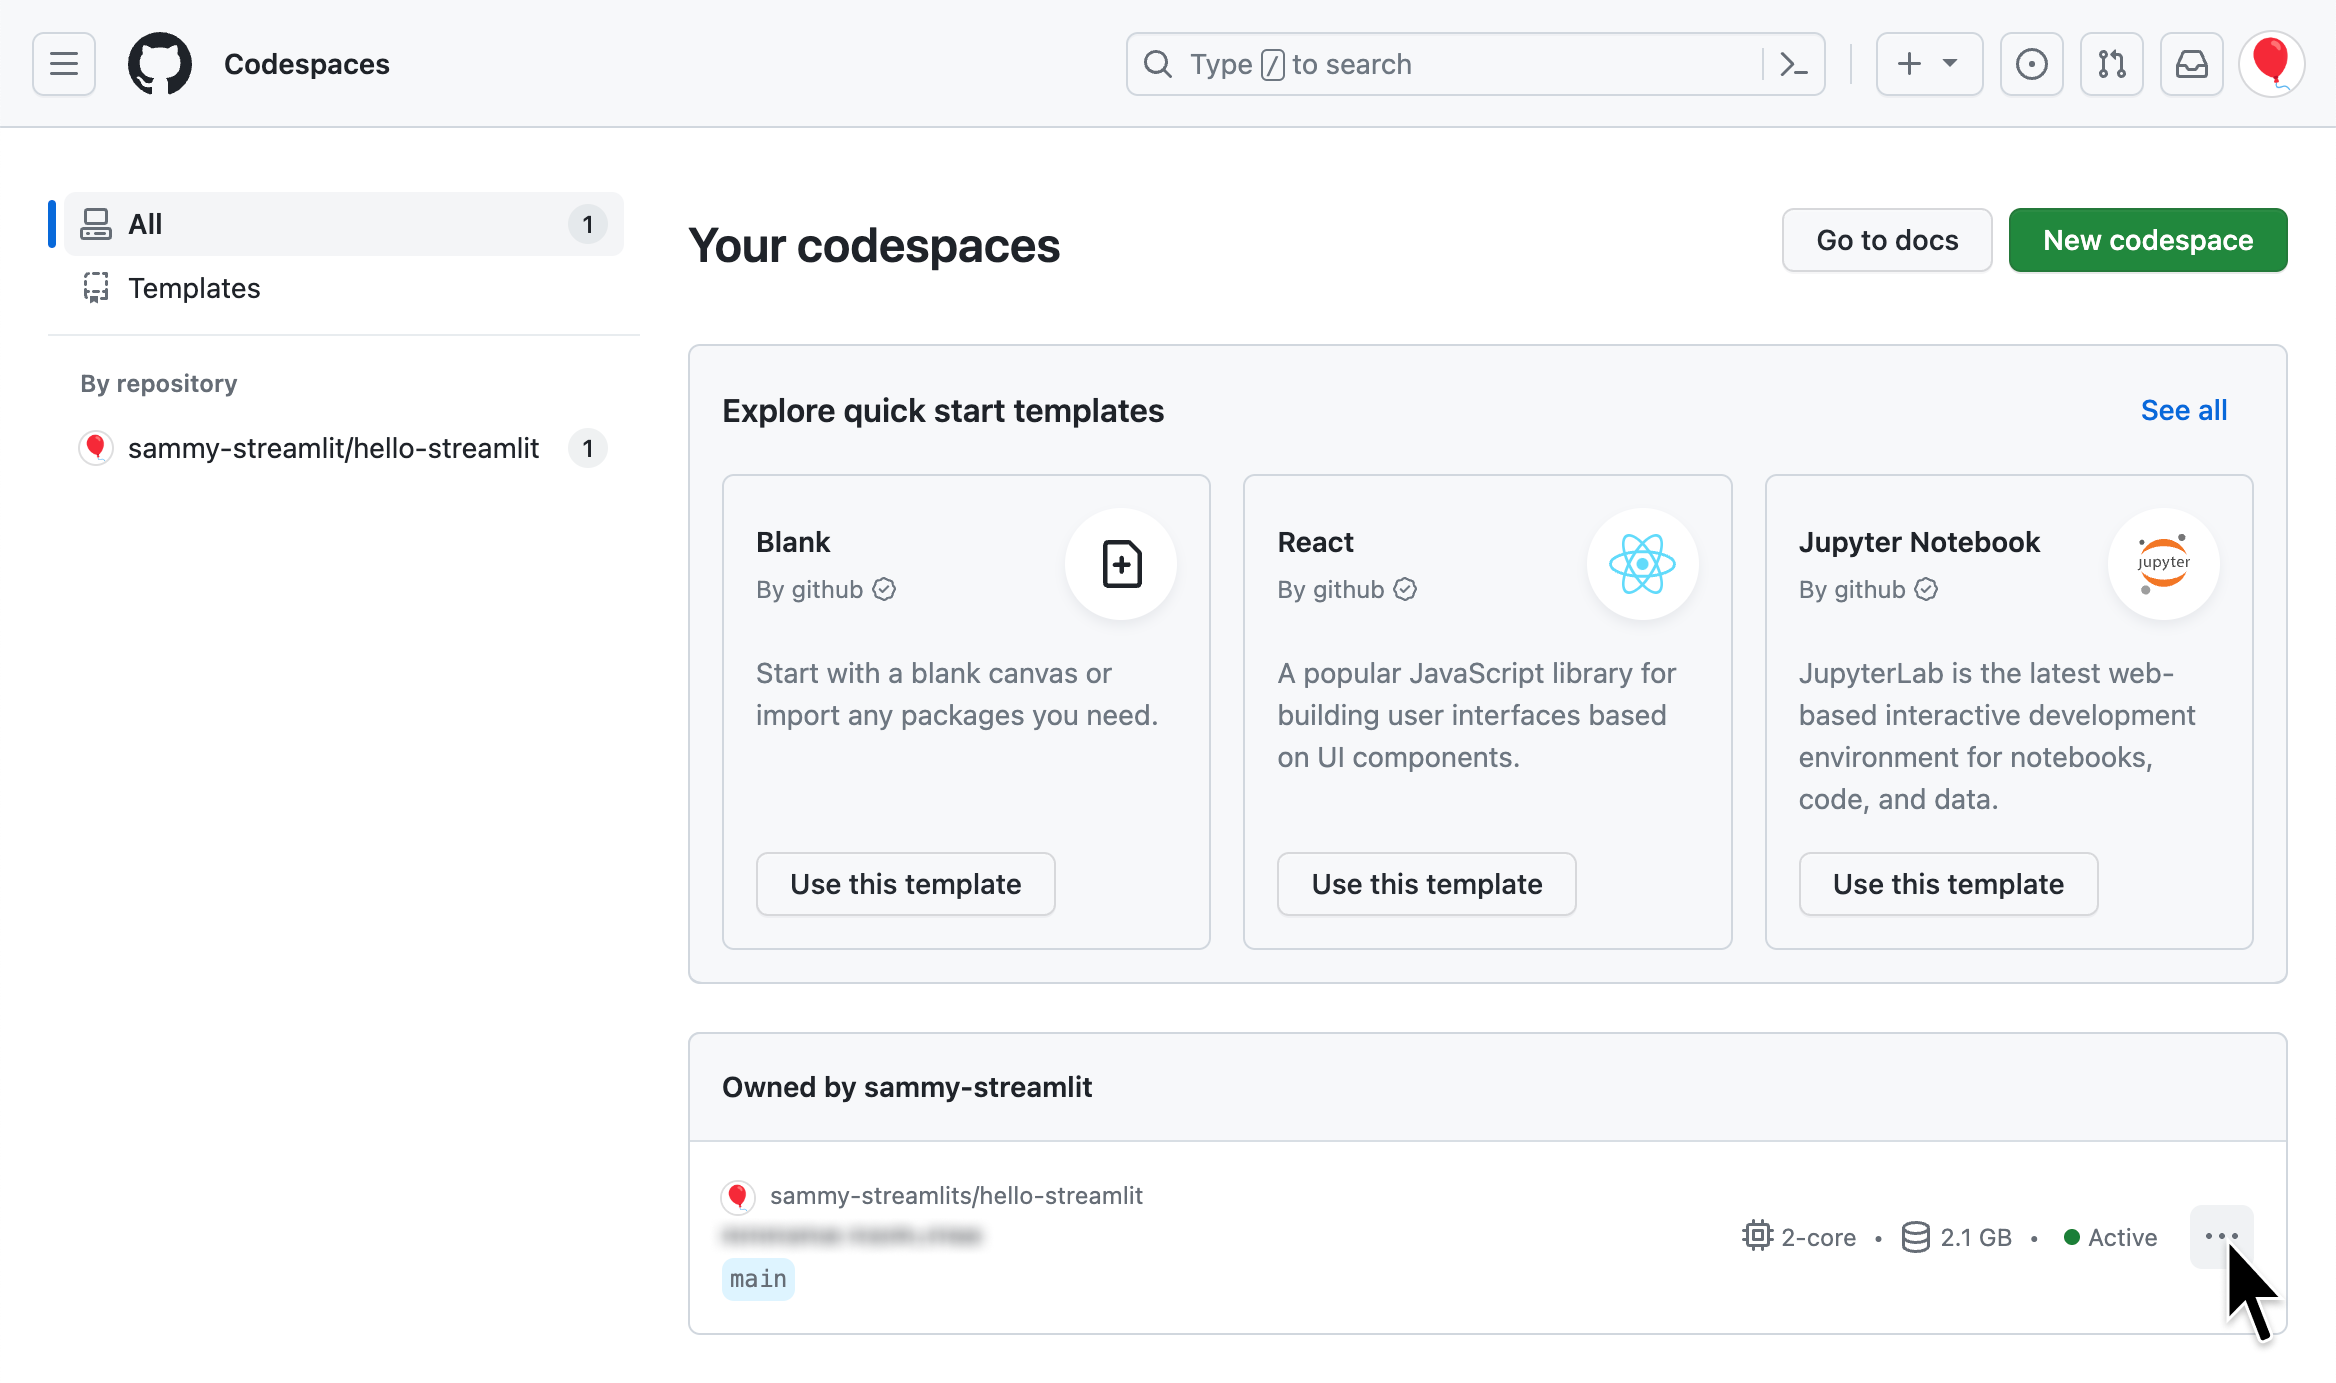
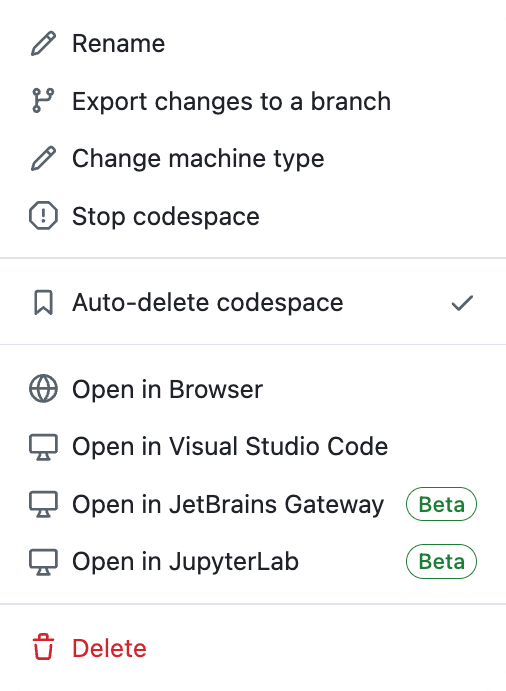
Go to github.com/codespaces. At the bottom of the page, all your codespaces are listed. Click the overflow menu icon (more_horiz) for your codespace.
-
Click "Stop codespace" if you'd like to return to your work later. Otherwise, click "Delete."
-
Congratulations! You just deployed an app to Community Cloud. 🎉 Head back to your workspace at share.streamlit.io/ and deploy another Streamlit app.
Still have questions?
Our forums are full of helpful information and Streamlit experts.