Connect Streamlit to Snowflake
Introduction
This guide explains how to securely access a Snowflake database from Streamlit. It uses st.connection, the Snowpark library, and Streamlit's Secrets management.
Prerequisites
-
The following packages must be installed in your Python environment:
txtstreamlit>=1.28 snowflake-snowpark-python>=0.9.0 snowflake-connector-python>=2.8.0push_pin Note
Use the correct version of Python required by
snowflake-snowpark-python. For example, if you usesnowflake-snowpark-python==1.23.0, you must use Python version >=3.8, <3.12. -
You must have a Snowflake account. To create a trial account, see the tutorial in Get started.
-
You should have a basic understanding of
st.connectionand Secrets management.
Create a Snowflake database
If you already have a database that you want to use, you can skip to the next step.
-
Sign in to your Snowflake account at https://app.snowflake.com.
-
In the left navigation, select "Projects," and then select "Worksheets."
-
To create a new worksheet, in the upper-right corner, click the plus icon (add).
You can use a worksheet to quickly and conveniently execute SQL statements. This is a great way to learn about and experiment with SQL in a trial account.
-
Optional: To rename your worksheet, in the upper-left corner, hover over the tab with your worksheet name, and then click the overflow menu icon (more_vert). Select "Rename", enter a new worksheet name (e.g. "Scratchwork"), and then press "Enter".
-
To create a new database with a table, in your worksheet's SQL editor, type and execute the following SQL statements:
SQLCREATE DATABASE PETS; CREATE TABLE MYTABLE (NAME varchar(80), PET varchar(80)); INSERT INTO MYTABLE VALUES ('Mary', 'dog'), ('John', 'cat'), ('Robert', 'bird'); SELECT * FROM MYTABLE;To execute the statements in a worksheet, select all the lines you want to execute by highlighting them with your mouse. Then, in the upper-right corner, click the play button (play_arrow). Alternatively, if you want to execute everything in a worksheet, click the down arrow (expand_more) next to the play button, and select "Run All".
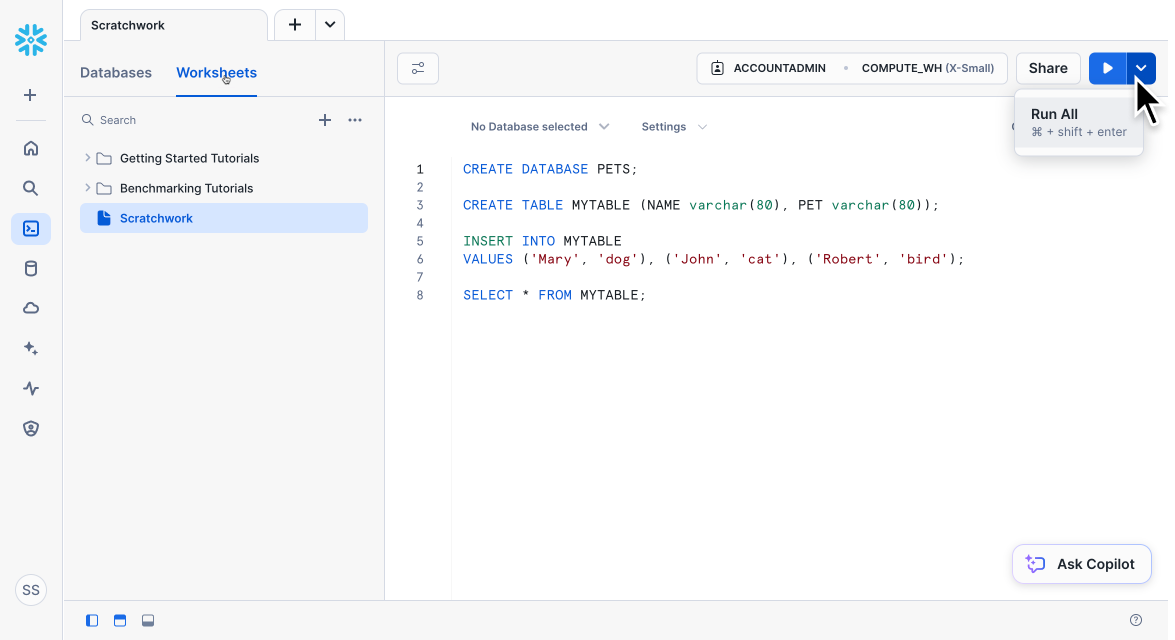
priority_high Important
If no lines are highlighted and you click the play button, only the line with your cursor will be executed.
-
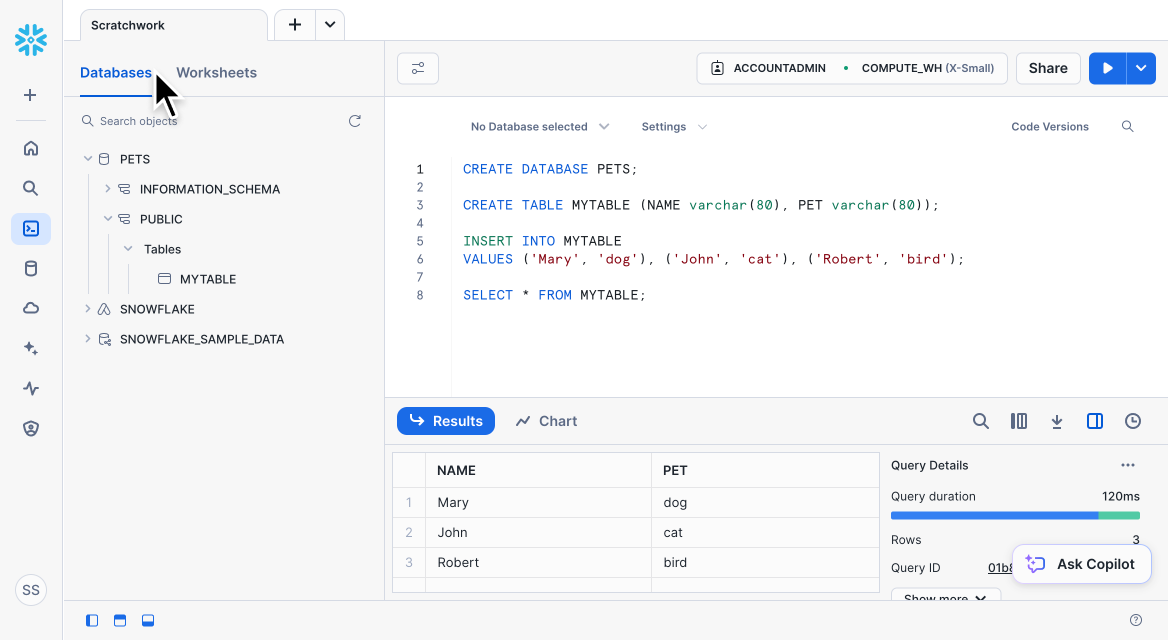
Optional: To view your new database, above the left navigation, select "Databases." Click the down arrows (expand_more) to expand "PETS" → "PUBLIC" → "Tables" → "MYTABLE."
-
For your use in later steps, note down your role, warehouse, database, and schema. In the preceding screenshot, these are the following:
TOMLrole = "ACCOUNTADMIN" warehouse = "COMPUTE_WH" database = "PETS" schema = "PUBLIC"Because the SQL statements did not specify a schema, they defaulted to the "PUBLIC" schema within the new "PETS" database. The role and warehouse are trial-account defaults. You can see the role and warehouse used by your worksheet in the upper-right corner, to the left of the "Share" and play (play_arrow) buttons.
In Snowflake, databases provide storage, and warehouses provide compute. When you configure your connection, you aren't explicitly required to declare role, warehouse, database, and schema; if these are not specified, the connection will use your account defaults. If you want to use multiple roles, warehouses, or databases, you can also change these settings within an active connection. However, declaring these defaults avoids unintentional selections.
-
To conveniently copy your account identifier, in the lower-left corner, click your profile image, and hover over your account. A popover dialog expands to the right with your organization and account. In the popover, hover over your account, and click the copy icon (content_copy).
The account identifier in your clipboard is period-separated, which is the format used for SQL statements. However, the Snowflake Connector for Python requires a hyphen-separated format. Paste your account identifier into your notes, and change the period to a hyphen.
TOMLaccount = "xxxxxxx-xxxxxxx"For more information, see Account identifiers in the Snowflake docs.
Add connection parameters to your local app secrets
There are three places Streamlit looks for your connection parameters: keyword arguments in st.connection, .streamlit/secrets.toml, and .snowflake/configuration.toml. For more information, especially if you want to manage multiple connections, see the examples in the API reference for SnowflakeConnnection.
To configure your connection, you must specify the following:
- Your account identifier (
account) - Your username (
user) - Some form of authentication parameter (like
passwordorprivate_key_file)
If you don't have MFA on your account, you can just specify your password. Alternatively, you can set up key-pair authentication on your account and point to your private_key_file. If you are just looking for a quick, local connection, you can set authenticator to prompt you for credentials in an external browser.
In addition to the three required parameters to authenticate your connection, it is common to specify the default role, warehouse, database, and schema for convenience. For more information about required and optional parameters, see the Snowflake Connector for Python documentation.
Option 1: Use .streamlit/secrets.toml
-
If you don't already have a
.streamlit/secrets.tomlfile in your app's working directory, create an empty secrets file.To learn more, see Secrets Management.
priority_high Important
Add this file to
.gitignoreand don't commit it to your GitHub repo! If you want to use this connection in multiple repositories, you can create a globalsecrets.tomlfile instead. For more information, seesecrets.tomlfile location. -
Add your connection parameters to
.streamlit/secrets.toml:TOML[connections.snowflake] account = "xxxxxxx-xxxxxxx" user = "xxx" private_key_file = "../xxx/xxx.p8" role = "xxx" warehouse = "xxx" database = "xxx" schema = "xxx"priority_high Important
Your account identifier must be hyphen-separated:
<my_organization>-<my_account>. This is the general-purpose identifier format and not the period-separated format used within SQL statements.In the example above, the connection uses key-pair authentication. Therefore,
private_key_fileis defined instead ofpassword.private_key_filecan be an absolute or relative path. If you use a relative path, it should be relative to your app's working directory (where you executestreamlit run).
Option 2: Use .snowflake/connections.toml
If you already have your connection configured using Snowflake's connections file, you can use it as-is. If you are using a default connection, no change is needed in later steps of this tutorial. If you are using a named connection, you will need to include the name in st.connection. This is noted in a later step. For information about using named connections, see the examples in the API reference for SnowflakeConnnection.
-
If you don't already have a
.snowflake/configuration.tomlfile in your user directory, create an empty connections file. -
Add your connection parameters to
.snowflake/connections.toml:TOML[default] account = "xxxxxxx-xxxxxxx" user = "xxx" private_key_file = "../xxx/xxx.p8" role = "xxx" warehouse = "xxx" database = "xxx" schema = "xxx"This example uses key-pair authentication as described in the previous option.
Write your Streamlit app
-
Copy the following code to your Streamlit app and save it. If you are not using the example database and table from the first section of this tutorial, replace the SQL query and results handling as appropriate.
Python# streamlit_app.py import streamlit as st conn = st.connection("snowflake") df = conn.query("SELECT * FROM mytable;", ttl="10m") for row in df.itertuples(): st.write(f"{row.NAME} has a :{row.PET}:")The
st.connectioncommand creates aSnowflakeConnectionobject and handles secrets retrieval. The.query()method handles query caching and retries. By default, query results are cached without expiring. Settingttl="10m"ensures that the query result is cached for no longer than 10 minutes. To disable caching, you can setttl=0instead. Learn more in Caching.push_pin Note
If you configured your connection using a named connection in
.snowflake/connections.tomlinstead of[default](Option 2 above), you must include your connection name inst.connection. If you have[my_connection]in your connections file, replace the line withst.connectionas follows:Pythonconn = st.connection("my_connection", type="snowflake") -
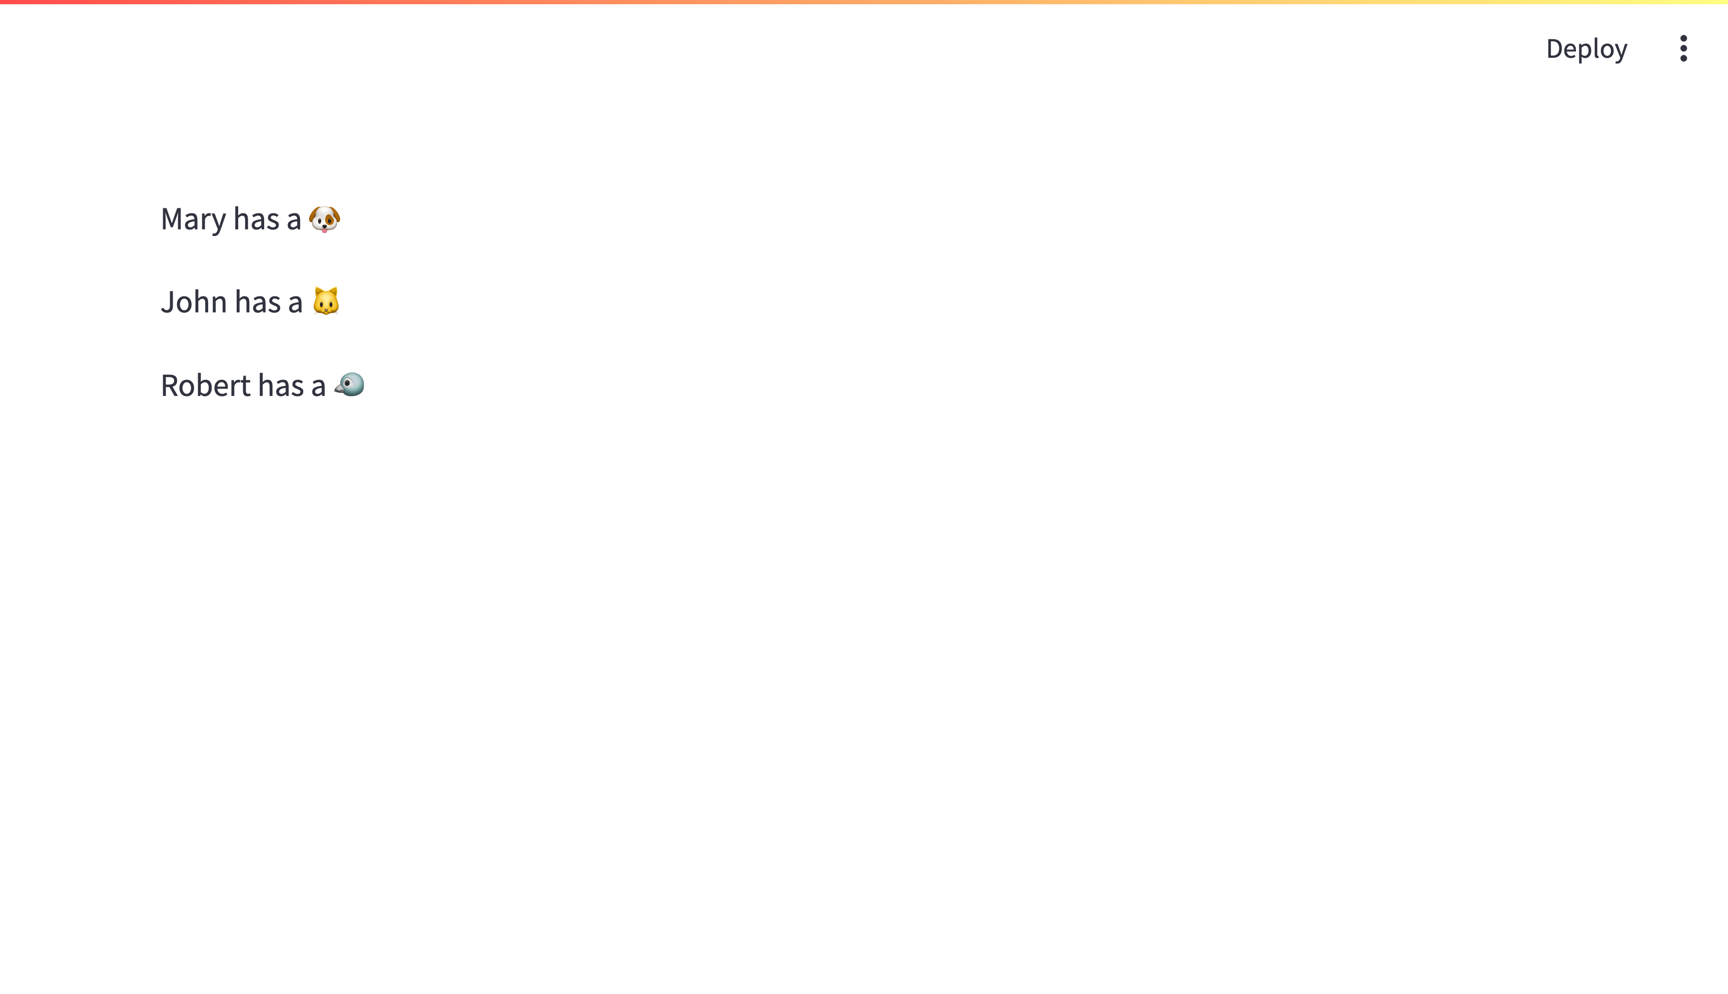
In your working directory, open a terminal, and run your Streamlit app.
Terminalstreamlit run streamlit_app.pyIf everything worked out (and you used the example table from the first section), your app should look like this:
Use a Snowpark session
The SnowflakeConnection used above also provides access to Snowpark sessions for dataframe-style operations that run natively inside Snowflake. Using this approach, you can rewrite the app above as follows:
# streamlit_app.py

import streamlit as st

conn = st.connection("snowflake")

@st.cache_data
def load_table():
    session = conn.session()
    return session.table("mytable").to_pandas()

df = load_table()

for row in df.itertuples():
    st.write(f"{row.NAME} has a :{row.PET}:")
Because this example uses .session() instead of .query(), caching is added manually for better performance and efficiency.
If everything worked out (and you used the example table from the first section), your app should look the same as the preceding screenshot.
Connecting to Snowflake from Community Cloud
This tutorial assumes a local Streamlit app, however you can also connect to Snowflake from apps hosted in Community Cloud. The main additional steps are:
- Include information about dependencies using a
requirements.txtfile withsnowflake-snowpark-pythonand any other dependencies. - Add your secrets to your Community Cloud app. You must use the
.streamlit/secrets.tomlformat described in Option 1 above.
Still have questions?
Our forums are full of helpful information and Streamlit experts.